34
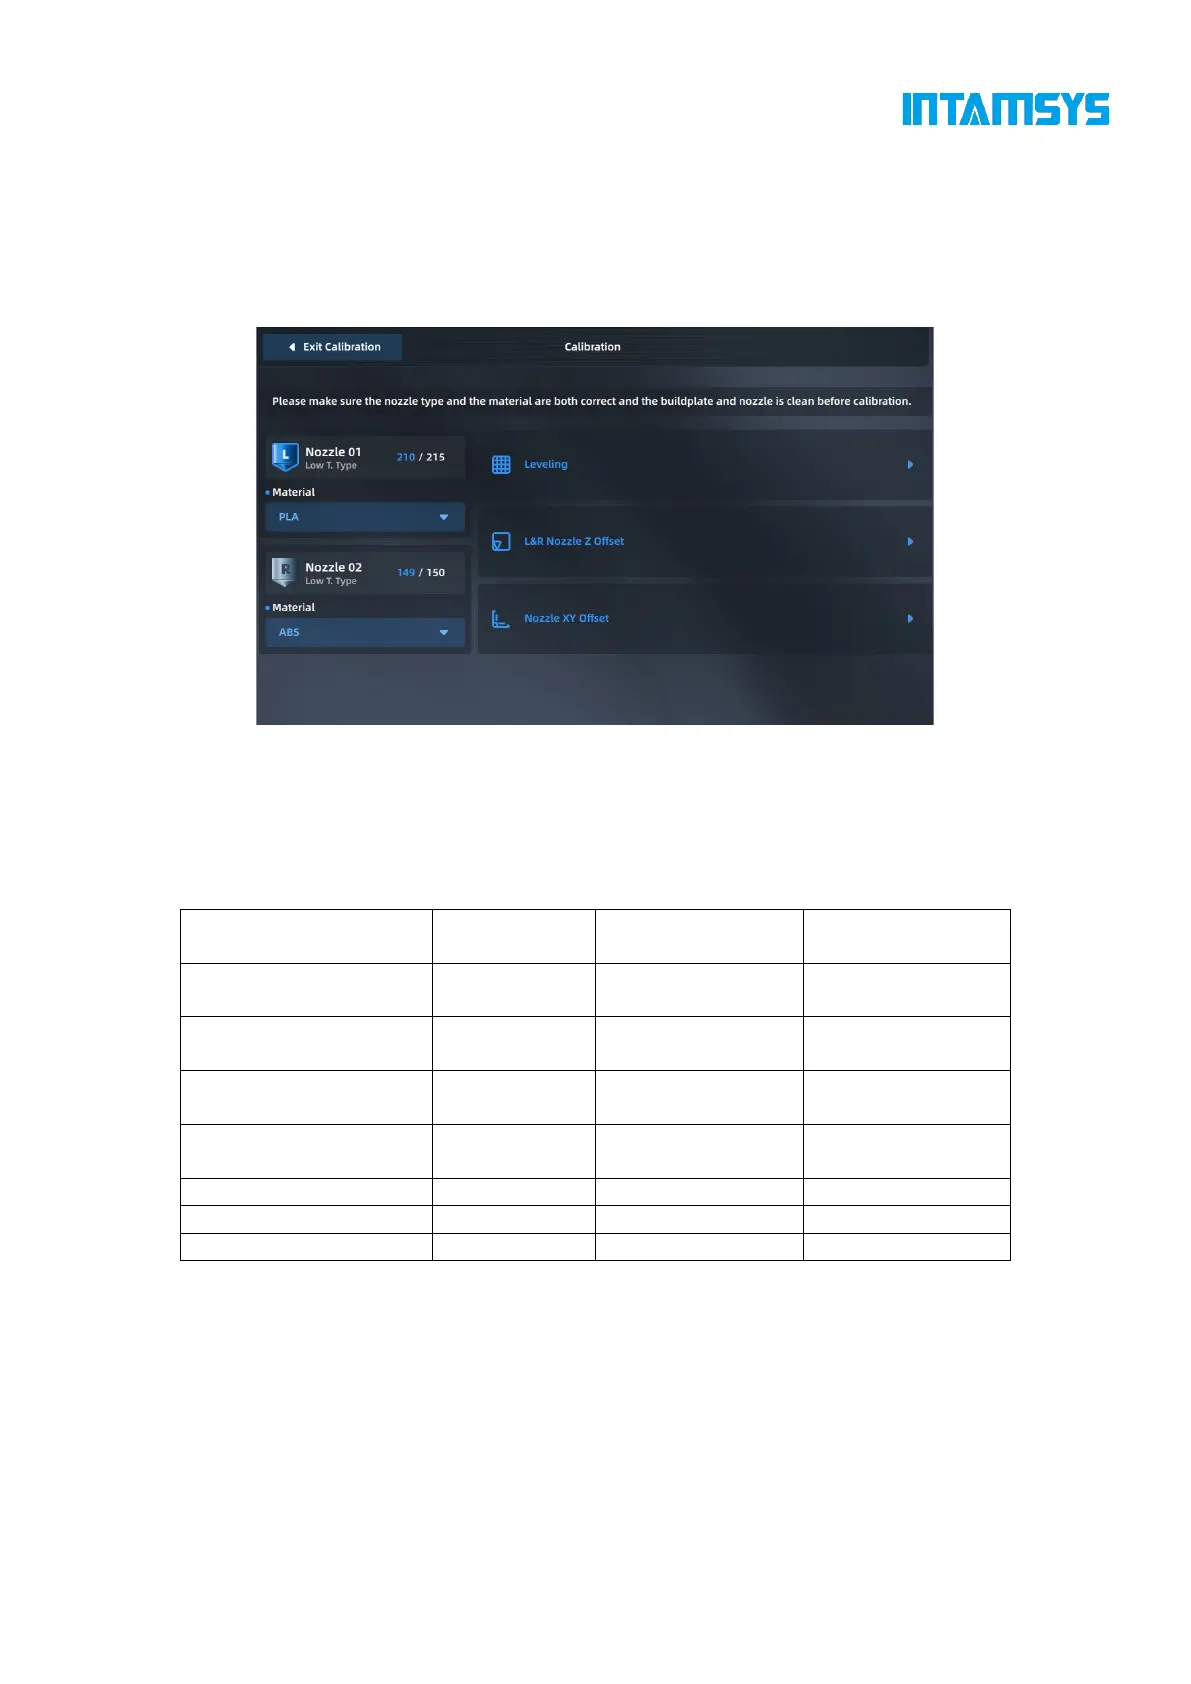
Printing build plate leveling: Use contact sensors to automatically detect the flatness of different
positions of the build plate. Position compensation is carried out during printing.
L&R Nozzle Z offset: Manually measure the Z-direction distance between the nozzle and the
printing build plate for compensation calibration.
Nozzle XY calibration: Compensate for nozzle XY by printing standard samples.
Fig. 4.25 Calibration Interface
You can choose to perform any one or several of these steps. When the printer is used for the first
time, the three steps must be carried out in sequence. The following table guides you on how to
selectively perform the steps after different operations.
Table 6.1 Conditions for Leveling and XYZ Calibration
4.5.2.1 Calibration of automatic printing platform leveling
Enter the leveling interface of printing build plate, and select Simple (4*4) or Complete (10*10)
mode for automatic leveling.
1. Click "Start Leveling". The printer will first perform a trigger test of the leveling sensor.
If the leveling sensor fails, a window will pop up and then the automatic leveling process
will be terminated.
2. After the leveling sensor test is passed, the extruder will move to the center position on the