Intel
®
RAID Software User’s Guide 73
Creating RAID 0, 1, 5, or 6 using Intel
®
RAID BIOS Console 2
(detailed)
This section describes the process to set up RAID modes using the custom configuration
options.
1. When the server boots, hold the <Ctrl> key and press the <G> key when the following
is displayed:
Press <Ctrl><G> to enter RAID BIOS Console
The Controller Selection screen appears.
2. Select a controller and click Start to begin the configuration.
3. Choose Manual Configuration and click Next (see Figure 21).
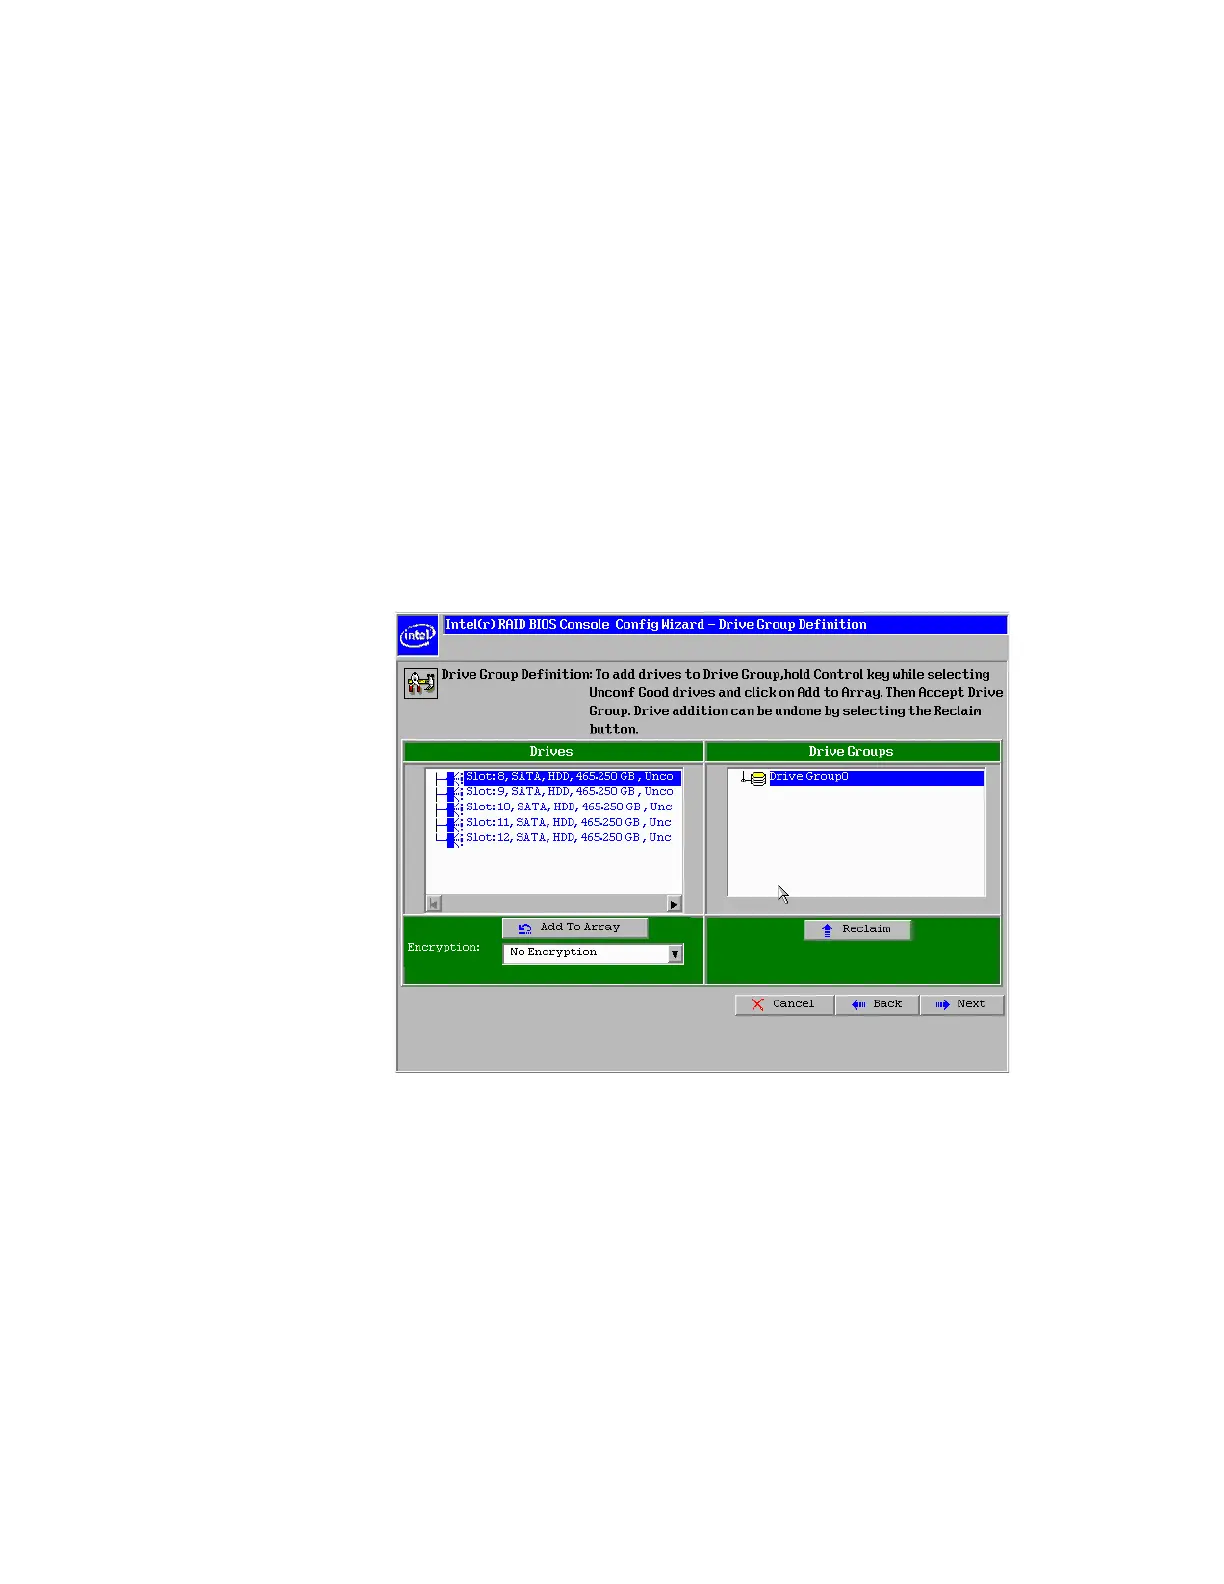
4. At the Disk Group Definition (DG Definition) screen, hold down the <Ctrl> key and
click each drive you want to include in the array or disk group.
See “RAID Levels” on page 9 for the required minimum number of drives that must be
added.
Figure 22. Intel
®
RAID BIOS Console 2 - Add Physical Drives to Array
5. Click Add To Array. If you make a mistake and need to remove drives, click Reclaim.
6. Click Next.
7. In the next screen, click Add to Span and then click Next.