3-14
K2600R Disassembly/Assembly
Front Panel Assembly
Replacing the Front Panel Mounting Bracket
1. Insert the front panel mounting bracket into the left side of the bottom enclosure. (This is
done to clear the top cover mounting holes on the left side.) Then slide the right side of the
front panel mounting bracket. The floppy disk drive should easily insert through the
opening provided for it on the front panel mounting bracket.
2. Install the two screws into the top corners of the front panel mounting bracket. Be sure to
line up and install the screws in the second hole back from the front edge. (The first hole is
used that secure the front panel cover.)
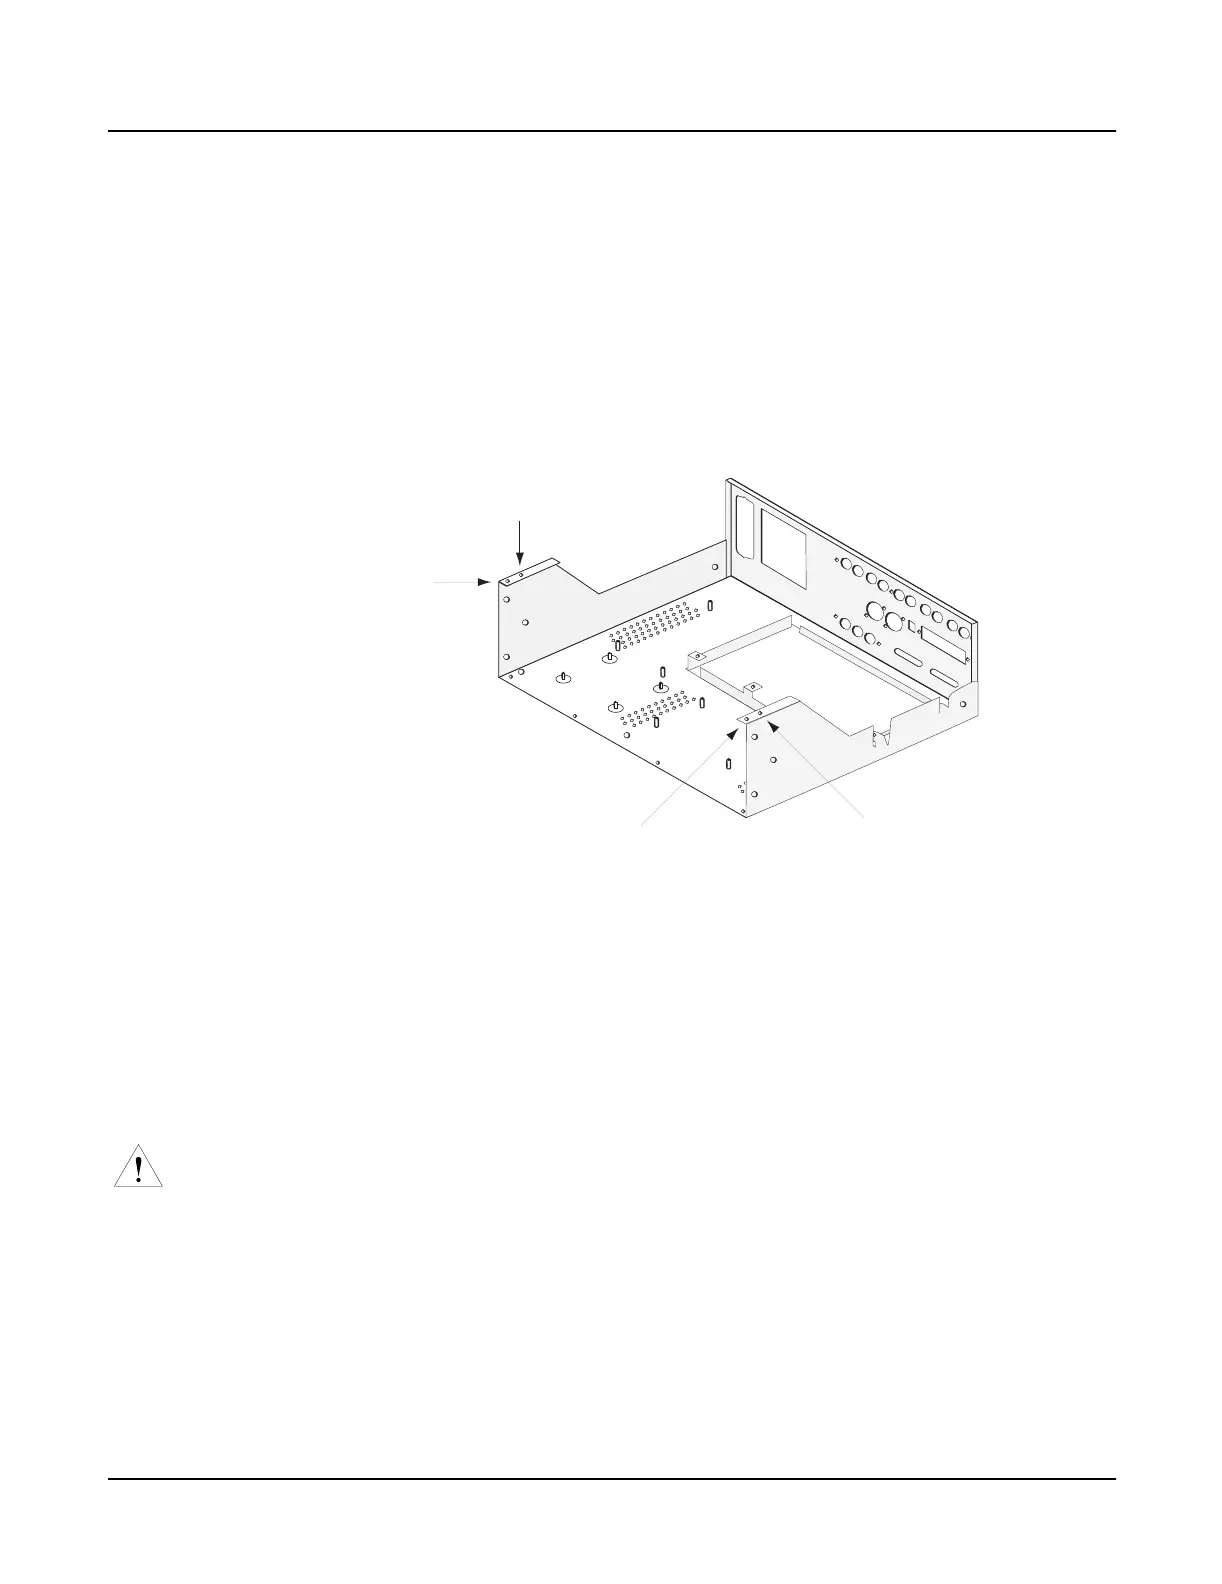
Figure 3-5 Front panel mounting bracket attachment points
3. Position the power switch through the opening provided for it on the front panel
mounting bracket and Front Panel/Scanner Board. Install the two brass screws that secure
the power switch to the Front Panel/Scanner Board.
4. Tilt the front of the K2600R up and install the three screws along the bottom edge of the
front panel mounting bracket.
Caution: If the unit you are servicing has a Sampling Board installed, the hardware that
secured it was removed with the removal front panel cover. At this point, the Sampling
Board is held in place only by the cables connected to it. When you tilt the K2600R up to
install the screws located on the bottom edge, be careful to not allow the board to move
freely and cause damage to it or other components.
5. Place the K2600R flat in its normal position.
6. Connect the shielded wire cable from the Power Supply Board to location J701 on the
Front Panel/Scanner Board.
7. Connect the flat ribbon cable from the CPU Board to location J702 on the Front Panel/
Scanner Board, and install the locking cable clip.
front panel
cover screw
mounting
bracket screw
mounting
bracket screw
front panel
cover screw

 Loading...