K2600/K2600X Disassembly/Assembly
Top Enclosure
4-7
Removing the Audio Board
The Audio Board is mounted onto the rear panel portion of the top enclosure.
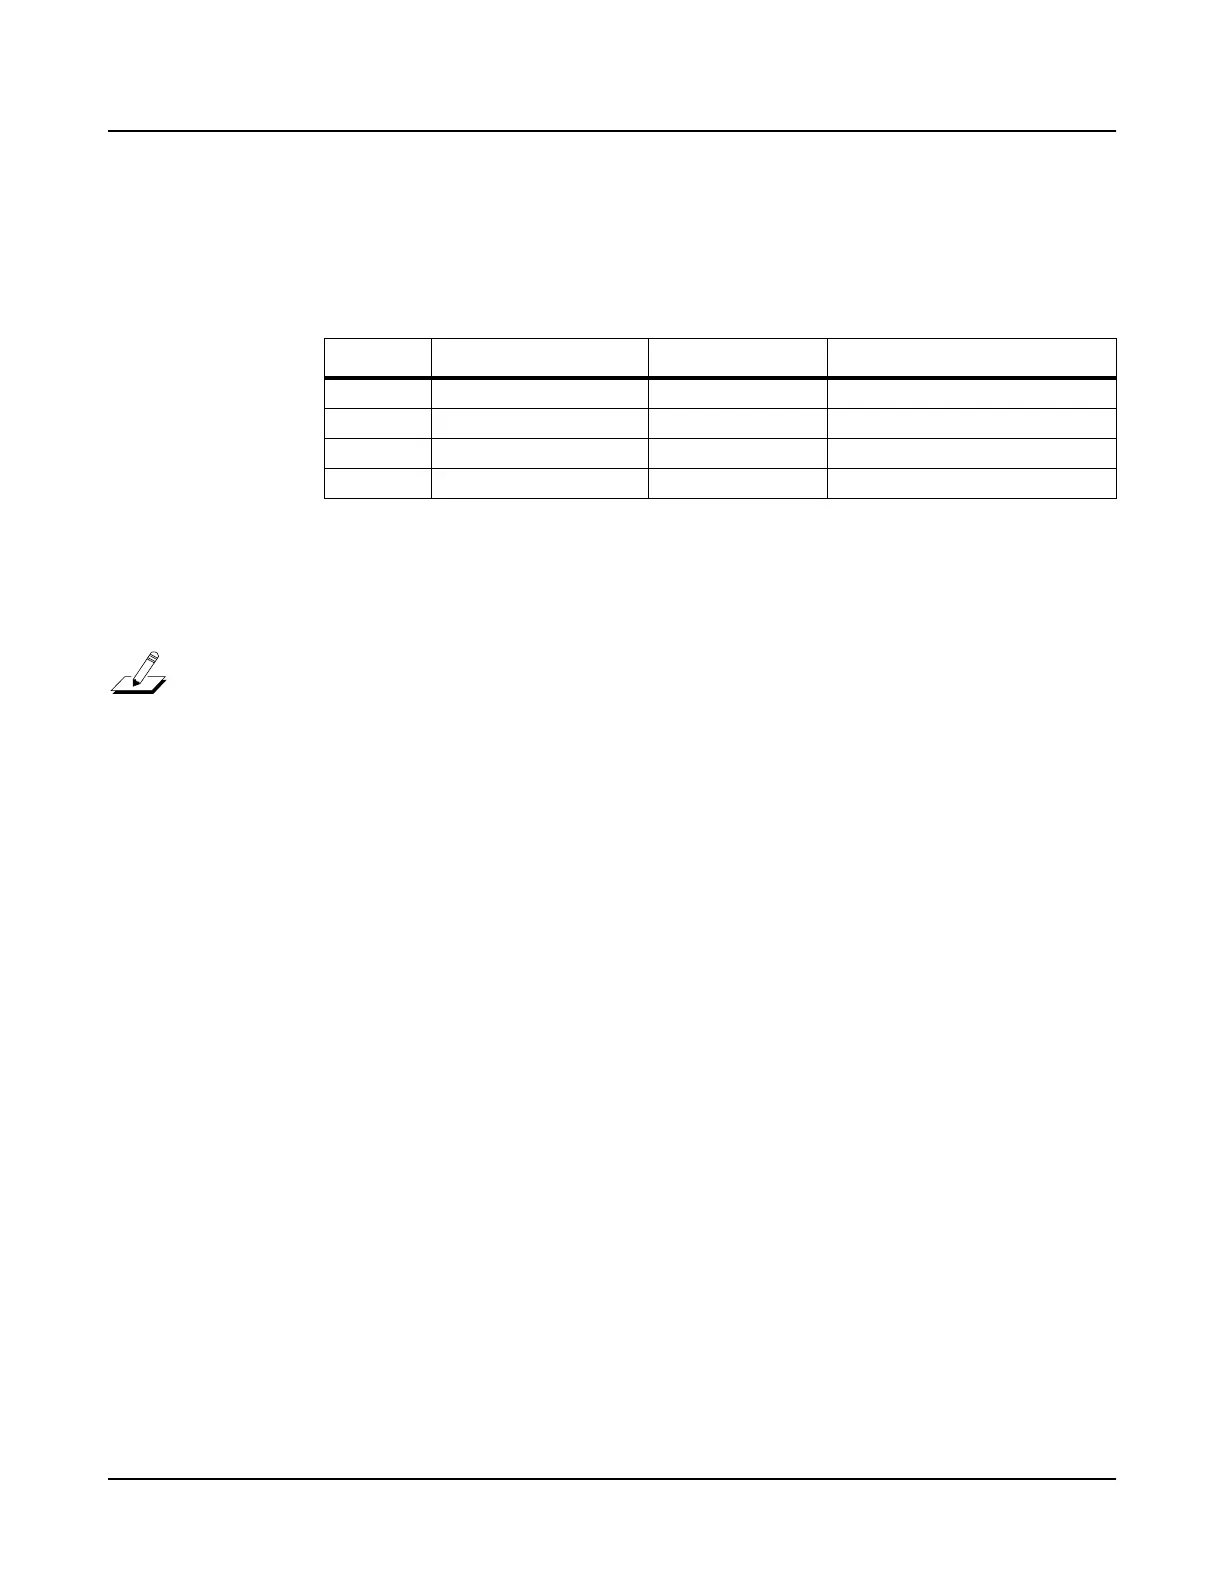
1. Disconnect the cables listed in Table 4-1.
2. Remove the two screws that secure the Audio Board to the rear panel, and remove the
Audio Board.
Note: Do not remove the nuts and washers from the audio jacks.
Replacing the Audio Board
1. Hold the Audio Board and position it so that the jacks are aligned properly with the holes
provided for them on the rear panel portion of the top enclosure.
2. Install the two screws that secure the Audio Board to the rear panel.
3. Connect the cables listed in Table 4-1.
Removing the Disk Drive
1. Peel back the adhesive tape securing the flat ribbon cable to the disk drive retainer
bracket.
2. Remove the cable locking clip and disconnect the flat ribbon and stranded wire cables
from the disk drive.
3. Remove the four screws that secure the disk drive to the disk drive retainer bracket, and
remove the disk drive.
4. If you are replacing the disk drive with a new disk drive, remove the front bezel from the
old disk drive. It is secured with two screws and flat washers.
Replacing the Disk Drive
1. If you are installing a new disk drive, install the two screws and flat washers that secure
the top enclosure bezel to the disk drive.
2. Position the disk drive on the retainer bracket and install the four screws to secure it to the
retainer bracket.
3. Connect the stranded wire cable and flat ribbon cable to the disk drive. Be sure to apply
the adhesive tape over the flat ribbon cable and install the cable locking clip.
Ref. Name Cable Type Destination
J601 DAC flat ribbon CPU Board
J602 Audio Power stranded Power Supply Board
J611 Sampler shielded wire Sampling Board
J612 Slider shielded wire Slider Board
Table 4-1 Audio Board cables

 Loading...