4-4
K2600/K2600X Disassembly/Assembly
Opening the K2600/K2600X
Removing the Top Enclosure
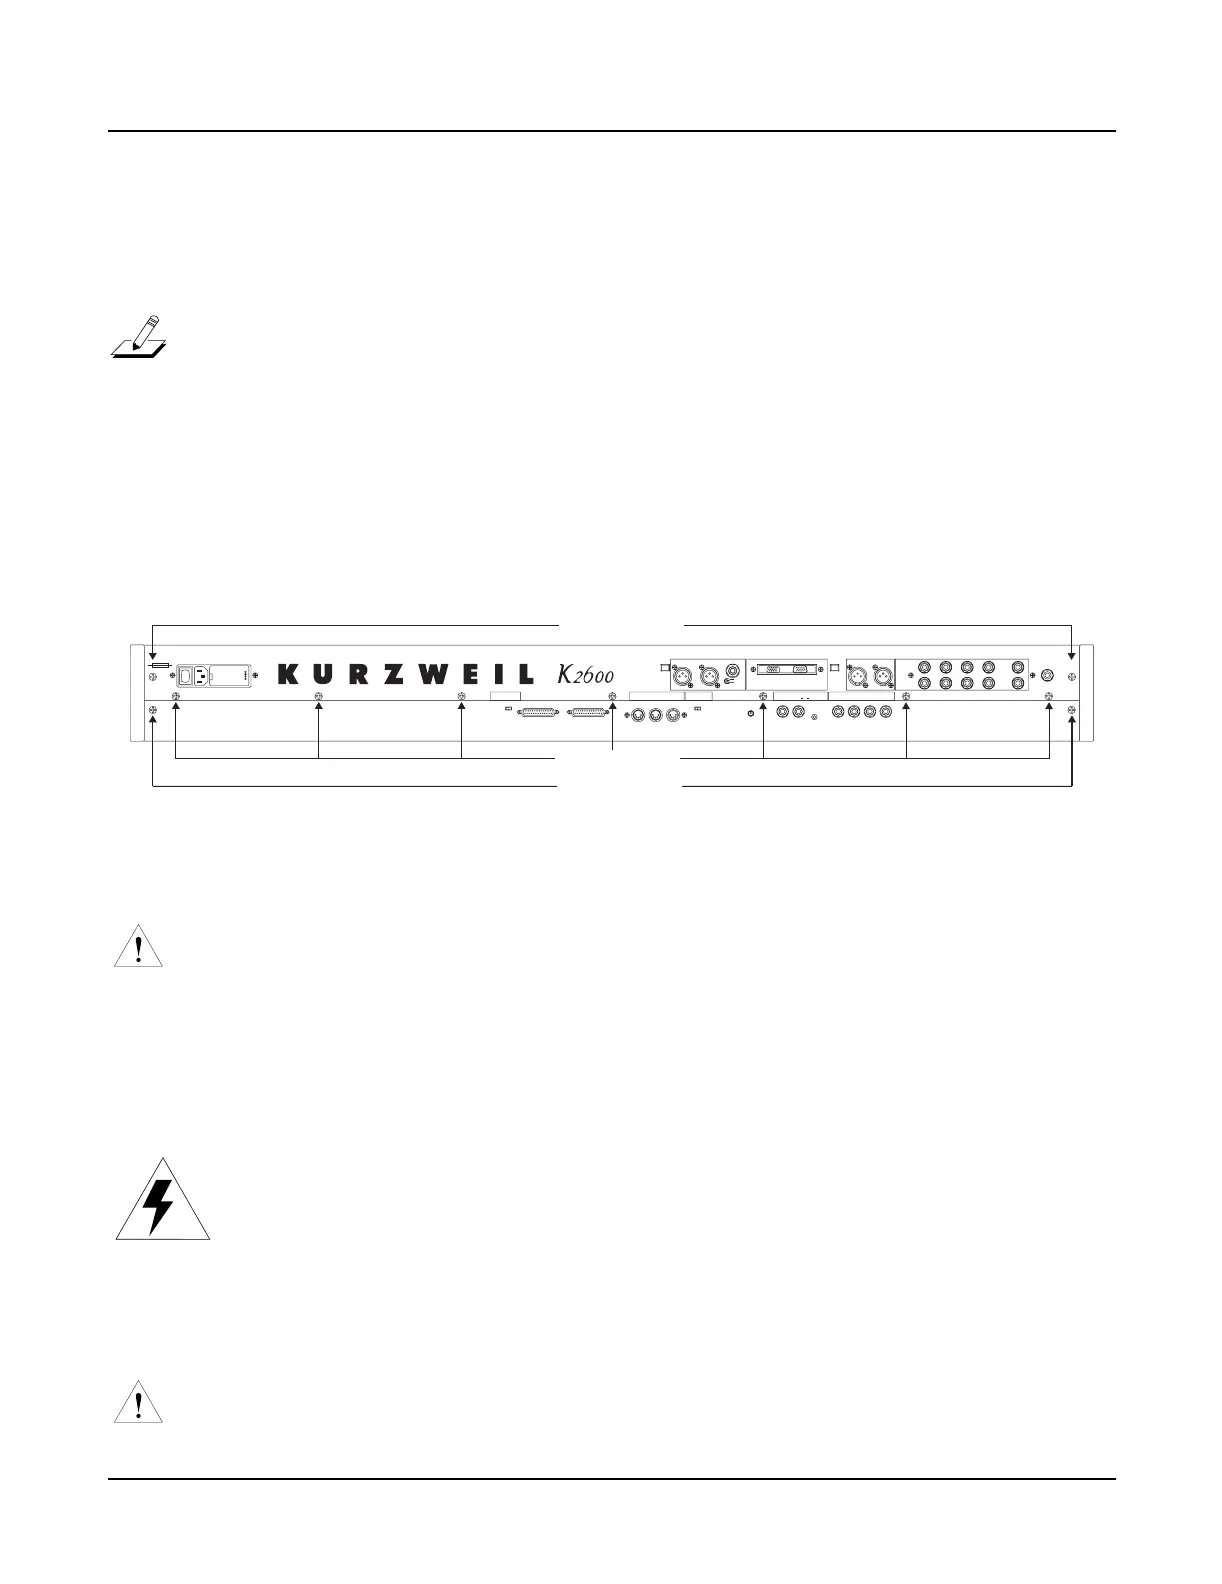
1. Refer to Figure 4-3. To remove the top enclosure, remove the left and right endcaps, and
the screws that secure the top enclosure to the bottom enclosure.
Note: Figure 4-3 is an illustration of the K2600 rear panel. An illustration of the K2600X
rear panel has not been included because the difference between the two is minimal. The
number of screws to be removed is the same and the position of the endblock screws is
identical. The only difference is the spacing of the seven rear panel screws.
2. Remove the seven rear panel screws. These secure the rear panel portion of the top
enclosure.
3. Remove the four endblock screws.
Figure 4-3 K2600 rear panel
Caution: The following steps describe removing the left and right endcaps. To avoid
damage to an endblock, be sure to hold onto the endblock when removing the screws.
When the these screws are removed, the endblock will be free of the unit.
4. Refer to Figure 4-2. Move the unit so that one end hangs over the edge of your work
surface. Remove the three endblock screws from the bottom enclosure. Set the endblock
safely aside. Repeat for the other endblock.
Warning: Be sure to have your work surface prepared. This includes placing foam
blocks behind the unit. When the top enclosure is removed, place it on the foam blocks to
avoid damaging the Alpha Wheel, control panel buttons, and sliders. The following
procedure requires enough room behind the rear of the unit to place the top enclosure face
down on your work surface.
5. Lift the top enclosure straight up, at least three inches.
Caution: The Audio Board extends approximately two inches beyond the rear panel
portion of the top enclosure. When you remove the top enclosure, if you do not lift the top
enclosure up at least three inches, you could damage the Audio Board.
Rear panel screws
Endblock screws
Endblock screws
SCSI Thru
In Thru / Out Out
Thru / Out
Optical
In
Lo Z Left RightLo Z
Left
Right
Hi Z
LCD Contrast
KDS Out DMTi In
Optical
Out
Breath12or
1234
Switch Pedals
Digital I/O
Out In
CC Pedals / Breath
Kurzweil I/O
MIDI Select
Analog Inputs
MIDI
SCSI Termination
SCSI
Auto / Disable
Bal/Unbal
Analog Outputs
Right
BDCA
Left
Mix
Headphones
(mono)
WARNING
FOR CONTINUED PROTECTION AGAINST
THE RISK OF FIRE, REPLACE ONLY WITH
THE SAME TYPE AND RATING OF FUSE.
ATT ENTION
UTILISER UN FUSIBLE DE
RECHANGE DE MEME TYPE.
100/120/230/240V ~ AC
1.5/.75 A
50-60 Hz
100/120V ~ F2.0A 250V slow-blow
230/240V ~ F1.0A 250V slow-blow

 Loading...