EasyManuals Logo

Lexmark MS610 Series Service Manual

Lexmark MS610 Series
316 pages
To Next Page IconTo Next Page
To Previous Page IconTo Previous Page
Page #188 background imageLoading...
Page #188 background image
Toner cartridge smart chip contact removal
1 Remove the right cover. See “Right cover removal” on page 178.
Note: For MS610de, also remove the following:
a Controller board shield. See “Controller board shield removal (MS610de)” on page 184.
b Controller board. See “Controller board removals” on page 184.
2 Disconnect the cable JARW1 from the system board.
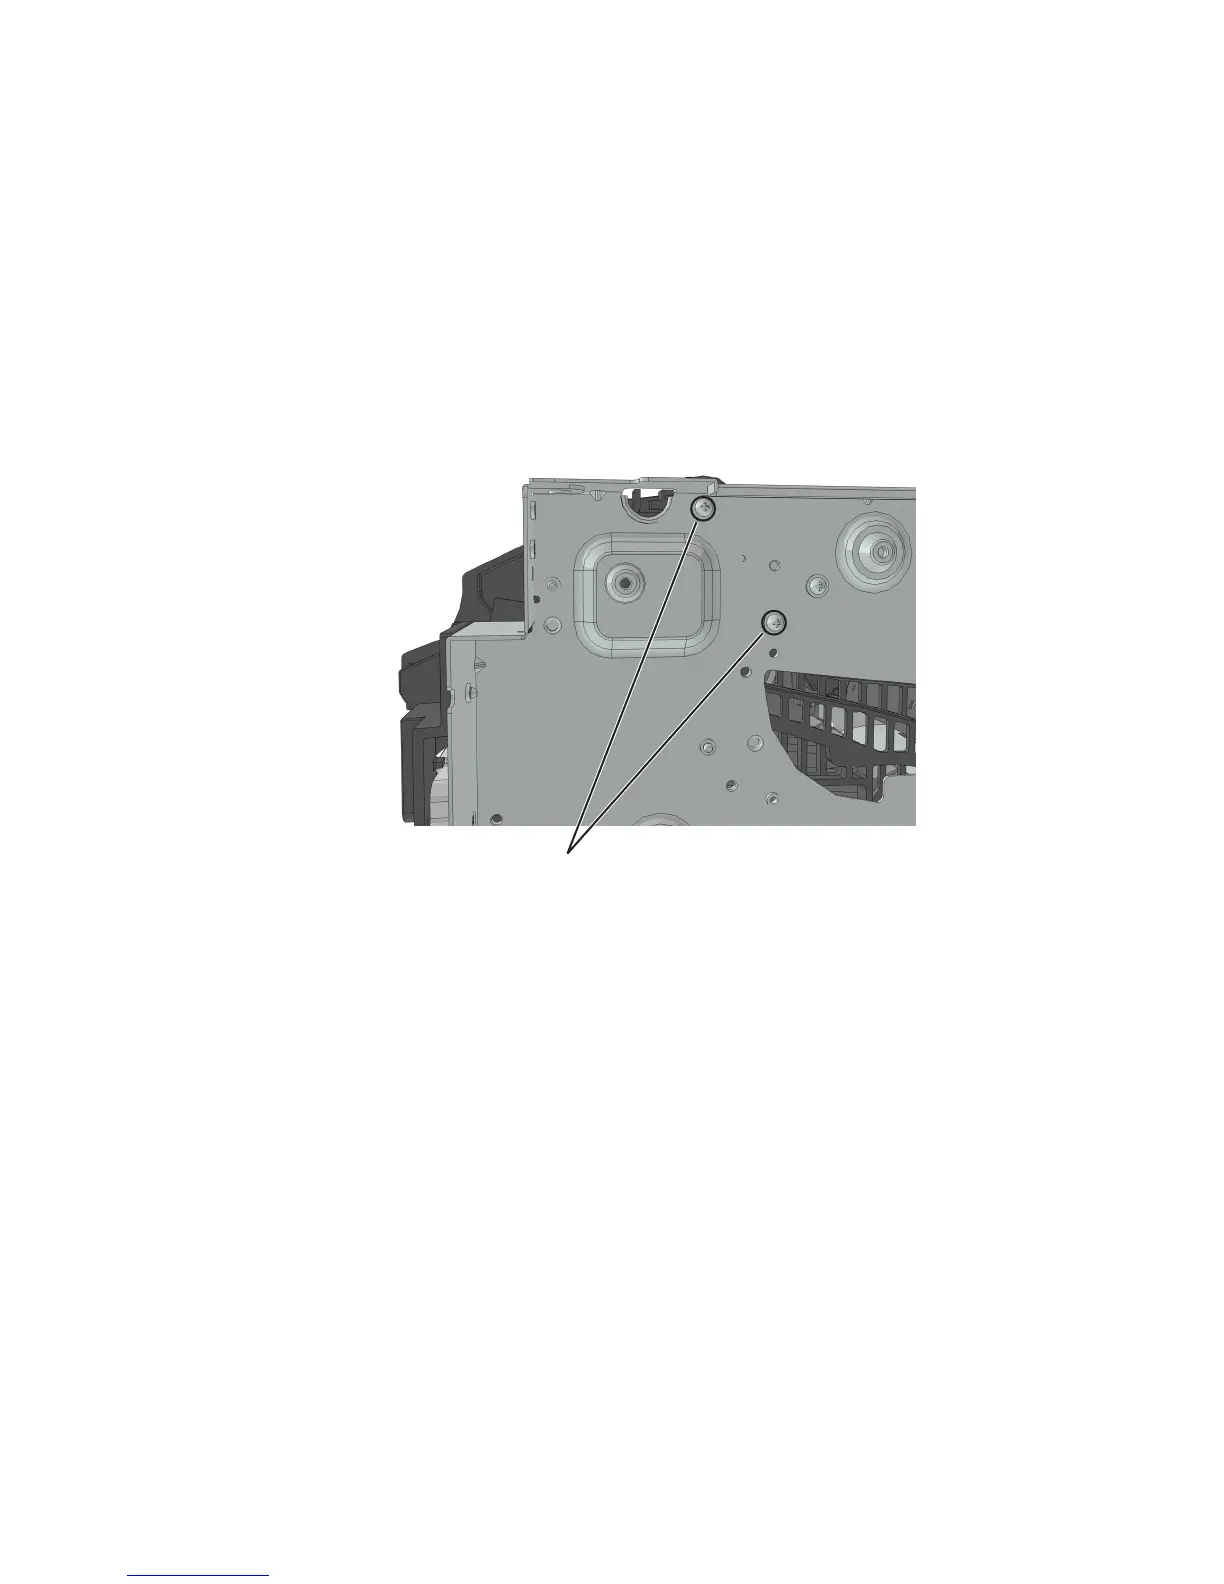
3 Remove the two screws (A).
A
4 Remove the two screws (B), and then detach the right cartridge guide.
Warning—Potential Damage: Do not cut or disconnect the cable at the rear of the right cartridge guide. Leave
the right cartridge guide dangling while performing the rest of the steps.
4514-630, -635, -636
Repair information
188

Table of Contents

Other manuals for Lexmark MS610 Series

Questions and Answers:

Question and Answer IconNeed help?

Do you have a question about the Lexmark MS610 Series and is the answer not in the manual?

Lexmark MS610 Series Specifications

General IconGeneral
Print TechnologyMonochrome Laser
Print SpeedUp to 50 ppm
Print Resolution1200 x 1200 dpi
Processor Speed800 MHz
Standard Memory256 MB
Maximum Memory1280 MB
Maximum Paper Size8.5 x 14 inches
Operating System CompatibilityWindows, Mac OS, Linux
ConnectivityEthernet
Input CapacityUp to 650 pages
Duplex PrintingYes

Related product manuals