Actions Yes No
Step 1
Check the imaging unit for wear or damage.
Is it free of wear or damage?
Go to step 2. Replace the imaging
unit.
Step 2
Make sure the paper path is free of debris or toner contamination.
Does the problem remain?
Go to step 3. The problem is solved.
Step 3
Check the transfer roll for contamination or excessive wear.
Is it free of contamination or wear?
Go to step 4. Replace the transfer
roll. See “Transfer roll
removal” on page
193.
Step 4
Remove the fuser and check for damage or debris on the rollers and belts.
Is it free of damage and debris?
Go to step 5. Replace the fuser. See
“Fuser removal” on
page 244.
Step 5
Reseat the cables JVIDEO1 and JGLV on the controller board.
Does the problem remain?
Replace the LSU. See
“Laser scanning unit
(LSU) removal” on
page 246.
The problem is solved.
Paper jams
Avoiding jams
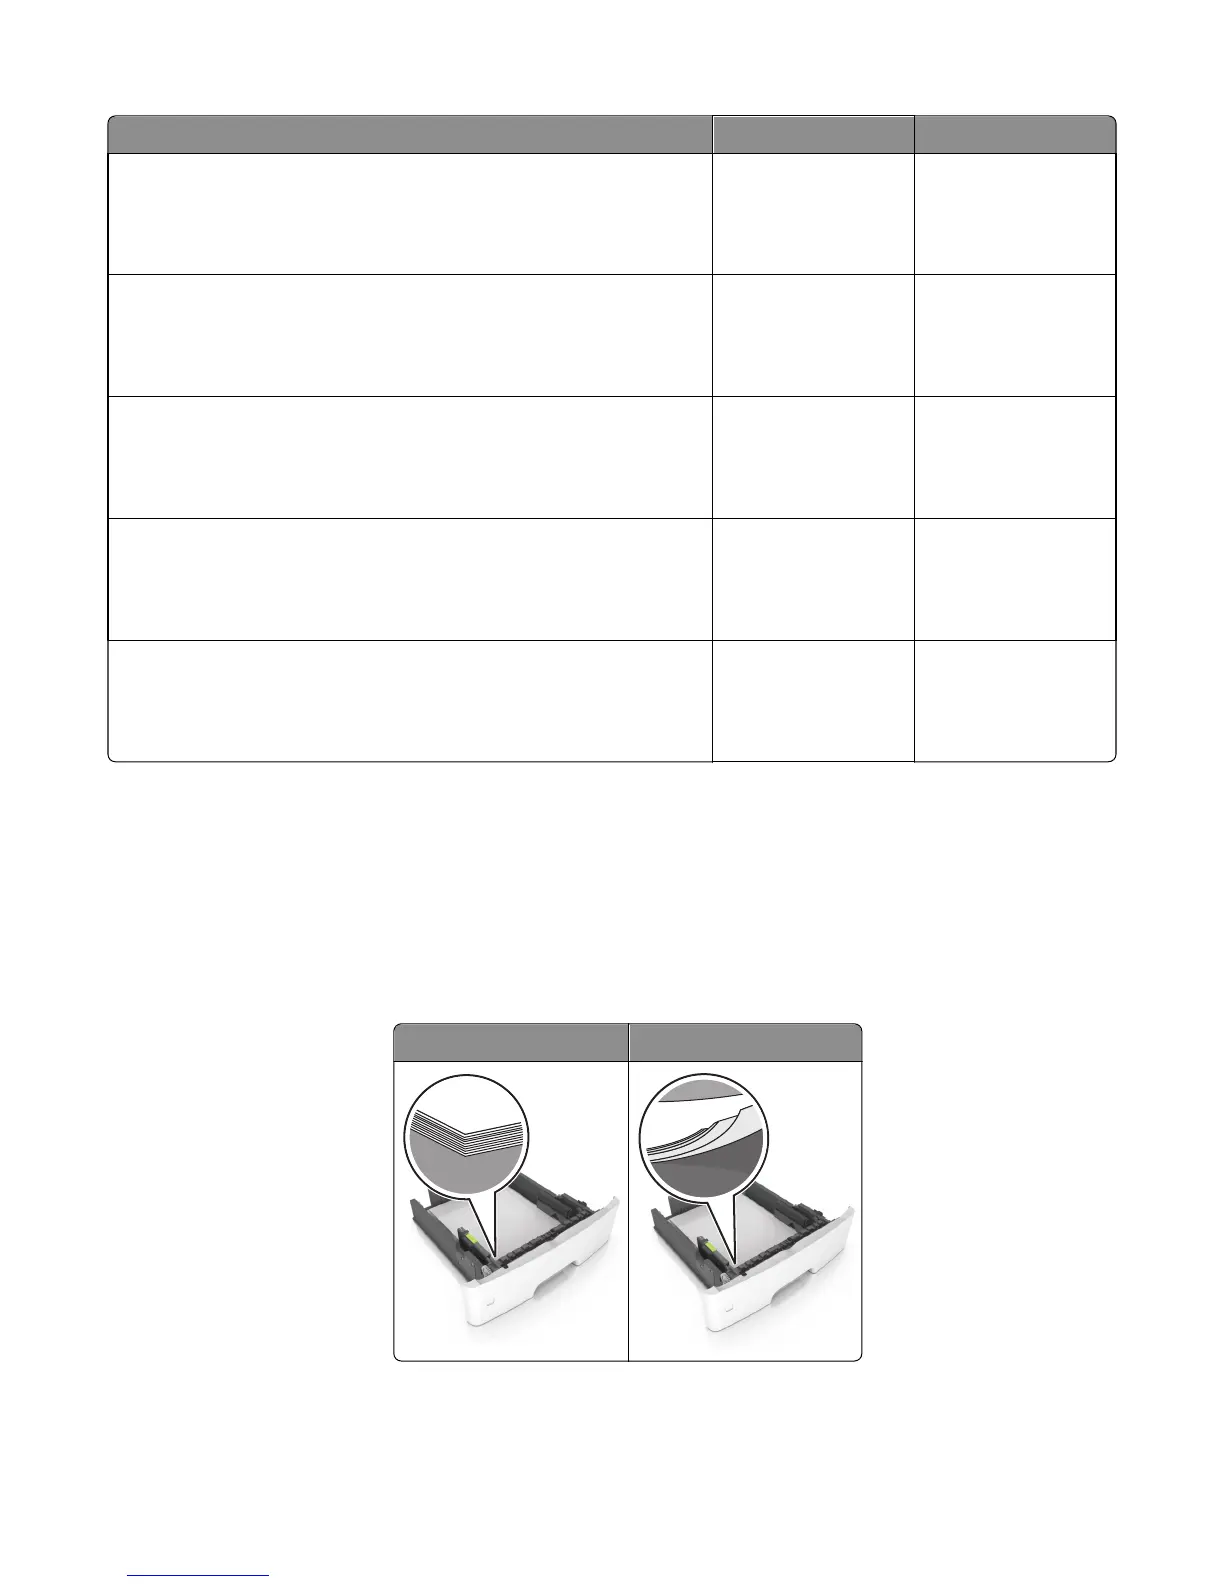
Load paper properly
•
Make sure paper lies flat in the tray.
Correct loading of paper Incorrect loading of paper
• Do not remove a tray while the printer is printing.
• Do not load a tray while the printer is printing. Load it before printing, or wait for a prompt to load it.
4514-630, -635, -636
Diagnostic information
53
 Loading...