Page 34 of 88 TP1A072–3 English
Aug 2017
Linx 10 Operating Manual —
Change the printer setup
Linx 10
Editor Settings
This option allows you to select the settings used to create a new message.
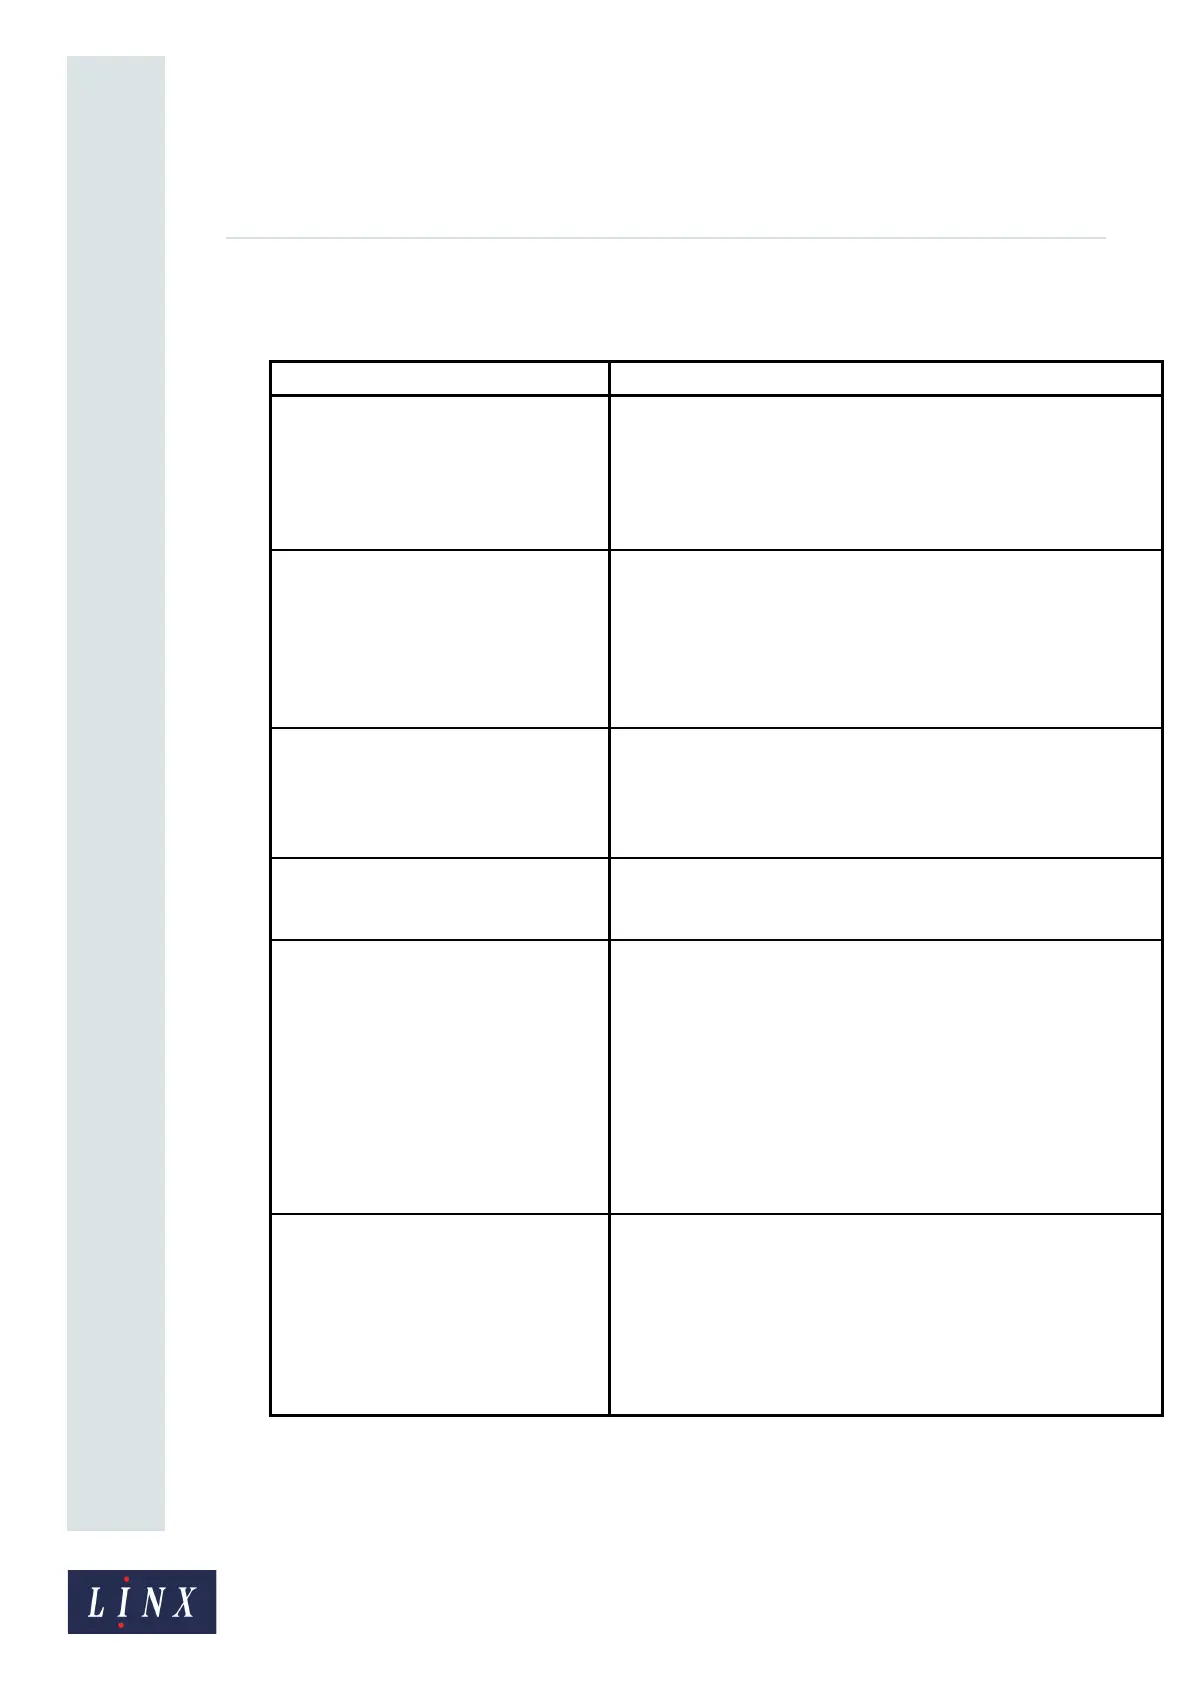
Option Description
New Message Settings Allows you to apply settings to any new message you create:
Use current message settings—any new message you create
uses the settings associated with the current selected message.
Use default settings—any new message you create uses the
default message settings for the printer. See ‘Basic message
settings’ on page 51 for more information about message settings.
Select Message Styles Allows you to change the message styles that you use to create
messages. For example, with the styles for your current locale, you
can also select Hindi or Simplified Chinese message styles.
Touch the box to the left of a message style to select that style for
use. Touch the OK button to return to the Editor Settings screen.
Touch the Exit button on the Select Message Styles screen to
cancel any changes.
Force Default Style Select Yes or No. If you select Yes, any new message
automatically uses the default message style. You do not have the
option to select another message style when you create a
message. See ‘Default Message Style’ on page 43 for more
information about default message styles.
Start Day Allows you to specify a start day for the week. The start day
defines which day of the week is day number one when the 'd1-7
(Day number of week)' date format is used in a date field.
Date Offset Limits Settings Allows you to define minimum and maximum values for the date
offset options on the Date Field Properties screen. The following
options are available:
Offset Limits Enabled—set this option to Yes to enable offset
limits.
Allowed Offset Units—use this option to select the offset units for
which to set limits (Days, Weeks, Months, or Years).
Date Offset Limits—use this option to enter the minimum and
maximum values for each selected offset unit. Your selected
values are displayed on the relevant Enter Date Offset screens
when you select an offset.
Print Delay for All Users If this option is enabled, the Print Delay option is accessible
from the carousel area on the Home screen at all user levels, even
if no user is logged in.
If not enabled, the Print Delay option is only available to users with
sufficient security access rights.
If both options (Print Delay and Print Delay for All Users) are
enabled, the Print Delay option is also displayed on the carousel
area.