Page 33 of 88 TP1A072–3 English
Aug 2017
Linx 10 Operating Manual —
Change the printer setup
Linx 10
To change the order in which the options appear in the carousel area, touch the required option to
highlight it, and then use the up and down arrow buttons to move the item within the list. The first
item in the list on the Customise Home Screen screen appears as the first option on the Home screen
carousel area.
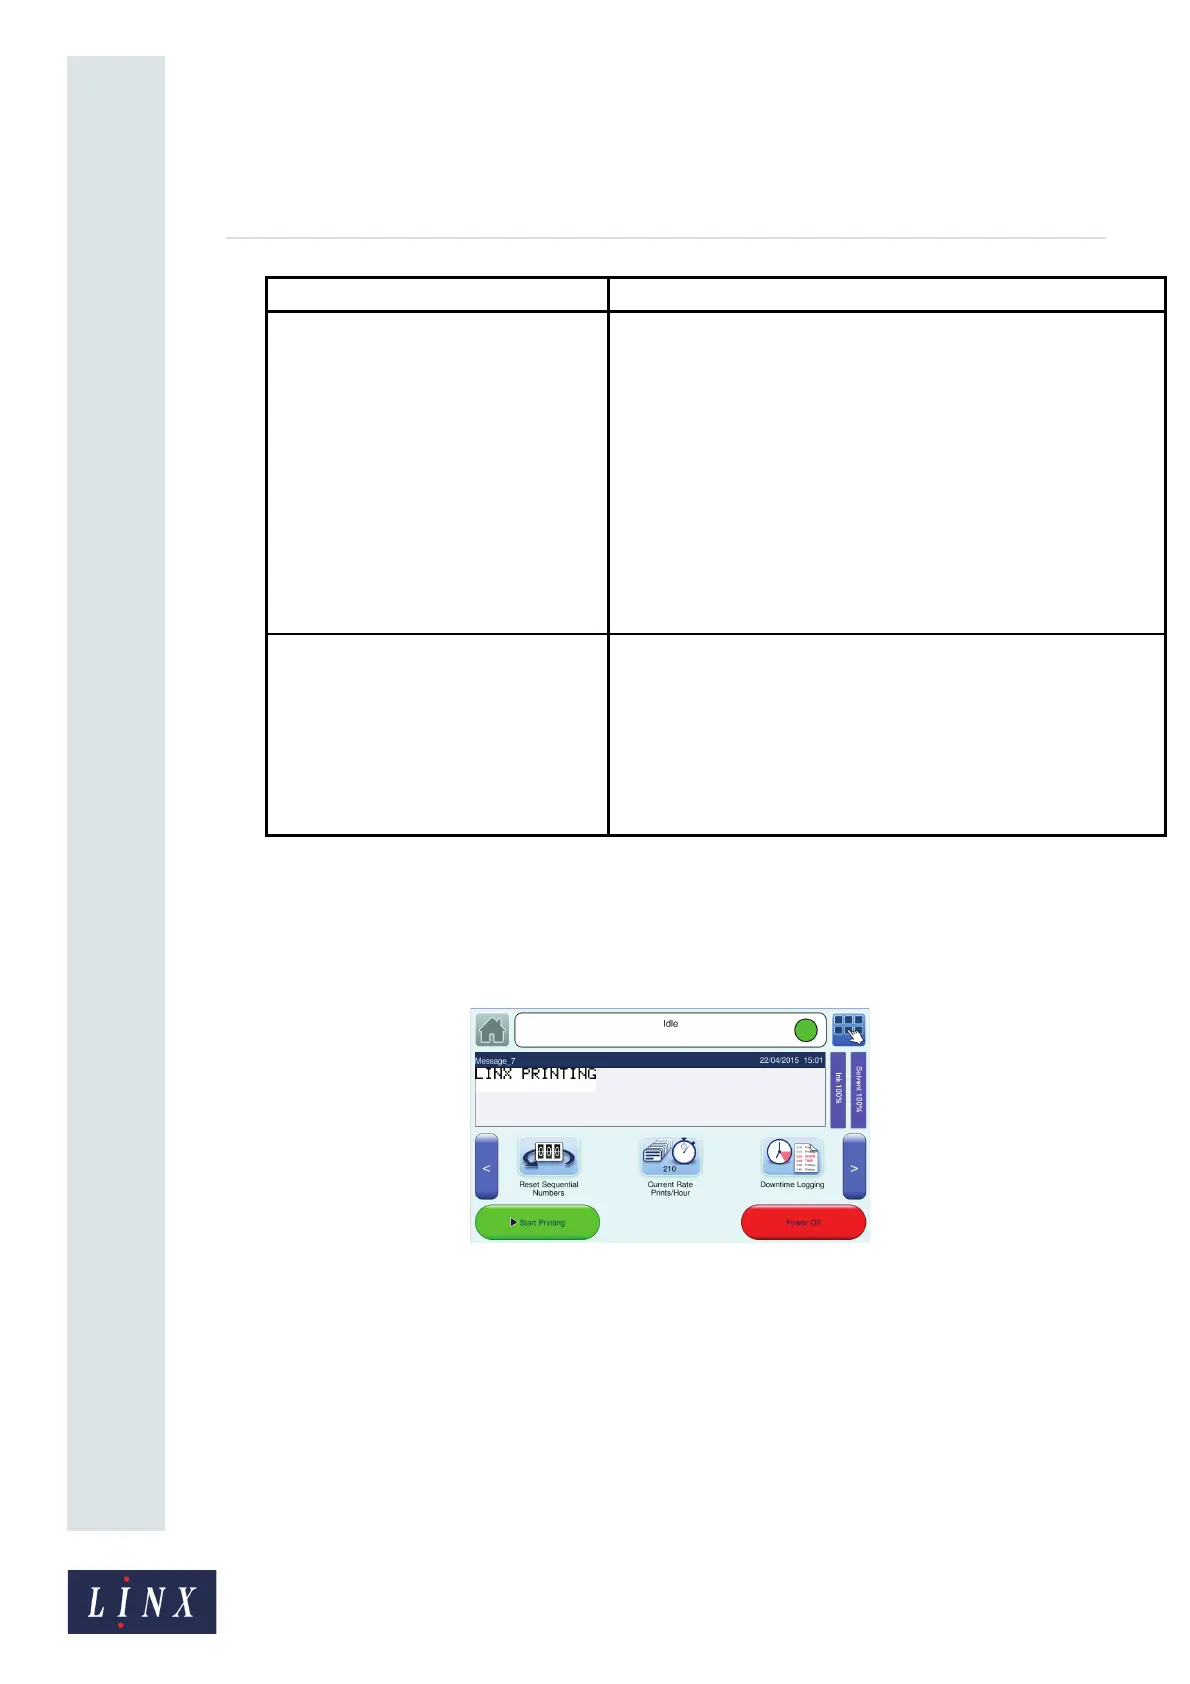
Figure 28 shows the carousel area with additional options selected.
Figure 28. Home screen: carousel area
Frozen Date If enabled, a button appears in the carousel area on the printer
Home screen. Touch the Frozen Date button to enable this option.
A screen is displayed to confirm that the option is turned on and an
icon is then displayed on the printer status bar.
When enabled, any date fields in the current selected message are
frozen at the current date (including any date offset values for the
fields). Touch the Frozen Date button to disable this option. A
screen is displayed to confirm that the option is turned off. Any date
field in the current selected message revert to the current date
(including any date offset values for the field). Any messages in a
production schedule use the frozen date that corresponds to when
the schedule was created and the frozen date enabled.
Print Delay for All Users If enabled, the Print Delay option is accessible from the carousel
area on the Home screen at all user levels, even if no user is
logged in.
If not enabled, the Print Delay option is only available to users with
sufficient security access rights.
If both options (Print Delay and Print Delay for All Users) are
enabled, the Print Delay button is also displayed on the carousel
area.
Option Description