MERLIN LEGEND Communications System Release 6.1
Installation
555-661-140
Issue 1
August 1998
Connecting the Control Unit to the Network Interface
Page 4-9
Wiring
!If necessary, repeat Steps 1 and 2 for a second column.
!Run the 25-pair amphenol cable on the RJ21X interface to the
termination blocks.
If more length is needed, use an A25D male-connector, single-ended,
25-pair, nonplenum cable.
!Mount the D-rings to properly dress the wires, as needed.
!Cut off the amphenol connector nearest to the cross-connect field
and strip the wires for each of the 25 pairs.
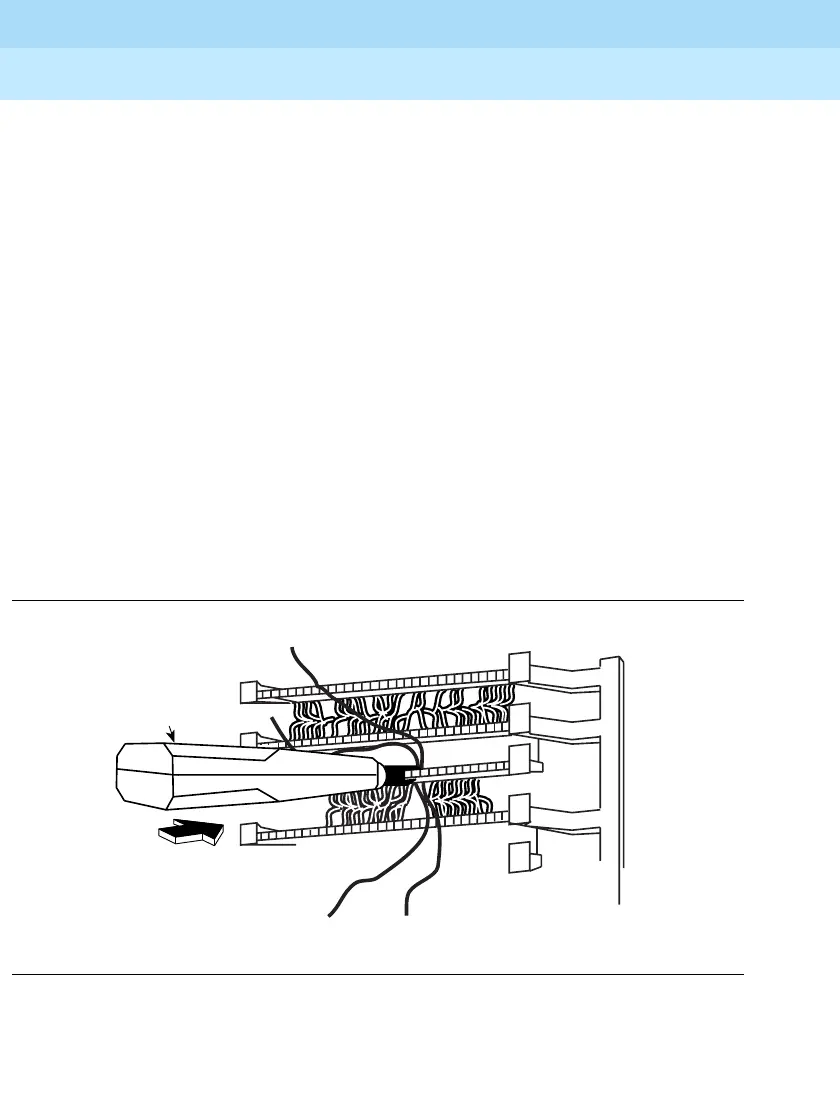
!Punch down the 25-pair wires to the termination block.
a. Route the wires through the fanning slots on the termination block.
b. Insert the conductors into the designated 110 connecting blocks
already on the termination block.
c. Use the D-impact tool to seat the conductors. See Figure 4–4.
d. Remove any insulation fragments with a spudger.
Figure 4-4. Using the D-Impact Tool to Seat the Conductors
D-Impact Tool

 Loading...