Operation
127
5
Top and Lower Links Adjustment
The top and lower links must be adjusted
correctly so that the implement can work at the
required depth and that the lower links are free to
move up and down with the shape of the ground.
NOTE: Make sure tyre pressures, wheel
equipment and blasting are correct before
making hitch adjustments.
IMPORTANT: After making any adjustments,
carefully raise the implement to make sure
there is clearance between the tractor and
implement.
NOTE: All photographs have been taken using
a European specification Tractor. The same
procedure applies for all market areas except
where stated.
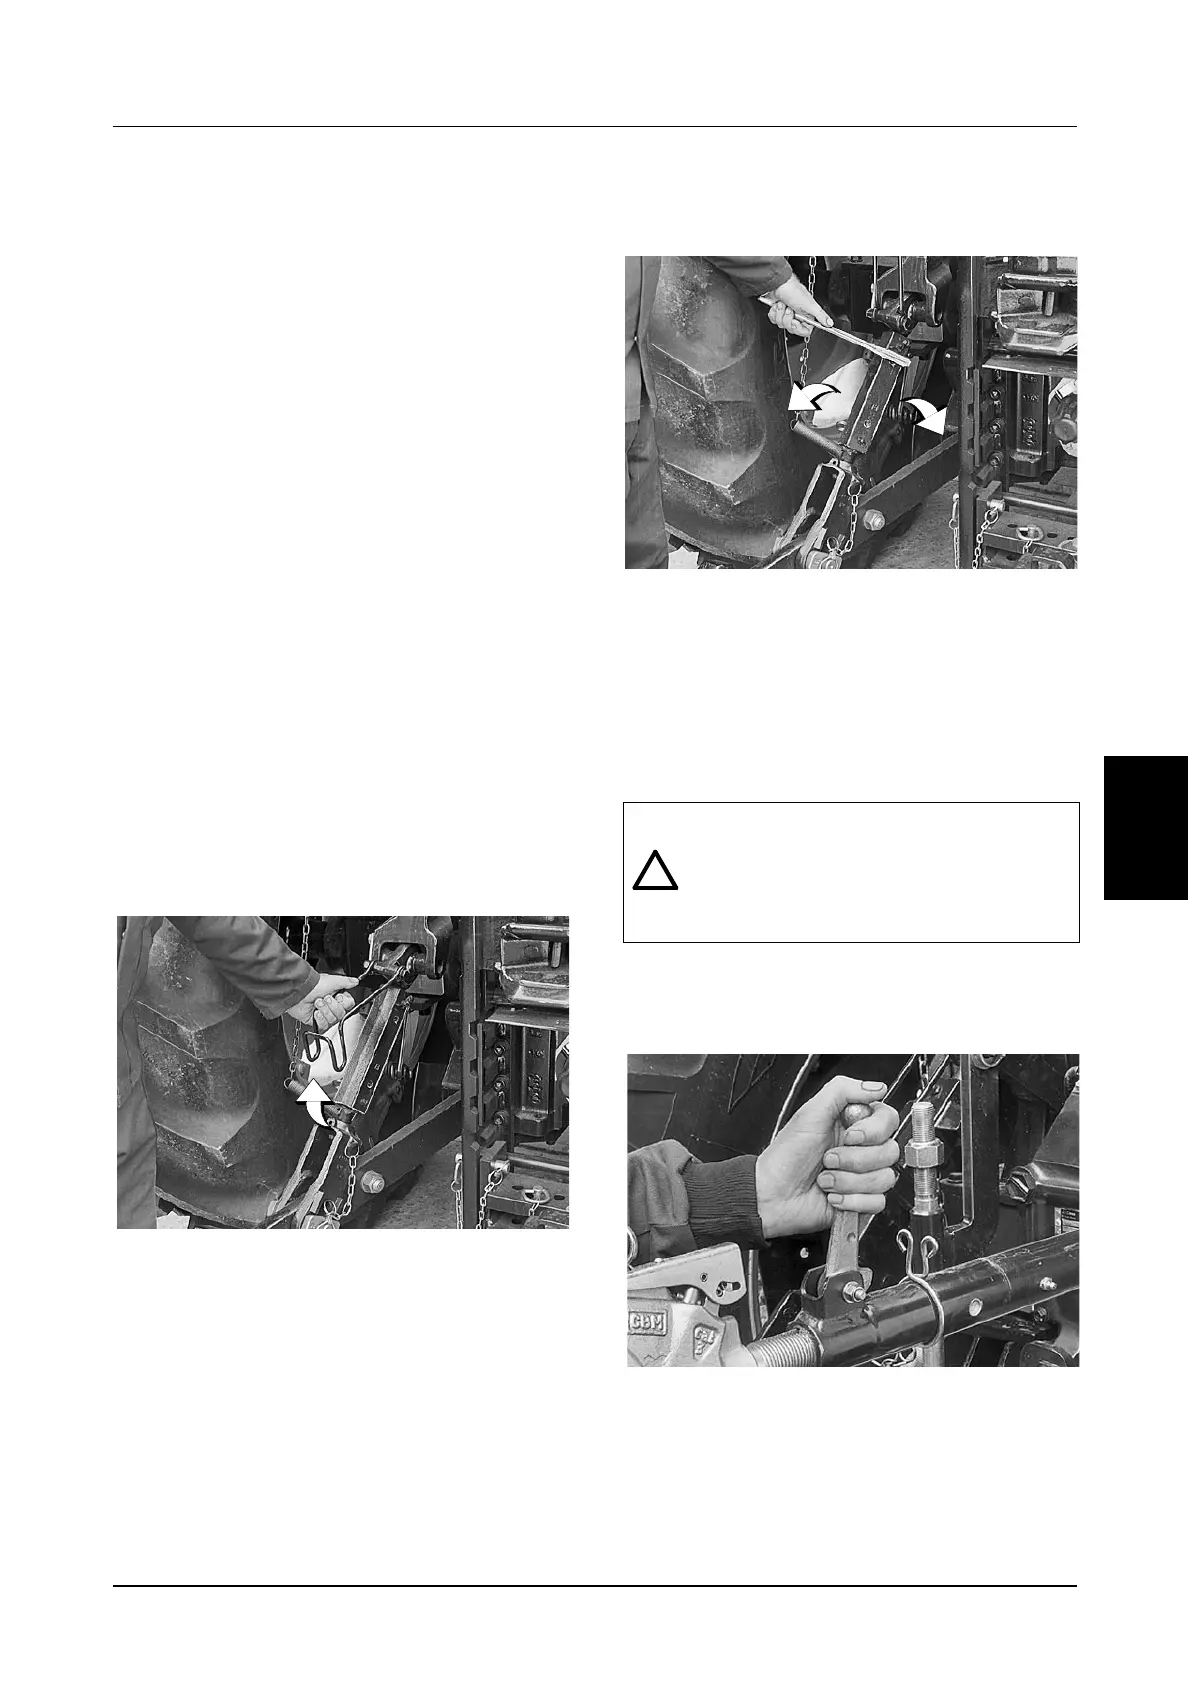
Lower Link Adjustment
Adjust the lower links as follows:
STEP 1
Put the tractor on a hard level surface and lower
the hitch to the lowest position.
STEP 2
DP99G161
To adjust the lower link height, pull the turnbuckle
lock off the turnbuckle.
STEP 3
DP99G162
Use a wrench to rotate the turnbuckle to adjust
the lower link to the required height.
NOTE: Be sure to place the turnbuckle locks in
their locked position after adjusting the lower
links.
Top Link Adjustment
Make sure that the length of the top link is
adjusted correctly. See the implement Operators
Manual for the correct length.
DP96J395
To adjust the length of the top link, pull the
adjustment handle out of the retaining clip to a
vertical position.
Turn the handle counterclockwise to shorten the
link or clockwise to lengthen the link. As seen
from behind the tractor looking forward.
WARNING: Only use the special swivel
type top link supplied with the tractor when
connecting to the top bracket. Serious
damage and possible injury can result, if
you use other types of top link.