Operation
107
5
AUTO HITCH (If Equipped)
(according to 89/173/EEC, ISO 6489)
Connecting an Implement
STEP 1
MD04D013A
STEP 2
Raise the hitch to maximum height.
IMPORTANT: Make sure LOAD CONTROL is in
the (0) off position, this will prevent unwanted hitch
movement when the tractor is moving at more than
0.8 km/h (0.5 mph).
STEP 3
MD04D014
STEP 5
Lower the auto hitch.
STEP 6
MH06B079
Extend the hook rearwards, by moving the
corresponding hydraulic remote control until the
hook is aligned under the implement towing eye.
STEP 7
Raise the auto hitch until the hook is engaged in the
implement towing eye.
STEP 8
Fully retract the hook by moving the correct remote
lever rearwards.
IMPORTANT: The Gap between the tip of the hook
and the keeper plate must be less than 8 mm. A
larger gap indicates the hook is not fully retracted.
STEP 9
Raise the auto hitch to maximum height.
STEP 10
Press and hold the Ride Control switch fully forward
(to the hitch override position) until the hitch stops
upward movement and the locking latches are
latched.
Release the Ride Control switch.
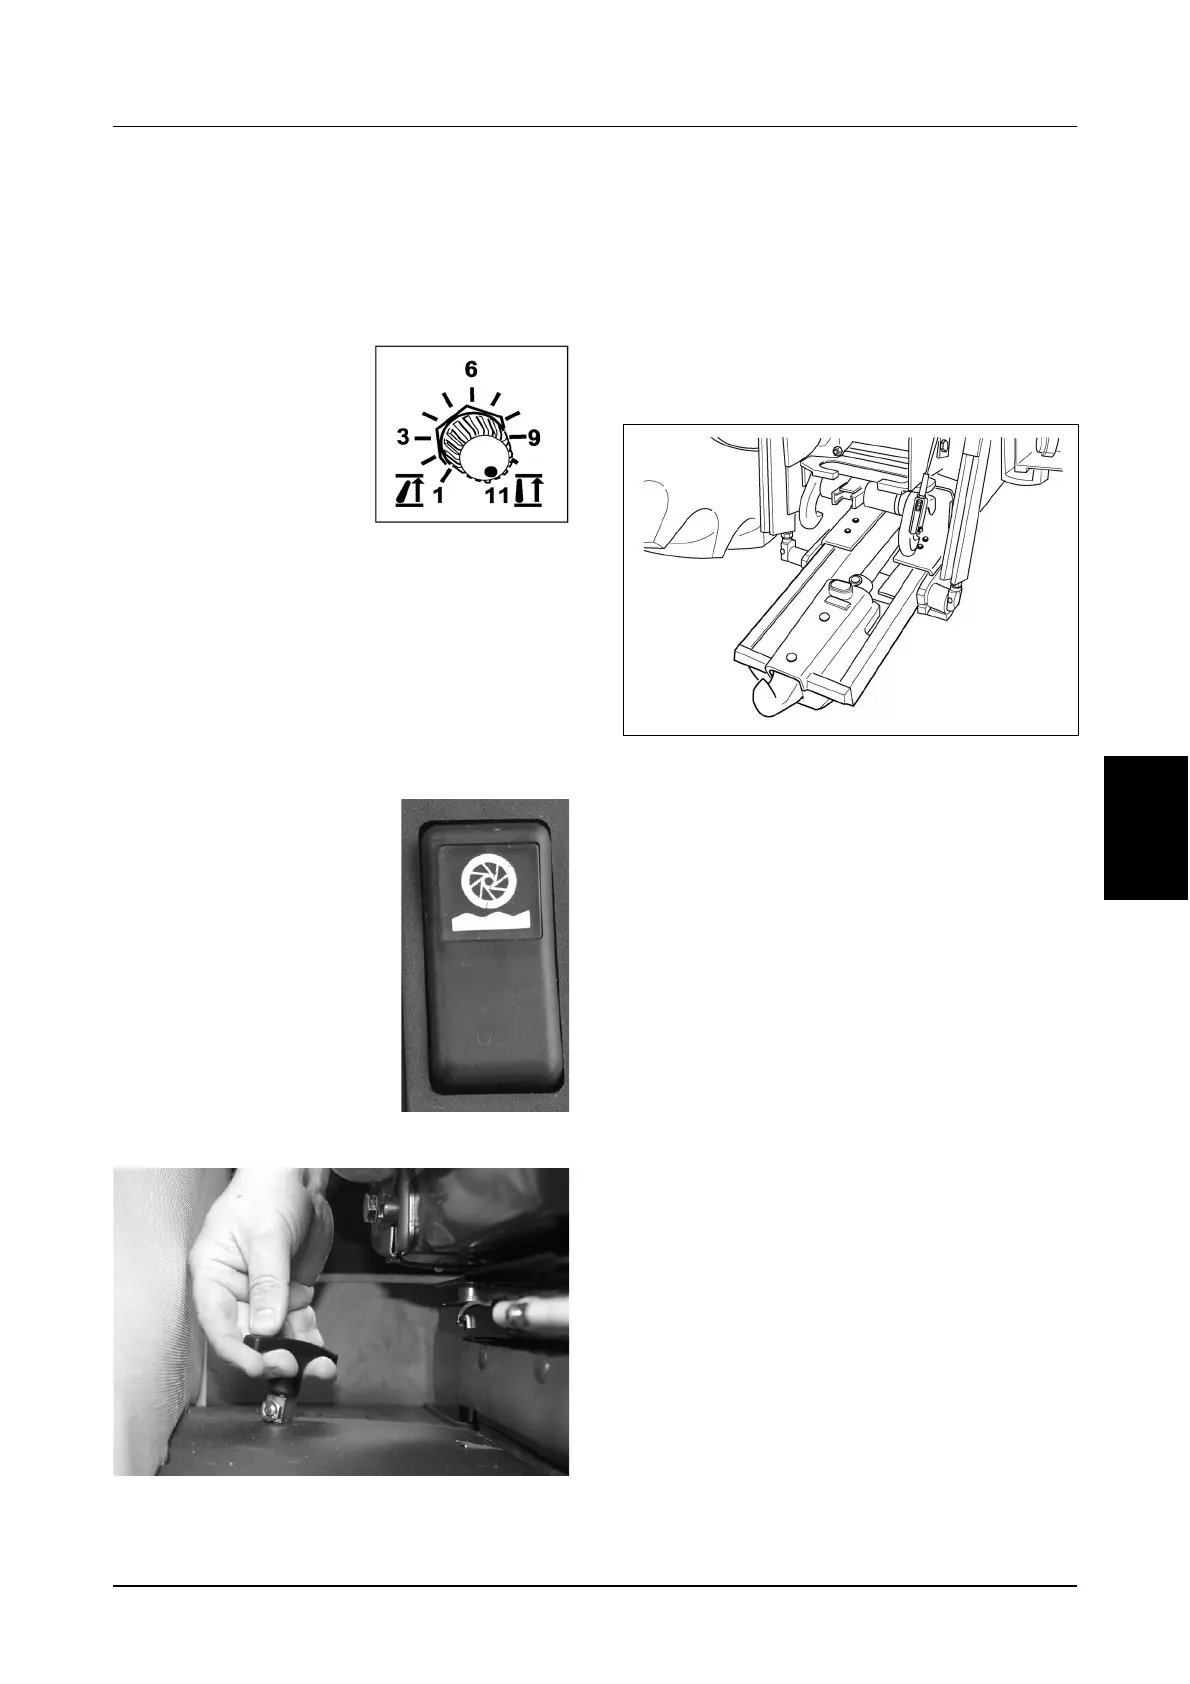
Turn the Upper Limit
Control Knob (1) to the
maximum setting (Setting
11).
Control switch fully forward
(to the hitch override
position) until the hitch stops
upward movement
Once the hitch stops pull
the auto hitch release
control to unlock the
locking latches and then
release the Ride Control
switch.
MD04C164