– 2.6 –
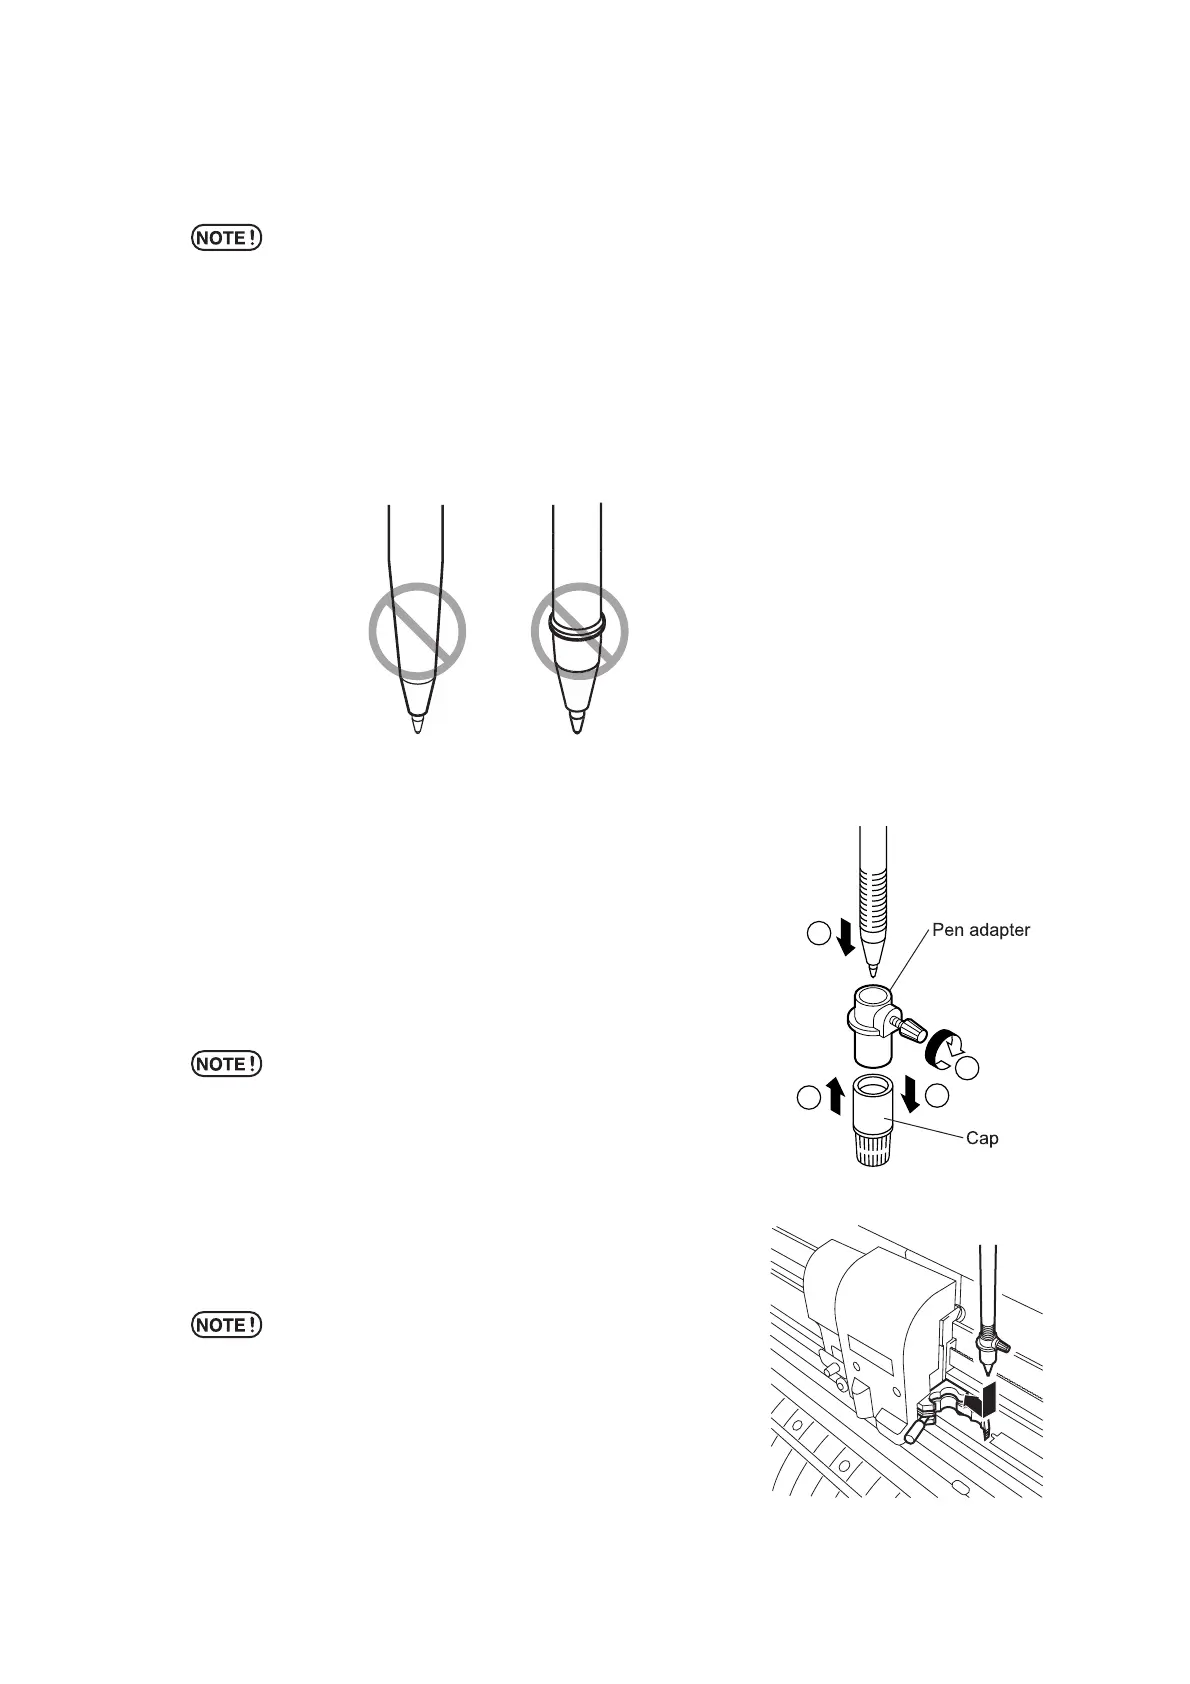
Attaching ball-point pen on the market
* As for the ball-point pen on the market, use the ones with 8 to 9 mm diam-
eter. Picture quality may vary depending on the pen used.
The recommended boll point pen is as follows,
PENTEL CO., LTD. Products No. : K105-A, K105-GA
* In case holding the boll point pen of the following figures by pen adapter, it
may cause slant or hit covers.
Uneven gauge
With level or bumps
1) Put the cap on the pen adapter.
Use the cap to adjust a pen height.
2) Insert the pen into the pen adapter.
Insert the pen all the way until the pen tip hits the cap.
3) Fix the pen tip.
Now, tighten the fixing screw clock-wise.
* Be careful not to over tighten the fixing screw of
the pen adapter. If tightened too much, ball-
point pen may crack.
4) Remove the cap.
5) Insert the pen adapter with the pen into the
tool.
* Set the adapter in a way that the fixing screw will
not hinder operation.
6) Turn the knob of the tool holder clock-wise to
fix the tool.
 Loading...


