Chapter 1 Before Use
1-13
1
2
2
2
2
3
Wipe off any ink adhering to the cap.
(1) Set the bottle with cap upright and use a
paper towel or the like to wipe off any ink
adhering to the cap.
4
Remove the specialized cap from the used
ink bottle.
• Use the tightening jig to remove the specialized
cap if it is difficult to remove.
5
Refer to P.1-10 “Setting ink bottles” to set
the new ink bottle.
When [INK NEAR END] is displayed
There is a little of ink left. It is recommended to replace
the ink bottle soon since ink may become empty in
printing while printing is continuously enabled.
When you press the key in LOCAL, you can
check the bottle to be replaced in the local guidance.
( P.3-33)
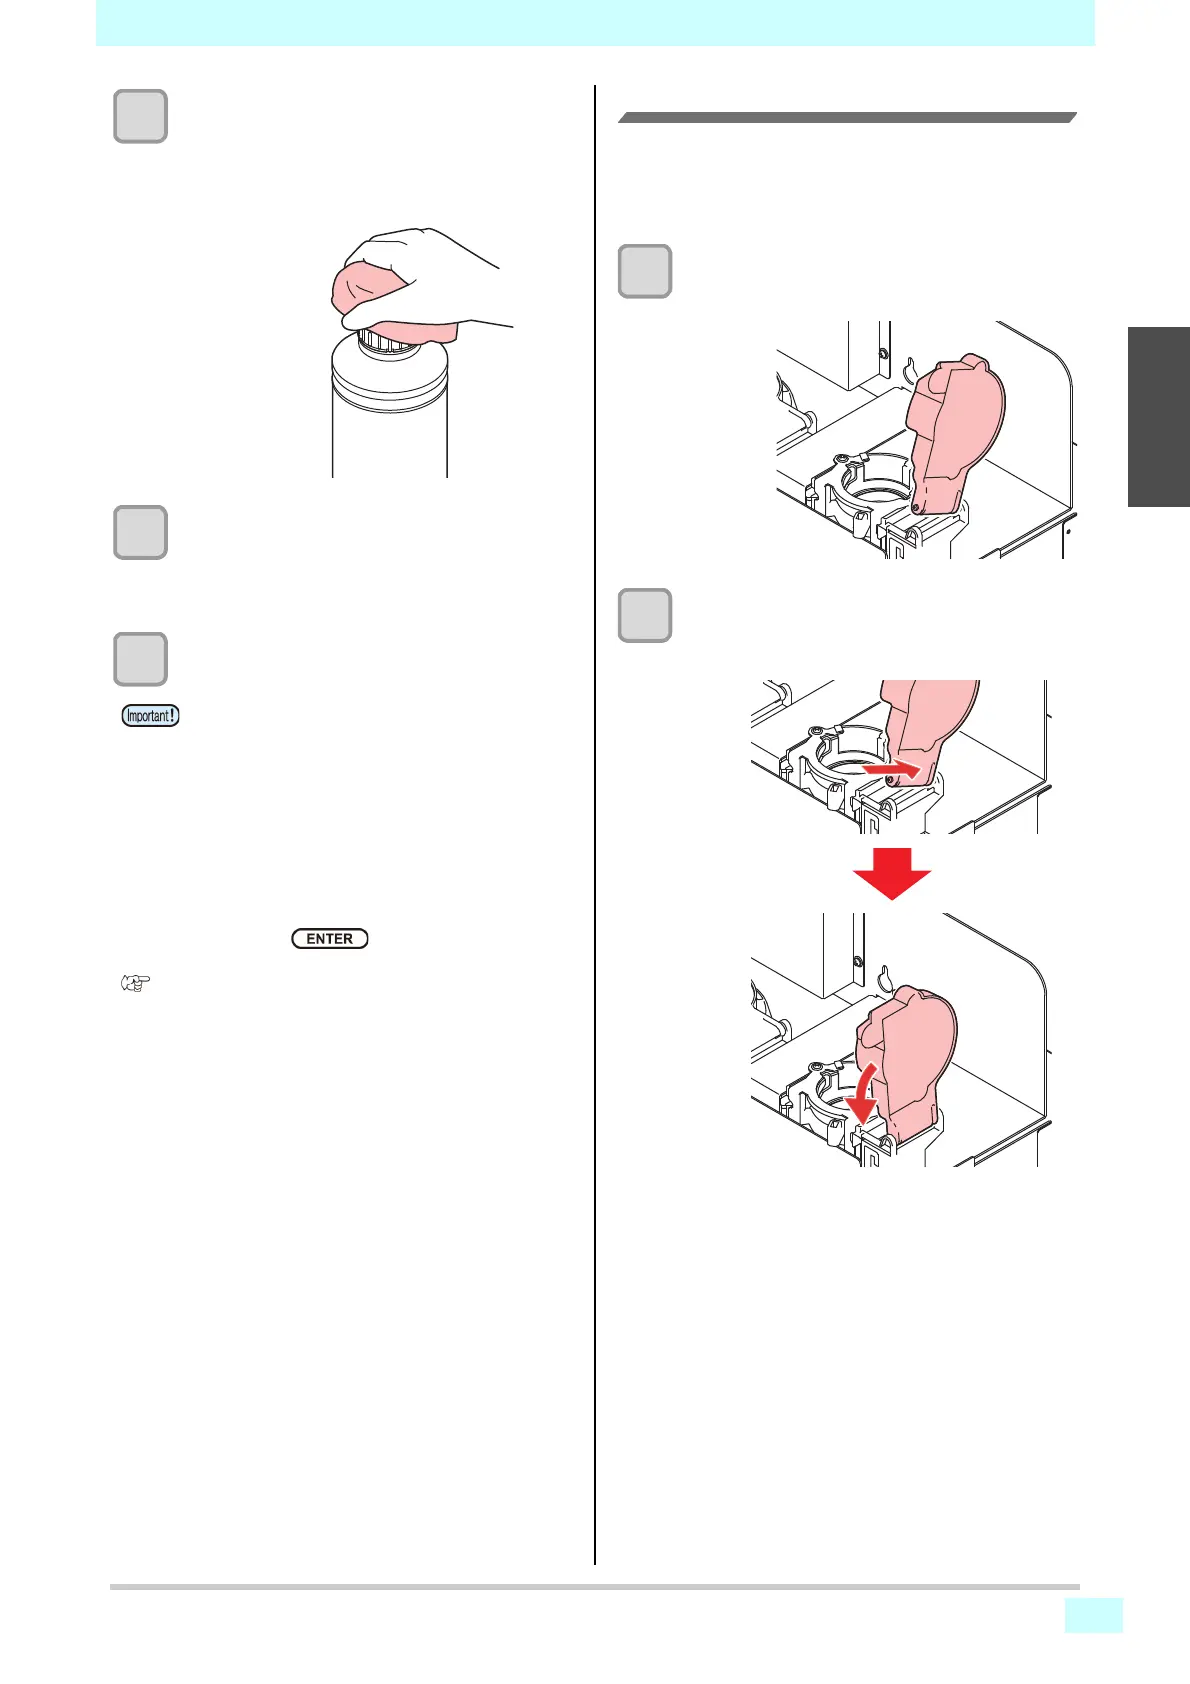
If the light-blocking cover comes off
If the light-blocking cover comes off, light striking the
inside of the tank can result in the ink curing.
Perform the following procedures if the light-blocking
cover comes off.
1
Insert the nub (on one side) of the light-
blocking cover into the hole on the tank.
2
While pressing towards the side of the
inserted hole of Step 1, insert the other
nub into the other side.
• Do not leave an ink bottle with the specialized cap
attached in a location where it is exposed to light
for a long period of time. Doing so can result in the
ink in the bottle curing.