User’s Guide – Ultima cutting plotter
42 AP-75032, Rev 2.2, 20/04/07
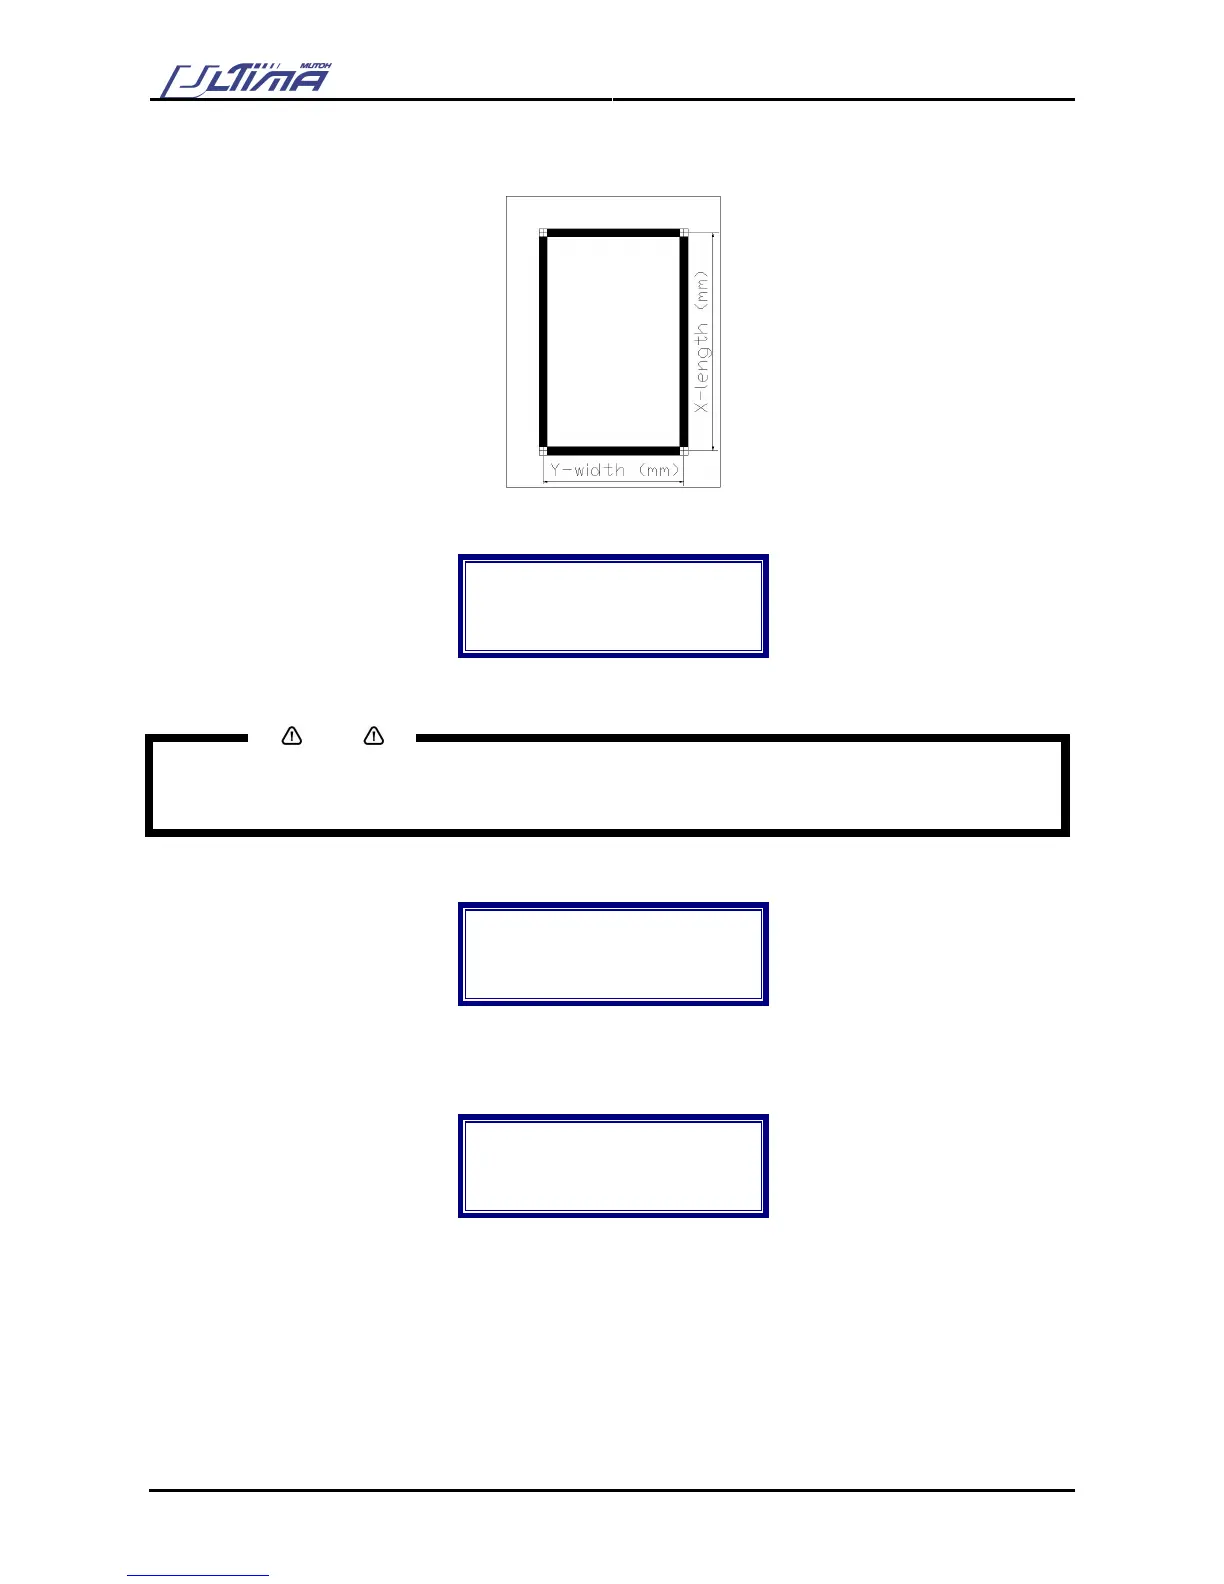
Step 6 : Before performing an alignment, ‘X Length’, ‘Y Width’ and ‘Roll Direction’ must be inserted. With
these values the Ultima cutting plotter will calculate the E-pos correction.
Step 7 : Press the [CONTOUR CUTTING] key. On the display following message will appear.
Contourcutting :
X Length (mm) :
→ 500
Start alignment
Step 8 : By using the [UP] and [DOWN] key you select an appropriate value for the X Length.
Notes
Please make sure that the value of the X Length is smaller than the length of the loaded media. Otherwise,
the Ultima cutting plotter cannot complete the alignment – NO VALID EPOS REFERENCE FOUND.
Step 9 : Press the [CONTOUR CUTTING] key to confirm. On the display following message will appear.
Contourcutting :
Y Width (mm) :
→ 500
Start alignment
Step 10 : By using the [UP] and [DOWN] key you select an appropriate value for the Y Width.
Step 11 : Press the [CONTOUR CUTTING] key to confirm. On the display following message will appear.
Contourcutting :
Roll direction
→ Non-reverse
Start alignment
Step 12 : Select the appropriate ‘roll direction’ (non-reverse or reverse) by using the [UP] and [DOWN] key.
Step 13 : Press the [CONTOUR CUTTING] key to check the entered values of the ‘X length’, ‘Y width’ and
‘roll direction’.
Step 14 : To confirm your settings press the [ENTER] key.
Step 15 : The Ultima cutting plotter will start the frame detection. (‘Manual’ or ‘automatic’ as selected in
step 5).