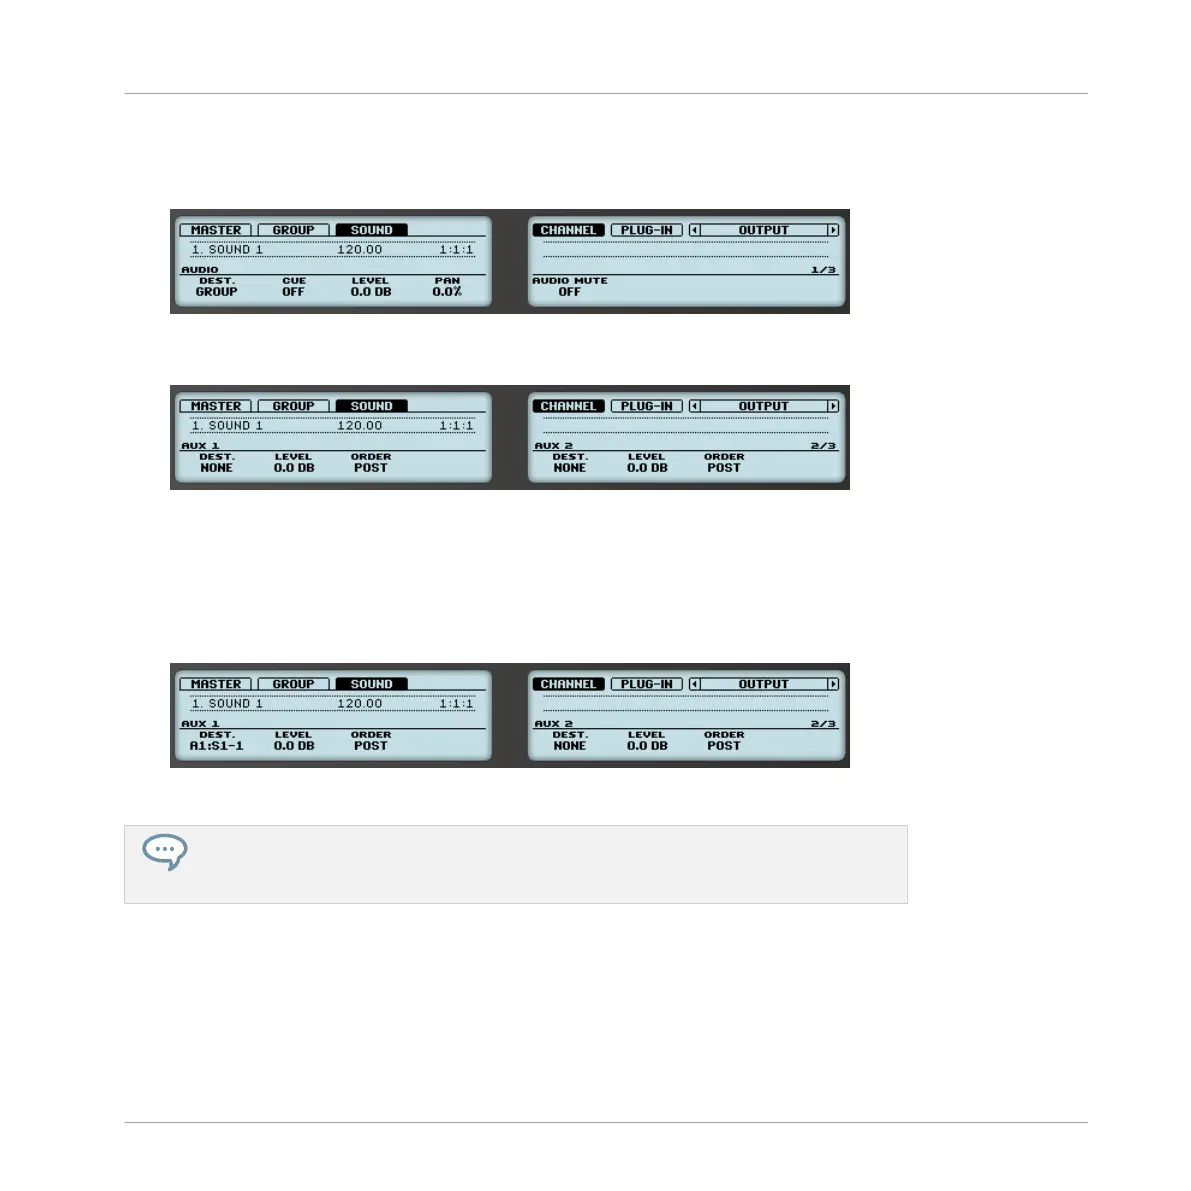
5. Press Button 7/8 to select OUTPUT.
The Output properties are shown in the displays of your controller (in the example under-
neath we show the Output properties of a Sound).
6. Press NAVIGATE + pad 2 to select the AUX page of parameters. You can also use the
Page buttons for this.
7. Turn Knob 1 (AUX 1 DEST.) to assign the first auxiliary output to the desired send effect.
In addition to the usual entries available, you will find all the Sounds and Groups with an
Effect Plug-in loaded in their first Plug-in slot — see ↑11.3.1, Step 1: Set Up a Sound or
Group as Send Effect. For each Sound, the entry shows the Group letter and number fol-
lowed by the Sound number (in the example underneath we selected the entry A1:S1-1
for the AUX 1 output).
8. Use Knob 2 (AUX 1 LEVEL) to adjust the level of the signal sent to that auxiliary output.
The signal of each auxiliary output is taken by default after the main output level control
has been applied. This can be changed via Knob 3 (AUX 1 ORDER). For more informa-
tion, please see section ↑8.1.3, Setting Up Auxiliary Outputs for Sounds and Groups.
You can repeat the process to route more Sounds/Groups to the same send effect, or route the
same Sound/Group to another send effect send using AUX 2.
Using Effects
Creating a Send Effect
MASCHINE - Manual - 601