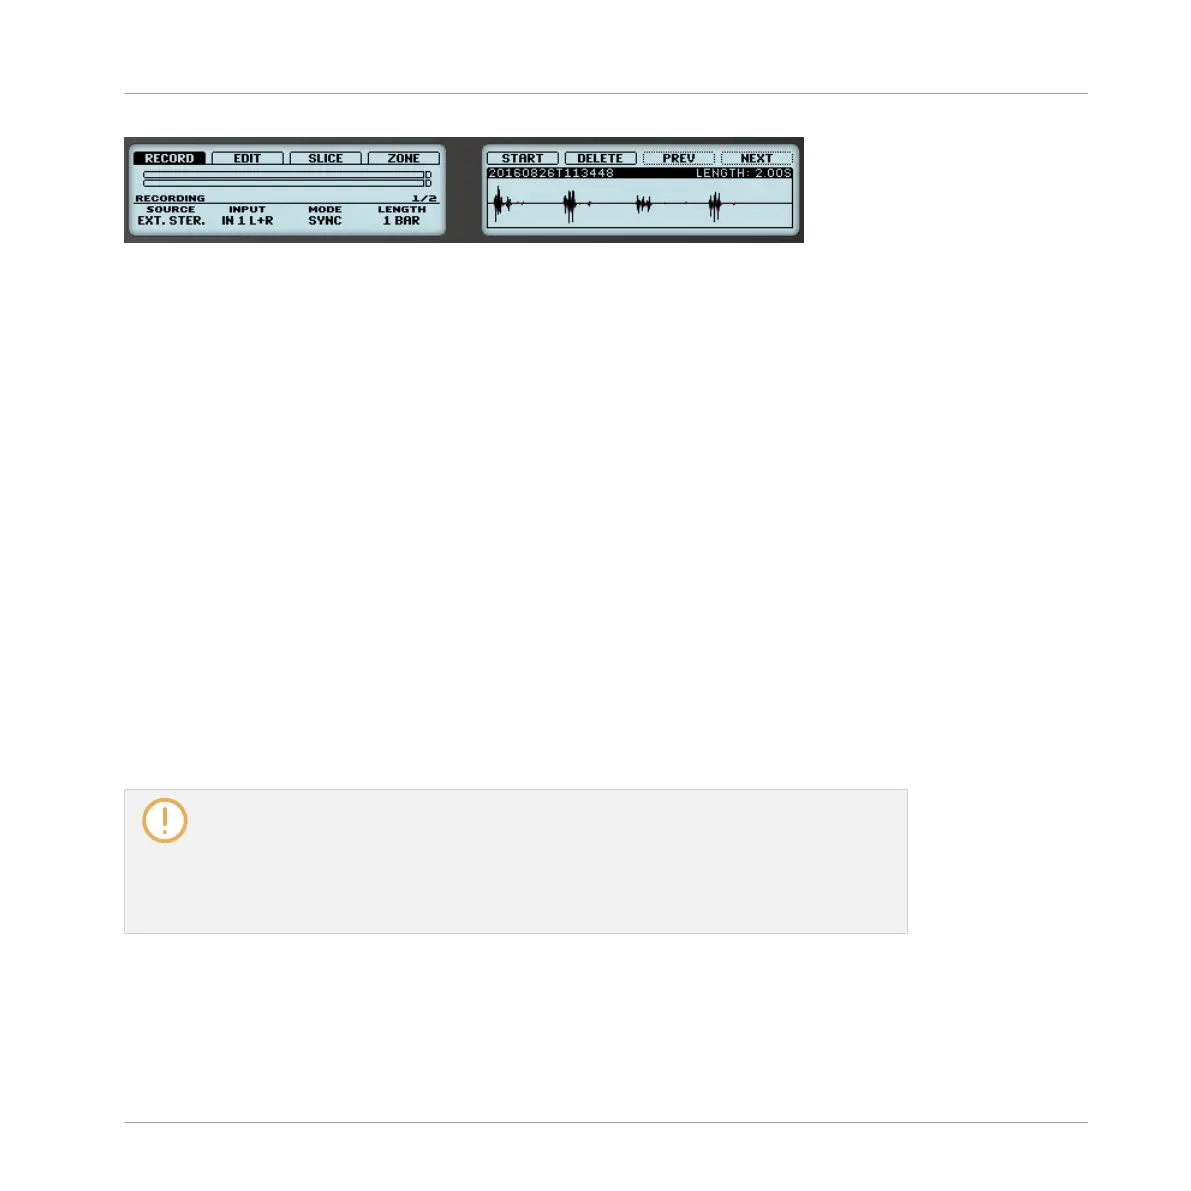
The recorded Sample is shown on the right display.
The name and length of the displayed Sample are indicated above the waveform. When the
Sample is played back (e.g., by pressing the fully lit pad), a playhead indicator (vertical line)
shows you the current play position within the waveform.
►
Turn Knob 5 to zoom in on the waveform of the Sample and Knob 6 to scroll through it.
Using the Recording History
All the recordings you have made since you opened the current Project are stored in the Re-
cording History. The following actions are available:
▪ To navigate your various recordings, press Button 7 (PREV) and Button 8 (NEXT).
▪ The selected recording is automatically loaded in the Sampler Plug-in and ready to be
played. You can further edit the selected recording via the other pages of the Sampling
mode. When selected, a recording is also automatically mapped to a new Zone covering the
entire key and velocity ranges in the ZONE page. Any existing Zones will be replaced.
▪ Press the fully lit pad to listen to the displayed recording on the Cue bus (see section
↑9.2.6, Using the Cue Bus for more information).
▪ Press Button 6 (DELETE) to delete the selected recording.
The Recording History is not saved with the Project! The Recording History is meant as
a temporary tool to help you manage the various recordings made during the current ses-
sion. When you close the current Project, the Recording History is cleared for all Sounds
—nevertheless all your recordings are saved as audio files and available for later use un-
less you explicitly delete them (via the MASCHINE interface or in your operating sys-
tem).
Sampling and Sample Mapping
Recording a Sample
MASCHINE - Manual - 766