8-Port Gigabit (PoE+) Ethernet Smart Managed Pro Switch with (2 SFP or 2 Copper Ports and)
Cloud Management
Configure Routing User Manual258
The login page displays.
If the NETGEAR Business page displays, see
Register and access the switch with your
NETGEAR account on page 34.
4. Enter one of the following passwords:
• After registration, enter the local device password.
By default, the local device password is password.
• If you previously managed the switch through the Insight app or Cloud portal, enter
the Insight network password for the last Insight network location.
For information about the credentials, see
Credentials for the local browser interface on
page 32.
5. Click the Login button.
The System Information page displays.
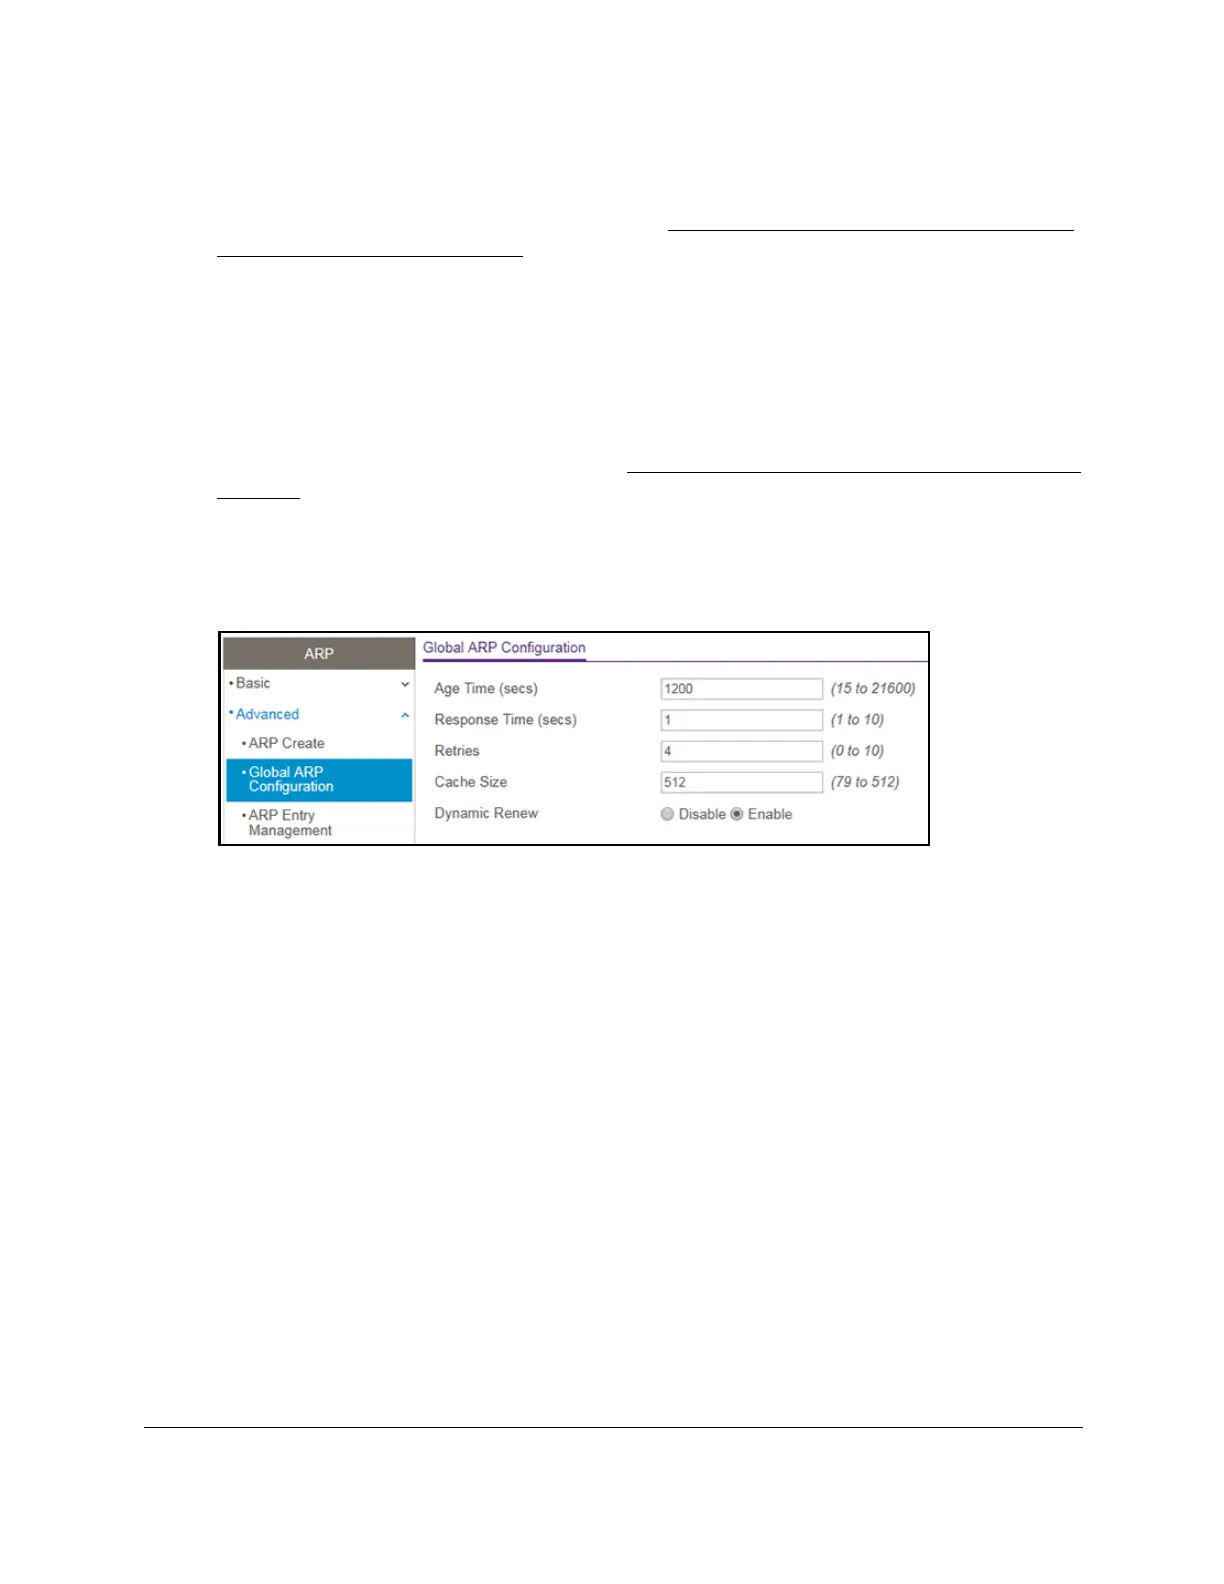
6. Select Routing> ARP
> Advanced > Global ARP Configuration.
7. In the Age Time field, enter the time, in seconds, that a dynamic ARP entry remains in the
ARP table before aging out.
The range is 15 to 21600 seconds. The default is 1200 seconds.
8. In the Response T
ime field, enter the time, in seconds, that the device waits for an ARP
response to an ARP request that it sends. The range is 1 to 10 seconds. The default is
1 second.
9. In the Retries field, enter the maximum number of times an
ARP request is retried after an
ARP response is not received.
The number includes the initial ARP request. The range is 0 to 10. The default is 4.
10. In the Cache Size field, specify the maximum number of entries allowed in the
ARP table.
This number includes all static and dynamic ARP entries.The range for this field is 79 to
512.
The default is 512.
11. Select the Dynamic Renew Enable or Disable radio button.
When enabled, the ARP component automatically attempts to renew dynamic ARP
entries when they age out.
The default setting is Enable.
12. Click the Apply button.