8-Port Gigabit (PoE+) Ethernet Smart Managed Pro Switch with (2 SFP or 2 Copper Ports and)
Cloud Management
Get Started User Manual26
Tip: After you complete the initial log-in process (see Register and access
the switch with your NETGEAR account on page 34), you can access
the local browser interface from the Switch Discovery Tool by clicking
the ADMIN P
AGE button next to your switch.
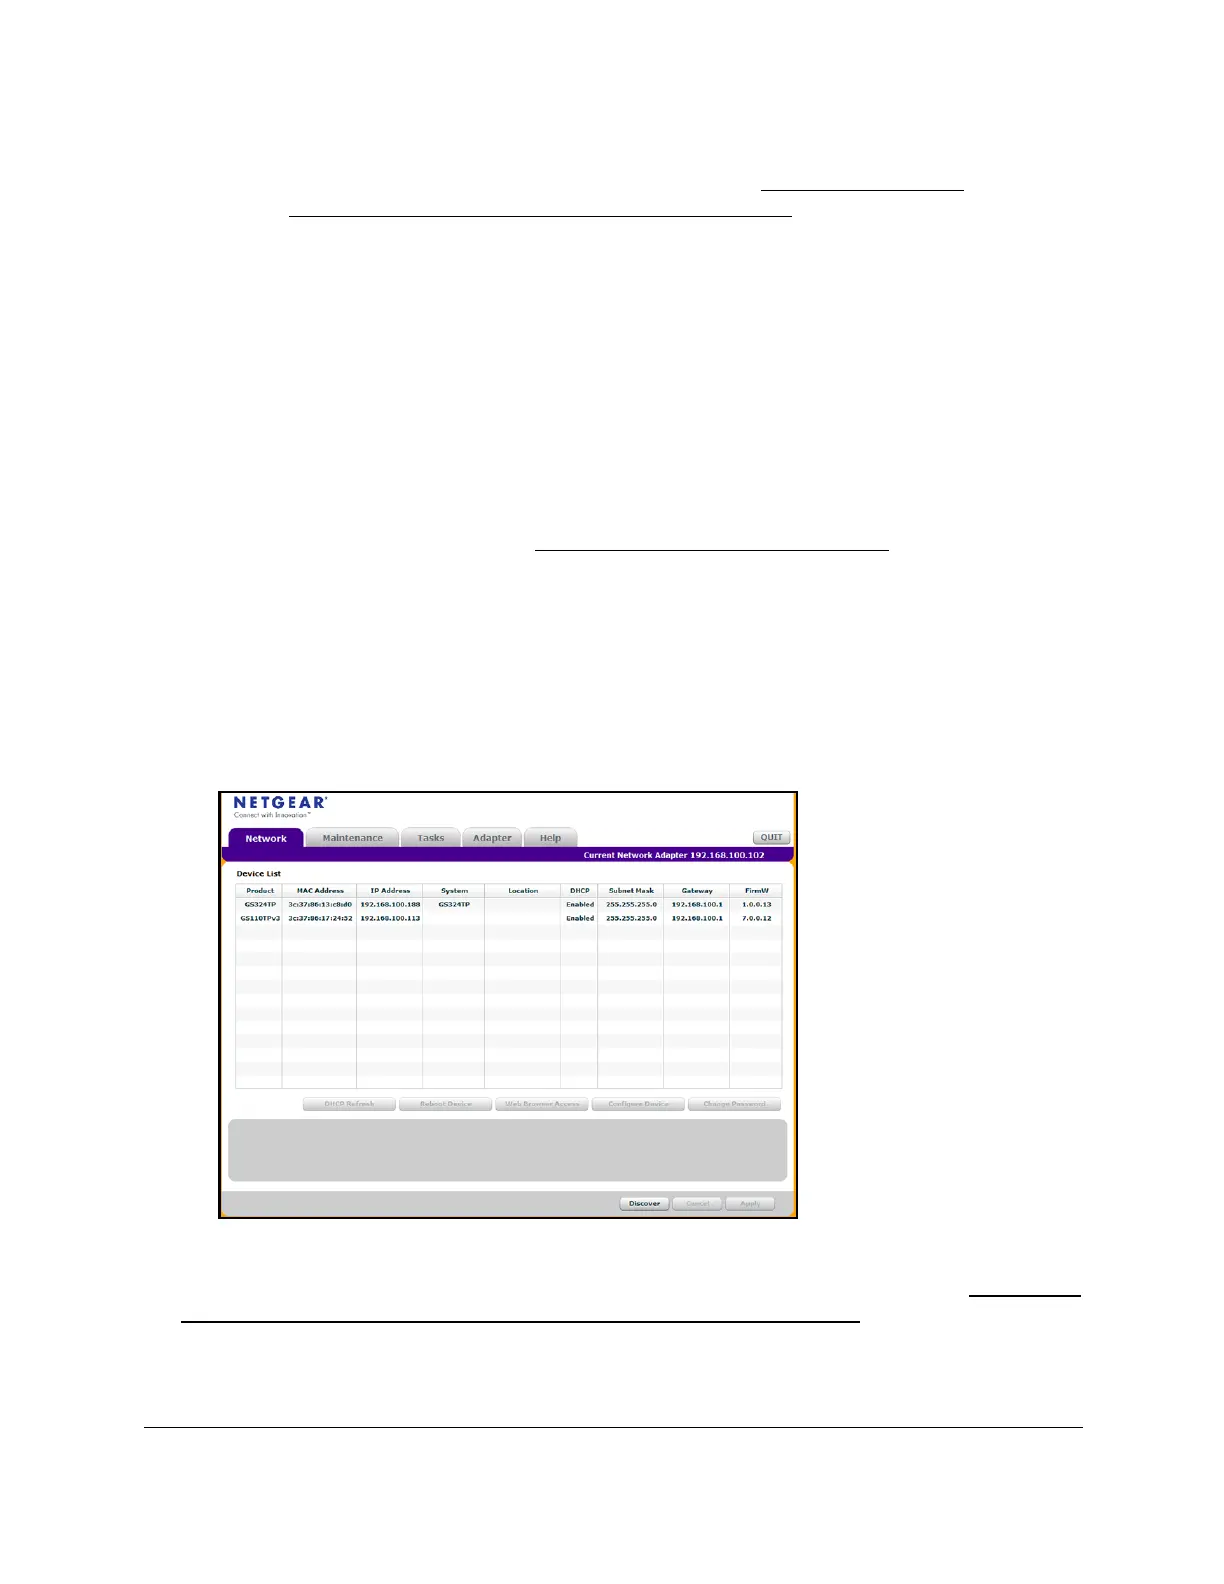
Discover the switch in a network with a DHCP server using
the Smart Control Center
This section describes how to set up your switch in a network that includes a DHCP server.
The DHCP client on the switch is enabled by default. When you connect the switch to your
network, the DHCP server automatically assigns an IP address to the switch. Use the Smart
Control Center (SCC) to discover the IP address automatically assigned to the switch.
For information about the SCC, visit
netgear.com/support/product/SCC.
To install the switch in a network with a DHCP server:
1. Connect the switch to a network with a DHCP server
.
2. Power on the switch by connecting its power cord.
3. Install the SCC on your computer
.
4. Start the SCC.
5. Click the Discover button for the SCC to discover all the devices in the subnet.
6. Write down the switch IP address assigned by the DHCP server.
For information about how to access the local browser interface of the switch, see
Access the
switch on-network when you know the switch IP address on page 29.