8-Port Gigabit (PoE+) Ethernet Smart Managed Pro Switch with (2 SFP or 2 Copper Ports and)
Cloud Management
Manage Device Security User Manual329
5. Click the Login button.
The System Information page displays.
6. Select Security
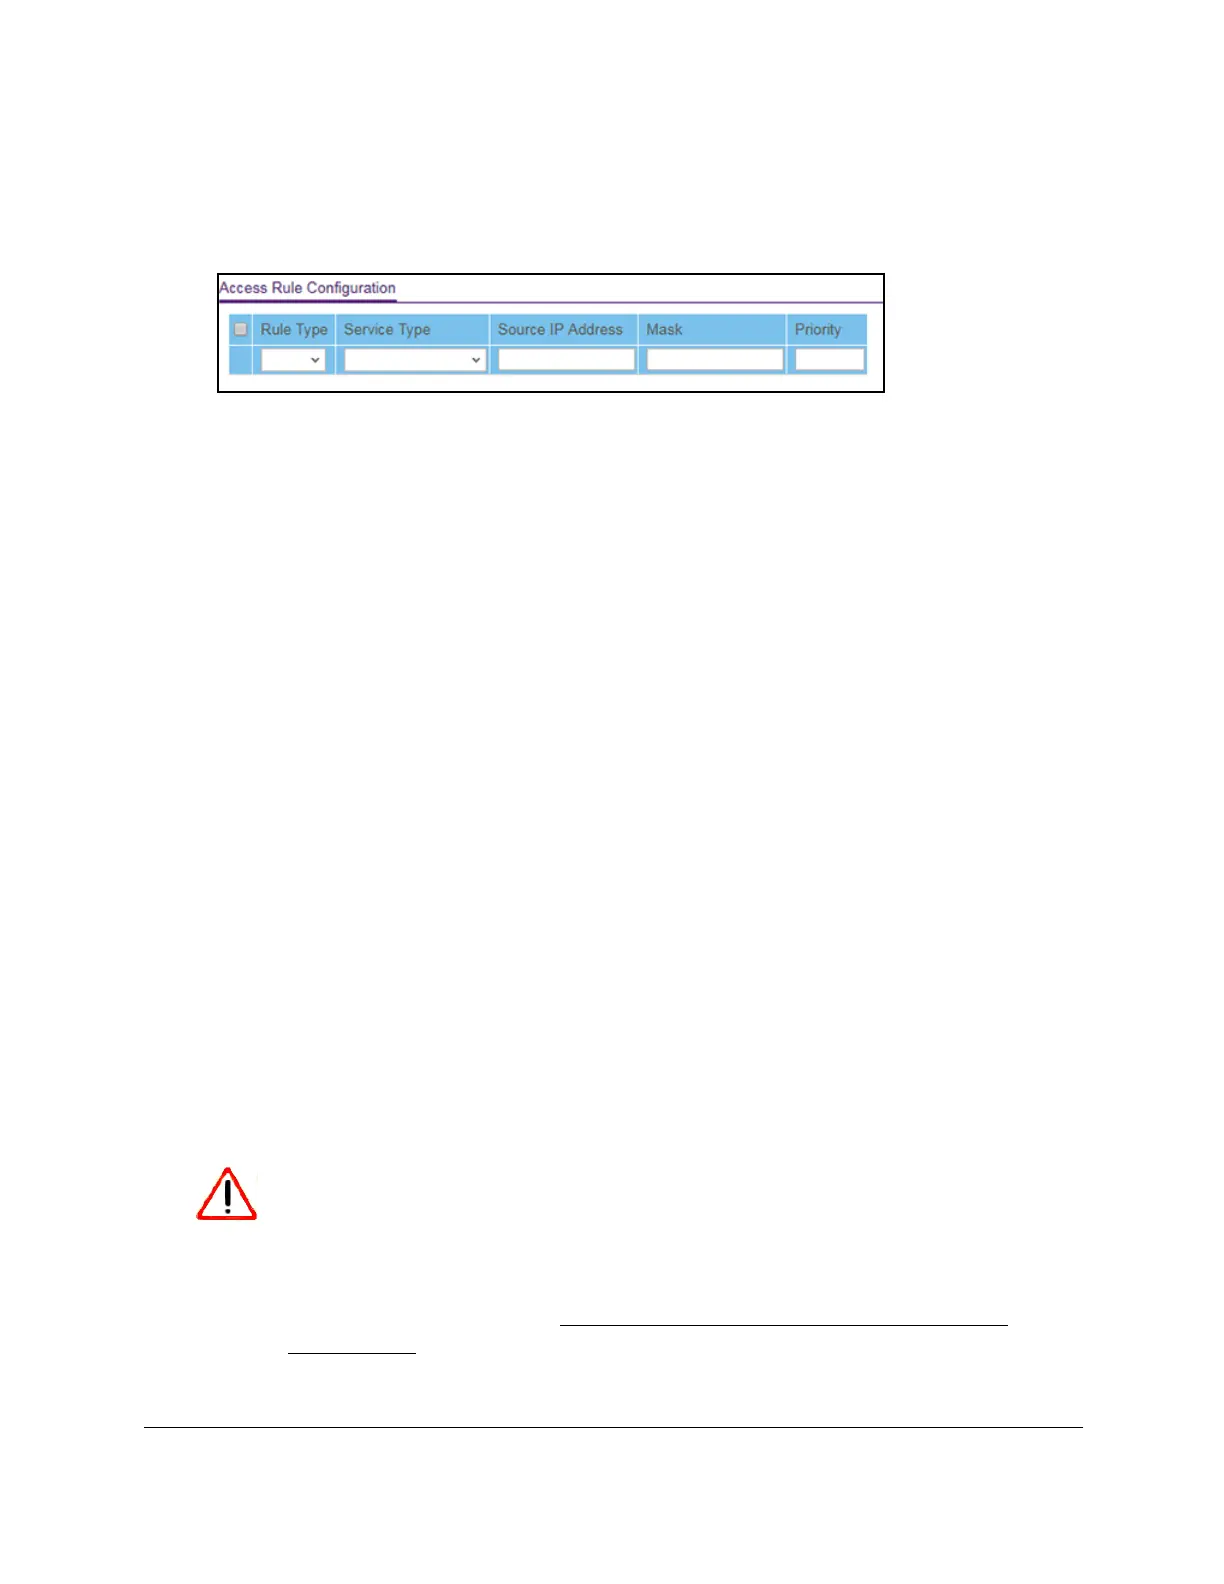
> Access > Access Control > Access Rule Configuration.
7. From the Rule Type menu, select Permit or Deny to permit or deny access when the
selected rules are matched.
A Permit rule allows access from a device that matches the rule criteria. A Deny rule
blocks a device that matches the rule criteria.
8. From the Service T
ype menu, select the access method to which the rule is applied.
The policy is restricted by the selected access method. Possible access methods are
TFTP, HTTP
, Secure HTTP (SSL), and SNMP.
9. In the Source IP Address field, enter the source IP address from which the management
traffic originates.
10. In the Mask field, specify the subnet mask from which the management traf
fic originates.
11. In the Priority field, assign a priority to the rule.
The rules are validated against the incoming management request in ascending order of
their priorities. If a rule matches, the action is performed and subsequent rules below that
rule are ignored. For example, if a source IP address 10.10.10.10 is configured with
priority 1 to permit, and the same source IP address 10.10.10.10 is also configured with
priority 2 to deny
, then access is permitted if the profile is active, and the second rule is
ignored.
12. Click the Add button.
The access rule is added.
Activate the access profile
After you add rules to the access profile, you can activate the access profile.
CAUTION:
If you configure a security access profile incorrectly and you activate the
access profile, you might no longer be able to access the switch’s local
browser interface. If that situation occurs, you must reset the switch to
factory default settings (see
Reset the switch to its factory default settings
on page 438).