8-Port Gigabit (PoE+) Ethernet Smart Managed Pro Switch with (2 SFP or 2 Copper Ports and)
Cloud Management
Manage Device Security User Manual311
The login page displays.
If the NETGEAR Business page displays, see
Register and access the switch with your
NETGEAR account on page 34.
4. Enter one of the following passwords:
• After registration, enter the local device password.
By default, the local device password is password.
• If you previously managed the switch through the Insight app or Cloud portal, enter
the Insight network password for the last Insight network location.
For information about the credentials, see
Credentials for the local browser interface on
page 32.
5. Click the Login button.
The System Information page displays.
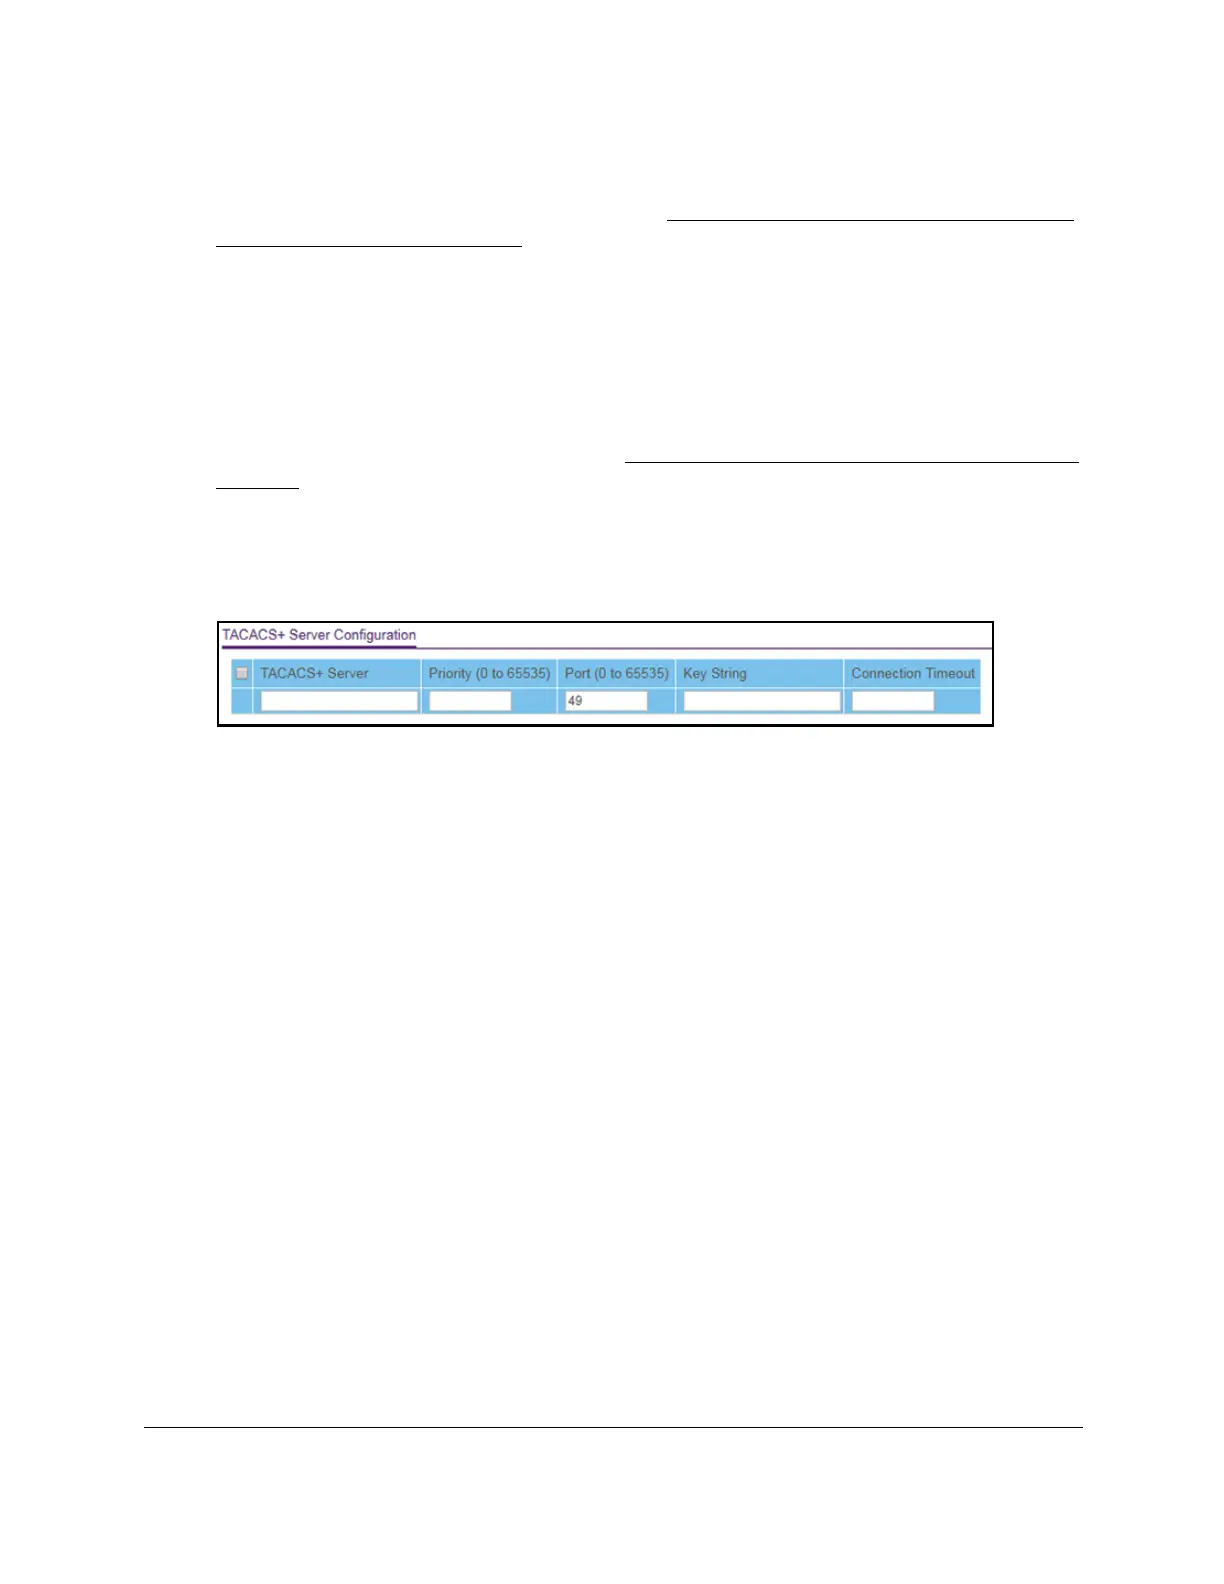
6. Select Security > Management Security> T
ACACS+ > TACACS+ Server Configuration.
7. In the TACACS+ Server field, enter the TACACS+ server IP address.
8. In the Priority field, specify the priority for the
TACACS+ server.
The priority determines the order in which the TACACS+ servers are contacted when
attempting to authenticate a user
. A value of 0 is the highest priority. The range is from
0 to 65535.
9. In the Port field, specify the authentication port value for
TACAS+ server sessions.
The value must be in the range from 0 to 65535. If you do not specify a value, the switch
uses the standard
TCP port 49 for sessions with the server.
10. In the Key String field, specify the authentication and encryption key for TACACS+
communications between the device and the TACACS+ server.
The range is from 0 to 128. The key must match the key used on the TACACS+ server.
11. In the Connection T
imeout field, specify the time that passes before the connection
between the device and the TACACS+ server times out.
The range is from 1 to 30. If you do not specify a value, the switch uses a default value
of 5 seconds.
12. Click the Add button.
The server is added to the switch.
 Loading...