8-Port Gigabit (PoE+) Ethernet Smart Managed Pro Switch with (2 SFP or 2 Copper Ports and)
Cloud Management
Manage Device Security User Manual405
4. Enter one of the following passwords:
• After registration, enter the local device password.
By default, the local device password is password.
• If you previously managed the switch through the Insight app or Cloud portal, enter
the Insight network password for the last Insight network location.
For information about the credentials, see
Credentials for the local browser interface on
page 32.
5. Click the Login button.
The System Information page displays.
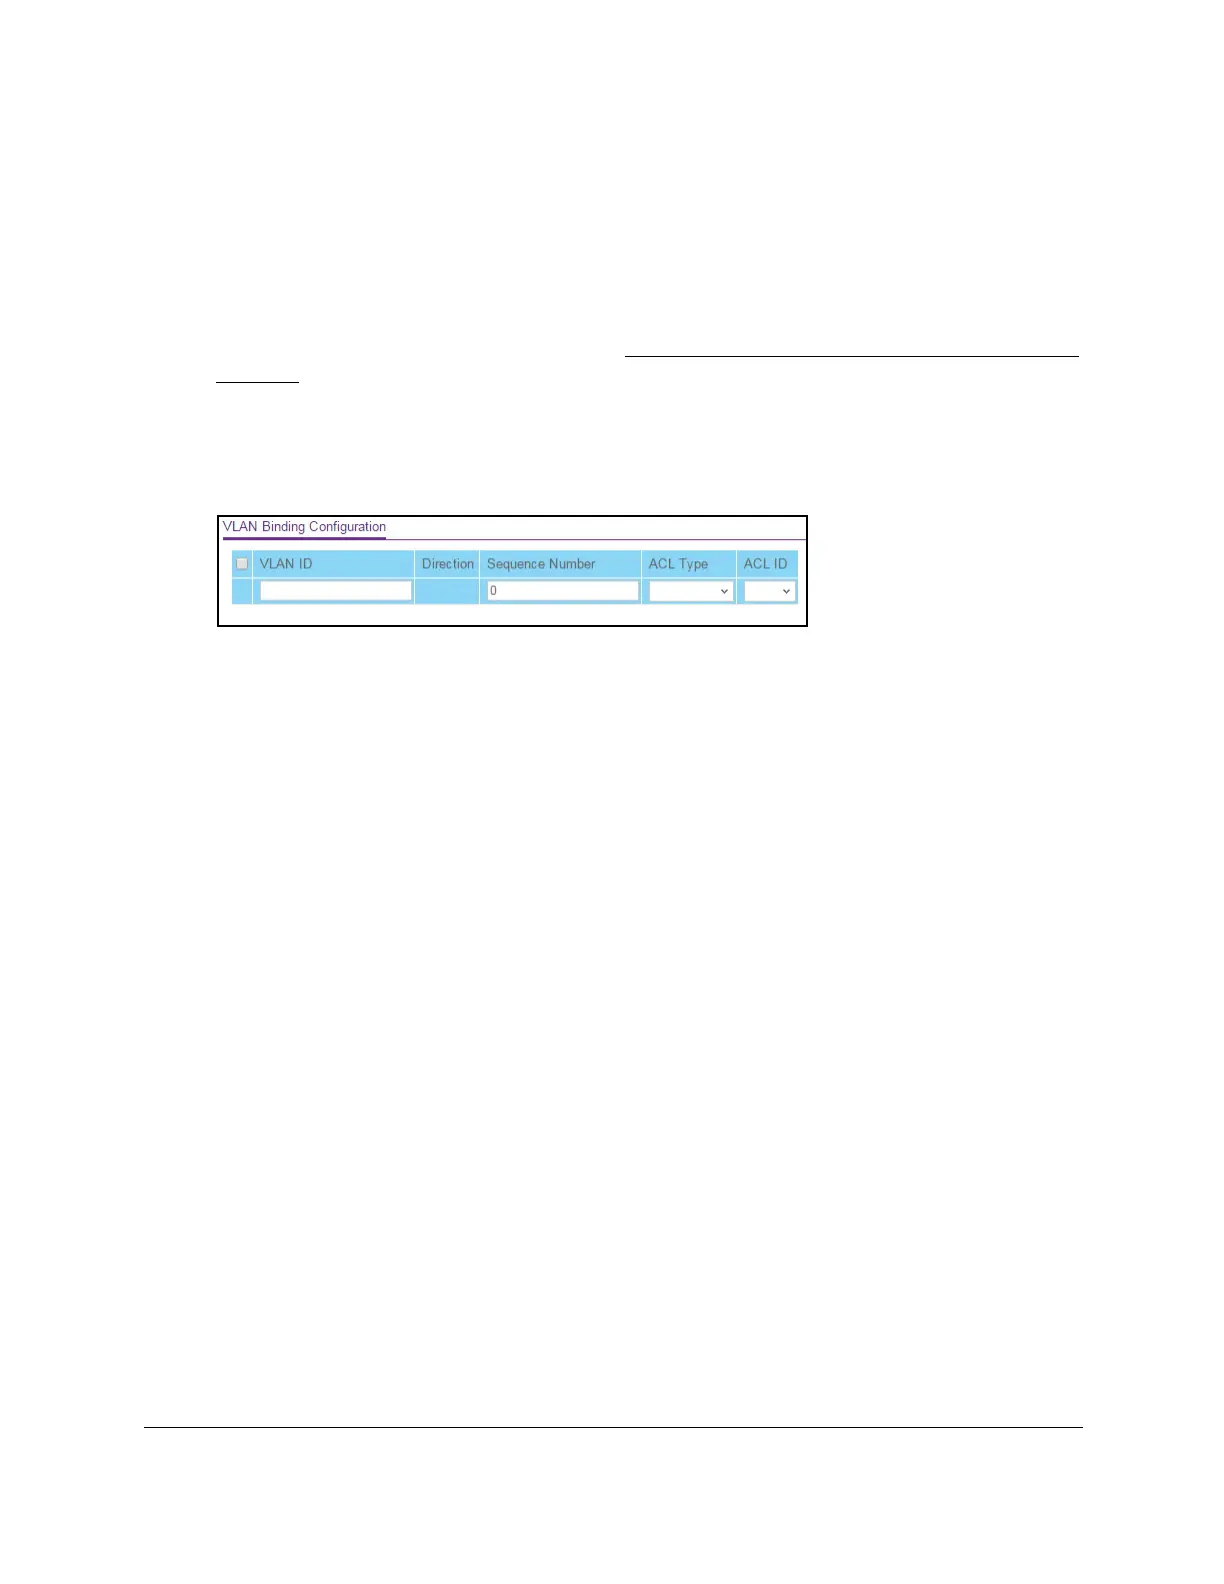
6. Select Security >
ACL> Advanced > VLAN Binding Configuration.
7. In the VLAN ID field, enter the VLAN ID to which the binding must apply.
The direction for packet filtering is always inbound.
8. In the Sequence Number field, enter an optional sequence number
.
You can specify an optional sequence number to indicate the order of this access list
relative to other access lists that are already assigned to the VLAN ID and selected
direction.
A lower number indicates a higher precedence order. If a sequence number is
already in use for the VLAN ID and selected direction, the specified access list replaces
the currently attached ACL using that sequence number. If you do not specify a sequence
number (the value is 0), a sequence number that is one greater than the highest
sequence number currently in use for the VLAN ID and selected direction is used.The
range is from 1 to 4294967295.
9. From the ACL T
ype menu, select the type of ACL.
You can select a MAC ACL, IP ACL, or IPv6 ACL.
10. From the ACL ID list, select the ID or name of the
ACL that must be bound to the specified
VLAN.
11. Click the Add button.
The VLAN ACL binding is added.
Remove a VLAN ACL binding
To remove a VLAN ACL binding:
1. Connect your computer to the same network as the switch.
You can use a WiFi or wired connection to connect your computer to the network, or
connect directly to a switch that is of
f-network using an Ethernet cable.