Configure Routing
209
XS708T, XS712Tv2, and XS716T Smart Managed Pro Switch User Manual
IPv6 Prefix Configuration
Configure IPv6 prefix configuration:
1. Connect your computer to the same network as the switch.
You can use a WiFi or wired connection to connect your computer to the network, or
connect directly to a switch that is off-network using an Ethernet cable.
2. Launch a web browser.
3. In the address field of your web browser, enter the IP address of the switch.
If you do not know the IP address of the switch, see Change the Default IP Address of the
Switch on page 10.
The login window opens.
4. Enter the switch’s password in the Password field.
The default password is password.
The System Information page displays.
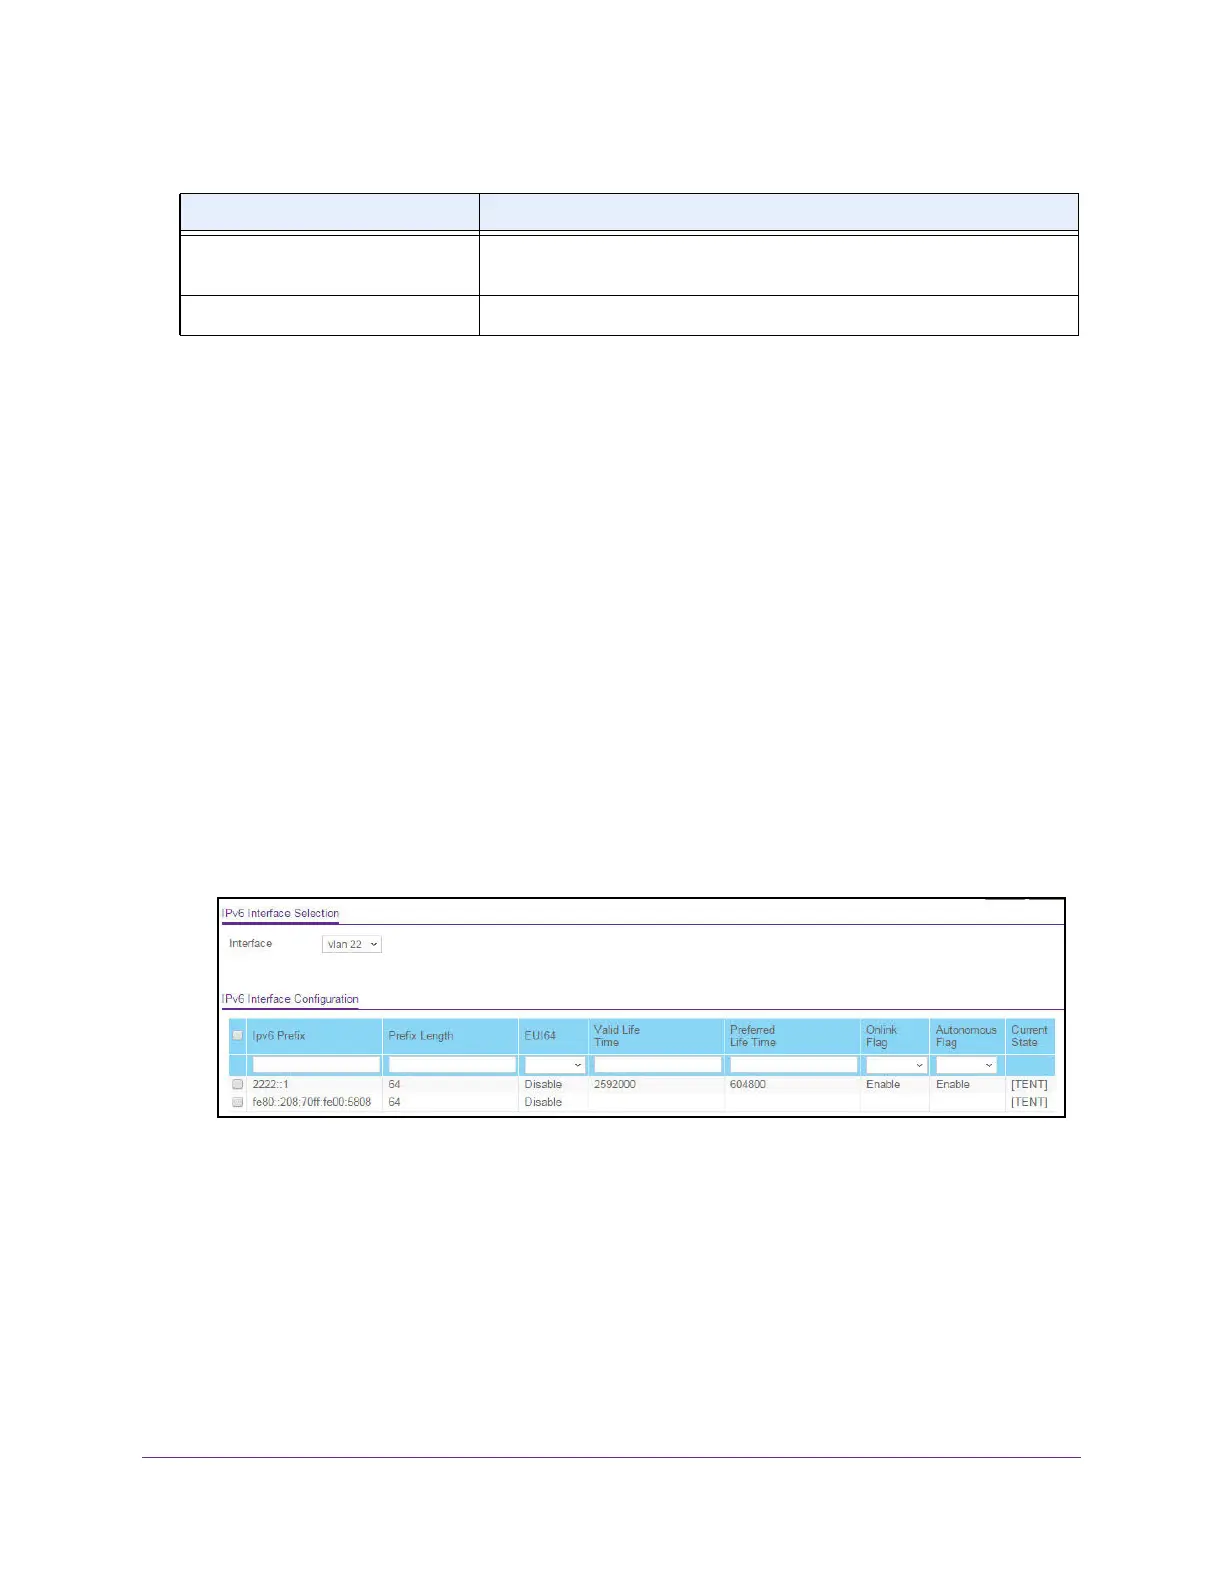
5. Select Routing> IPv6 > Advanced > Prefix Configuration.
6. From the Interface menu, select the interface to be configured.
When the selection is changed, the page refreshes, causing all fields to be updated for
the newly selected interface.
7. In the IPv6 Prefix field, specify the IPv6 prefix for an interface.
8. In the Prefix Length field, specify the IPv6 prefix length for an interface.
9. From the EUI64 menu, select Enable or Disable to indicate whether the specified 64-bit
unicast prefix is enabled.
10. In the Valid Life Time field, specify the router advertisement per prefix time.
Operational Mode Specifies the operational state of an interface. The default value is
Disable.
Link State Indicates whether the link is up or down.
Table 57. IPv6 VLAN Configuration information (continued)
Field Description

 Loading...