Training Guide Course No. 196514
Level 2 Maintenance, X-1000 Series Dispensing Systems 5-3 P/N 196515 (Revision A)
Exercise Sheet 5-1-1
Replacing Board and Panel-Mounted Fuses
Tools and Materials Needed:
ESD Grounding Strap Replacement Fuse
Small Flat Head Screwdriver
Board Mounted Fuse
1. Perform a Service Shutdown as specified on page 1-11 of this manual.
2. Open the access door and locate the fuse to be replaced.
3. Open the Conveyor Controller Door by turning the four captive Phillips head
fasteners ¼-turn.
4. Open the Computer Door by unscrewing the two captive, slotted thumbscrews.
5. Remove and discard the damaged fuse.
6. Verify that you will be installing the correct replacement fuse and then insert the
new fuse into the Fuse Holder.
7. Close the access door.
8. Perform a Post-Service Start-up as detailed on page 1-14 of this manual.
Panel Mounted Fuse
1. Perform a Service Shutdown as specified on page 1-11 of this manual.
2. With your fingers, gently push in and turn the Fuse Holder counterclockwise
until the head of the Fuse Holder pops out enough to allow you to grasp it.
3. Pull the Fuse Holder out of its socket.
4. Remove and discard the damaged fuse.
5. Verify that you will be installing the correct replacement fuse and then insert the
new fuse into the Fuse Holder.
6. With your fingers, simultaneously push and twist the Fuse Holder clockwise into
the socket until it locks into place.
7. Perform a Post-Service Start-up as detailed on page 1-14 of this manual.
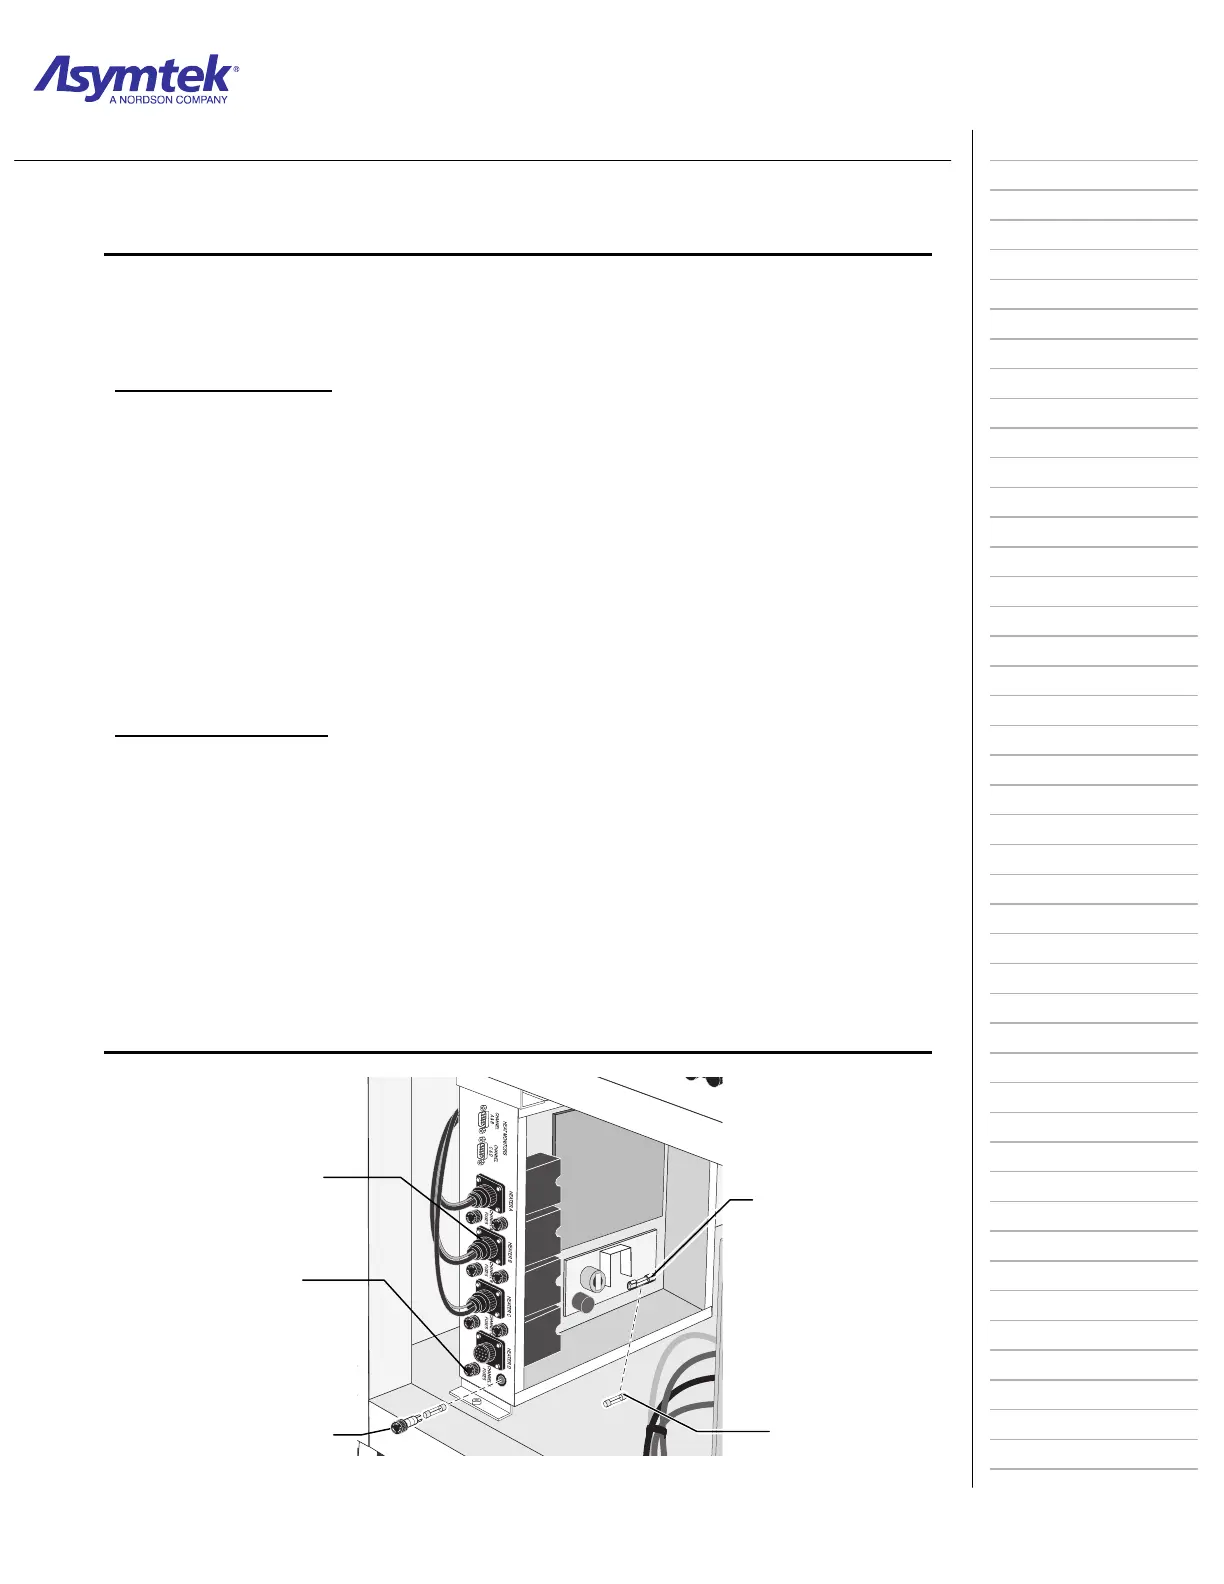
Conveyor/Heate
Controlle
Board Mounted Fuse
(Conveyor Controller
Power Supply Shown)
Glass Fuse
Panel Mounte
Fus
Fuse Ca
Board and Panel-Mounted Fuses
 Loading...


