4-32 Workstation 5A Setup Guide - Fourth Edition
Installing and Operating the Workstation 5A
Workstation 5A Recovery
• If the path and image name are not specified correctly, an error
box appears, stating “Image file not found!” See page 4-36 for
more information.
• When the image transfer is complete, the boot order is restored to
start from the original USB Hard Drive, and the workstation
rest
arts.
• If the optional SATA Disk Drive is ins
talled, re-enter the BIOS and
move ‘SATA Drive 0’ to the top of the BBS as shown below, then
save and restart.
0 - [SATA drive 0]
1 - [IDE 0/Pri Master] CF Card
2 - [PXE Boot]
3 - [None]
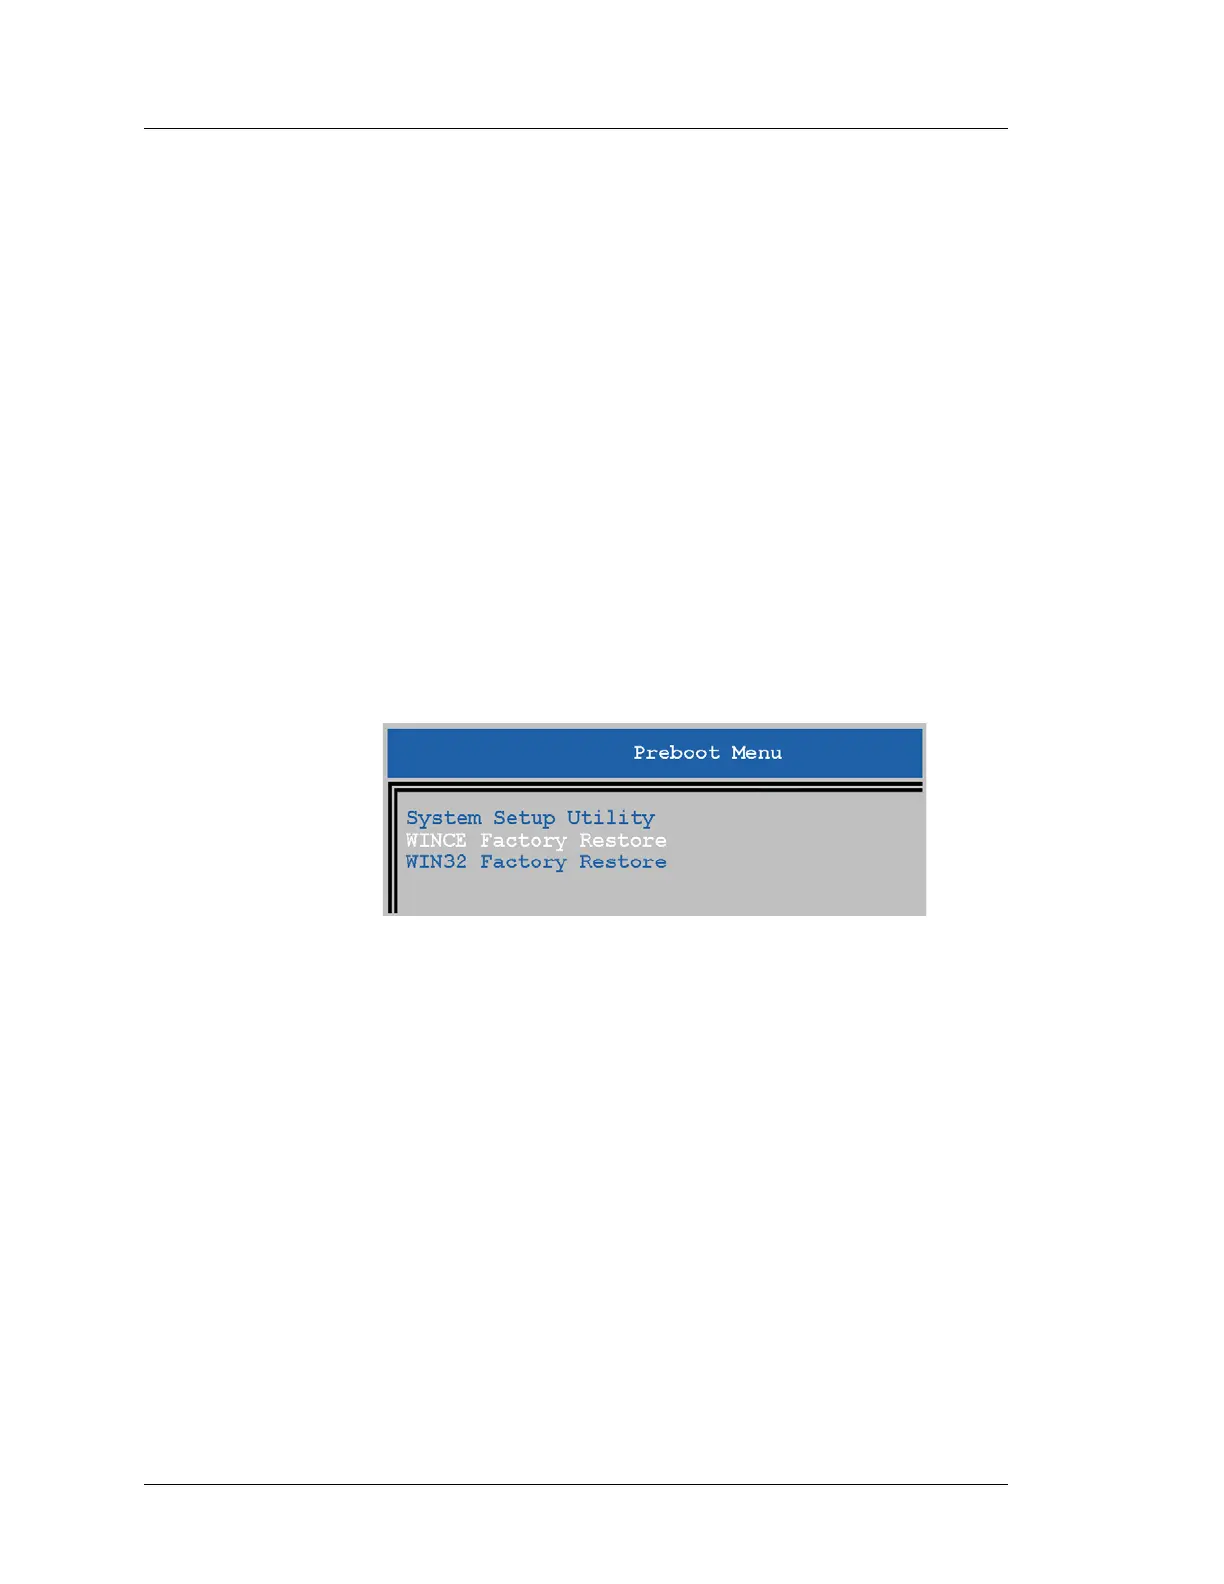
Pre-Boot Menu (BIOS Q1010m Only)
This BIOS Version moves WINCE and WIN32 Factory Restore to a Preboot
Menu, shown below.
Figure 4-21: BIOS Version Q1010m Preboot Menu
WINCE Factory Restore
1. W
ith a USB Keyboard attached, power-up the workstation with the
power button.
2. When the Blue Splash Screen appears, press the [Del] key to enter the
System Configuration Utility.
• The Preboot Menu shown above appears.
3. To start WINCE Factory Restore, select it from the Menu and press
[Enter].
• The workstation restarts, displays the Blue splash screen, then:
• Prompts for a login:
Type M1cr0s and press [Enter].
• Prompts for a password:
Type Quant1c0 and press [Enter].
 Loading...