Workstation 5A Setup Guide - Fourth Edition 3-35
What’s Inside?
Installing Options
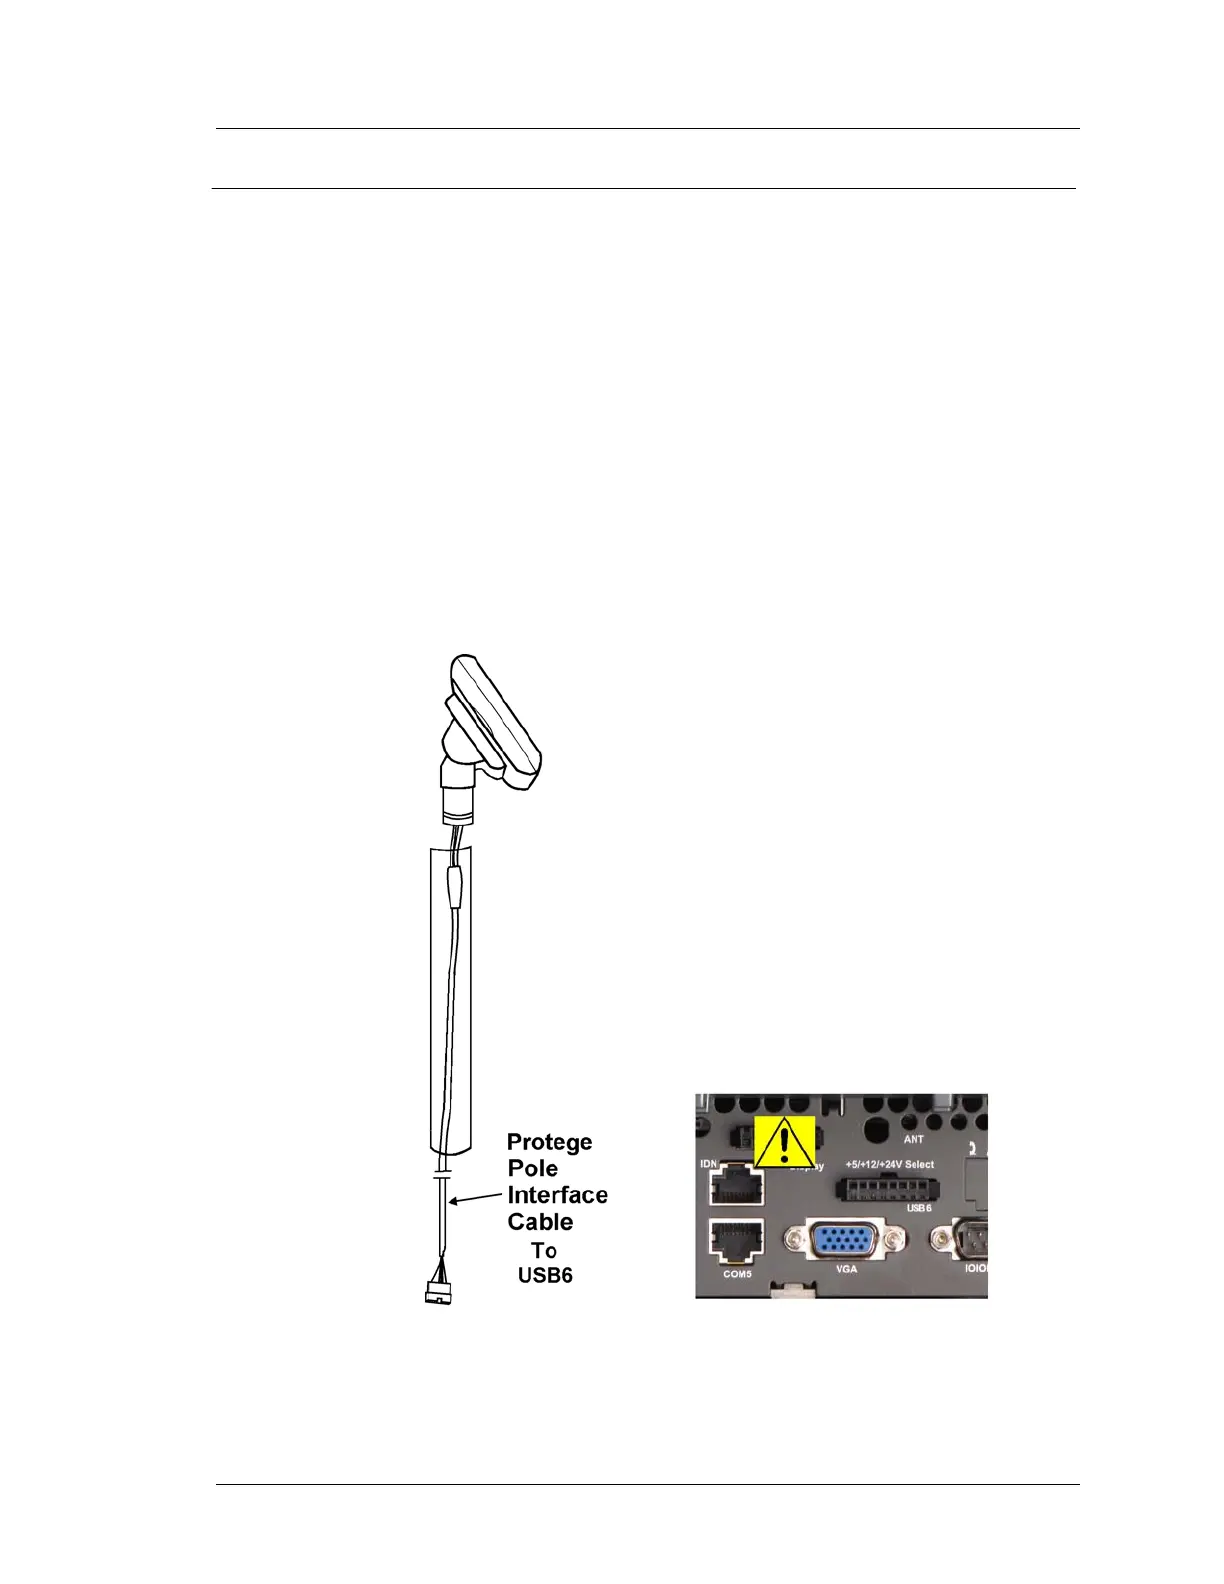
Protégé Customer Display System - Pole Mount
The Pole Mount Protégé is shipped pre-assembled with a 19” interface cable,
6” Pole, base and nut. The Interface cable is designed for the custom powered
USB interface on the IO panel called USB6.
1. Attach the base to cash drawer, or using the base of the pole as a template,
attach to the counter surface. Appendix A provides details of the hole
dimensions.
2. Route the Protégé Display Cable through the pole and through the stand (if
used) to the IO Panel.
o Warning: Do not connect the Protégé to the ‘Rear Display’ connector.
Connecting the Protégé to the Rear Display Connector can damage the
Protégé.
3. Attach the Protégé to the pole and adjust to the desired position. Tighten
the 1.5mm set screw.
Figure 3-29: Attaching the Protégé Customer Display System to the 6” Pole
4. Connect the Protégé to the USB6 connectors on the WS5A IO Panel.