Workstation 5A Setup Guide - Fourth Edition 3-37
What’s Inside?
Reassembling the WS5A
Reassembling the WS5A
The following procedure describes how to connect the top cover cables and
reassemble the WS5A casework.
Procedure:
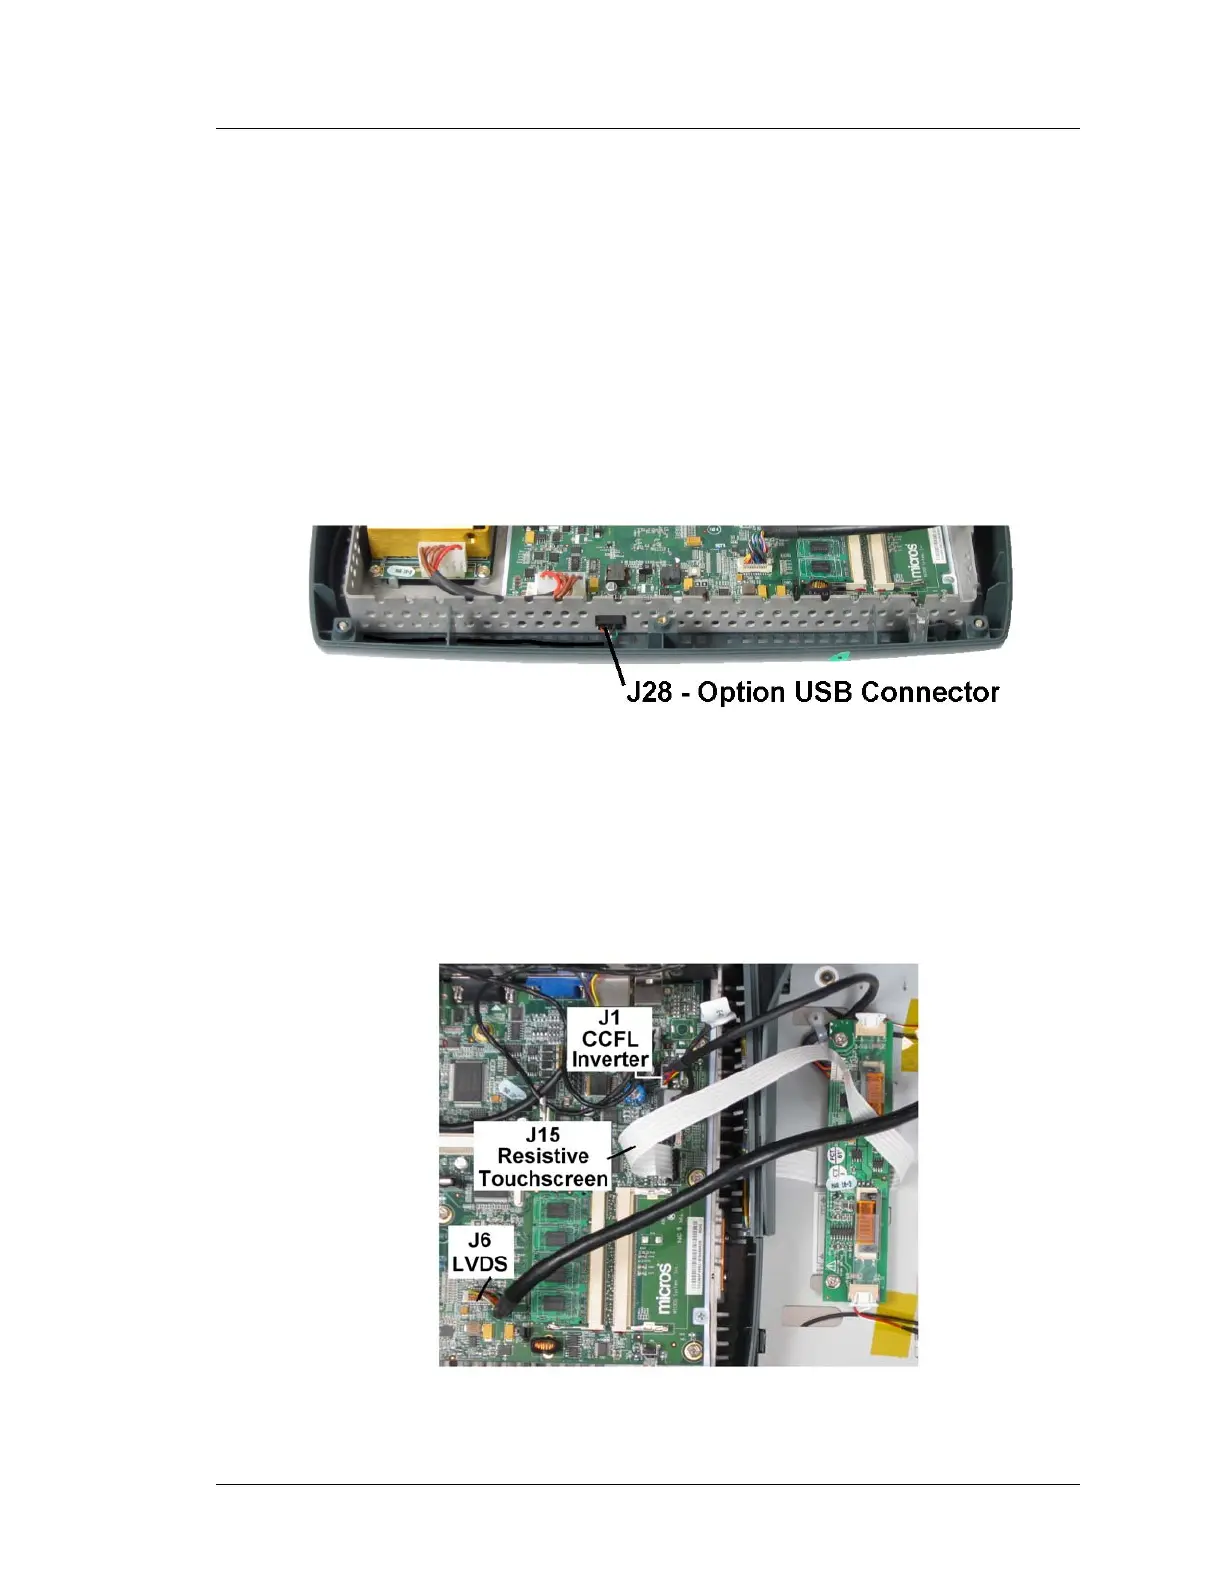
1. Refer to Figure 3-31, below. If the finger print reader or other option is
installed in the top cover, place it directly behind the base. Run the
interface cable on either side (left side is preferred) of the chassis but make
sure it stays below the chassis lip. Connect the cable to USB Option Header
J28.
Figure 3-31: USB Option Connector J28
2. Connect the LCD/Touchscreen cables to the System Board.
o The Figure below shows where to connect the CCFL backlight,
resistive touchscreen and LVDS cables to a Revision D or F system
board.
Figure 3-32: Installing LCD/Touchscreen Cables (CCFL-Resistive Touchscreen)
 Loading...