Workstation 5A Setup Guide - Fourth Edition 3-33
What’s Inside?
Installing Options
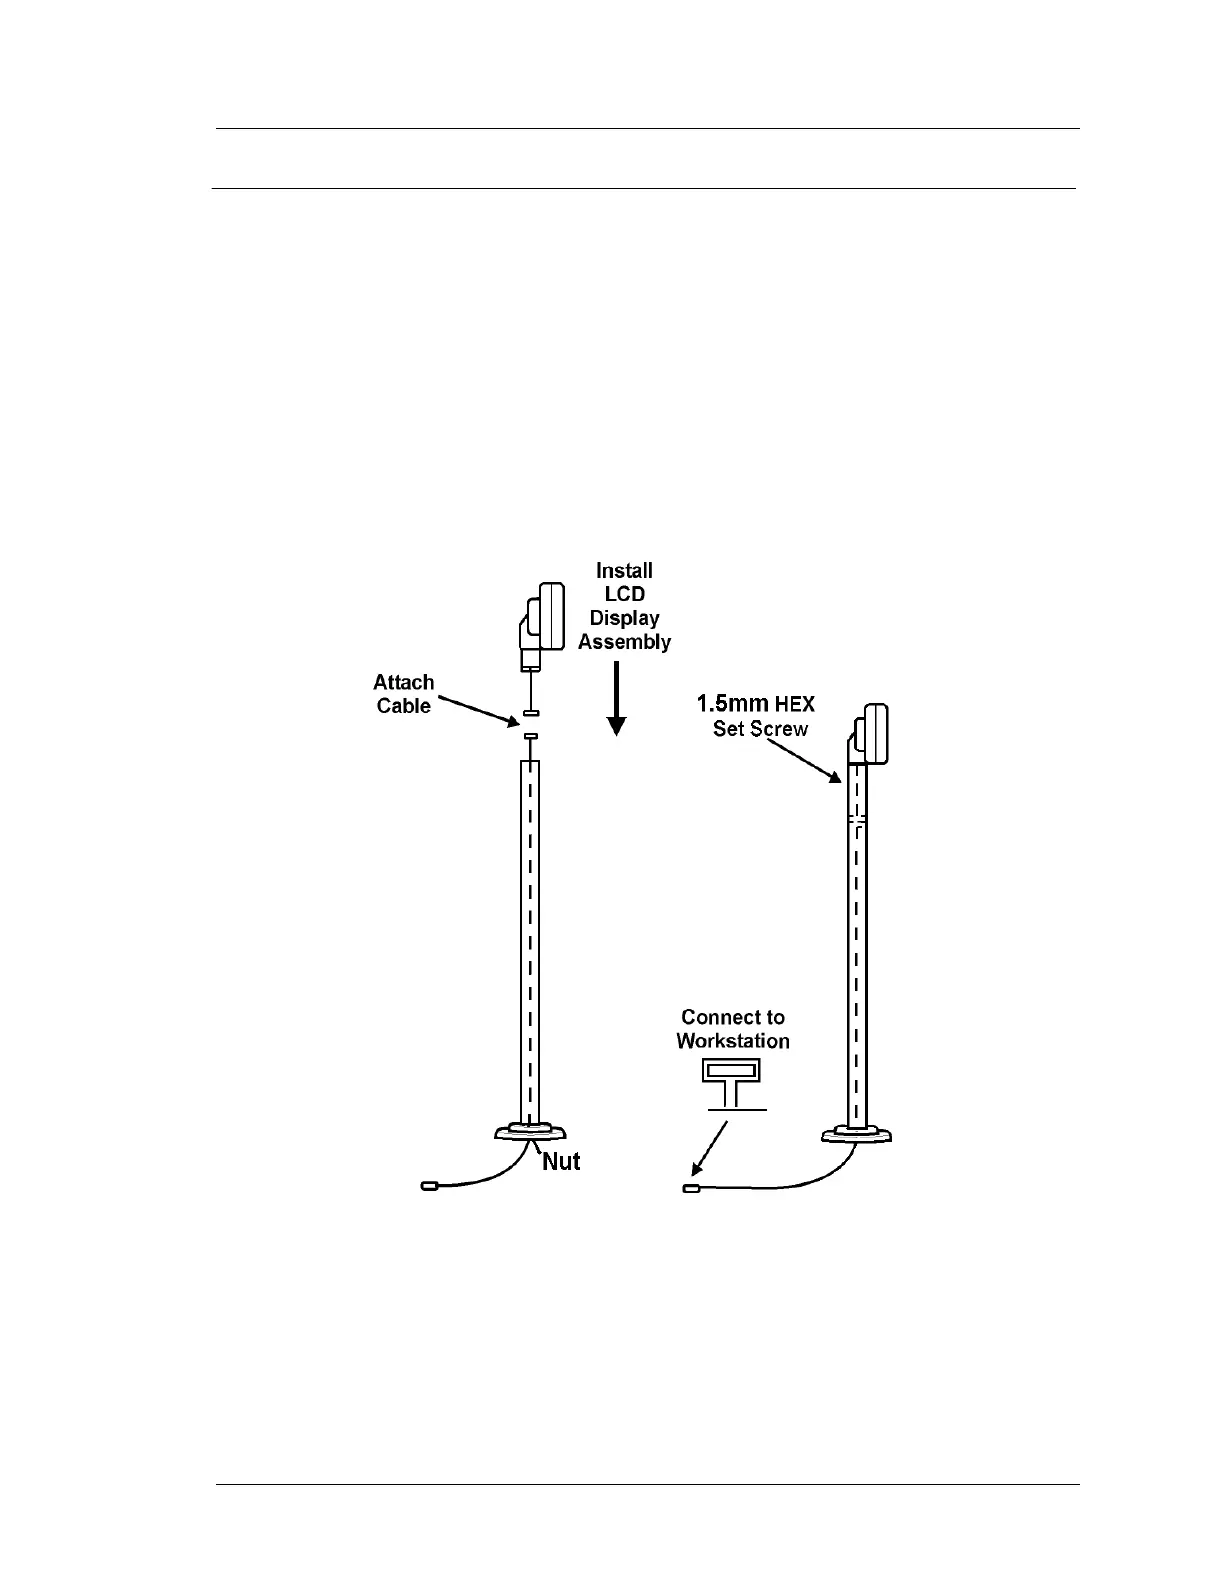
LCD Customer Display - Pole Mount
This procedure describes how to install and connect the Pole LCD Customer
Display to the Workstation 5A. The pole version is provided as a kit consisting
of the LCD Display Assembly /w 5 ft. cable, pole, base, extension cable, and
nut. The installer must provide the 8-32 x 1/2” base mounting hardware.
1. Use the base as a template to locate the mounting holes in the counter
surface.
2. After mounting the pole and base to the counter surface, route the
extension cable through the pole and connect it to the LCD assembly cable.
Attach the LCD assembly to the pole, position the display head in the
desired position and use a hex wrench to secure the display in place.
Figure 3-27: Assembling the Pole Customer Display
3. Power
-off the unit and attach the keyed 4-Pin DIN connector to the port
labelled “Customer Display.”
4. The LCD Pole Display is automatically detected by the API at power-up.