3-32 Workstation 5A Setup Guide - Fourth Edition
What’s Inside?
Installing Options
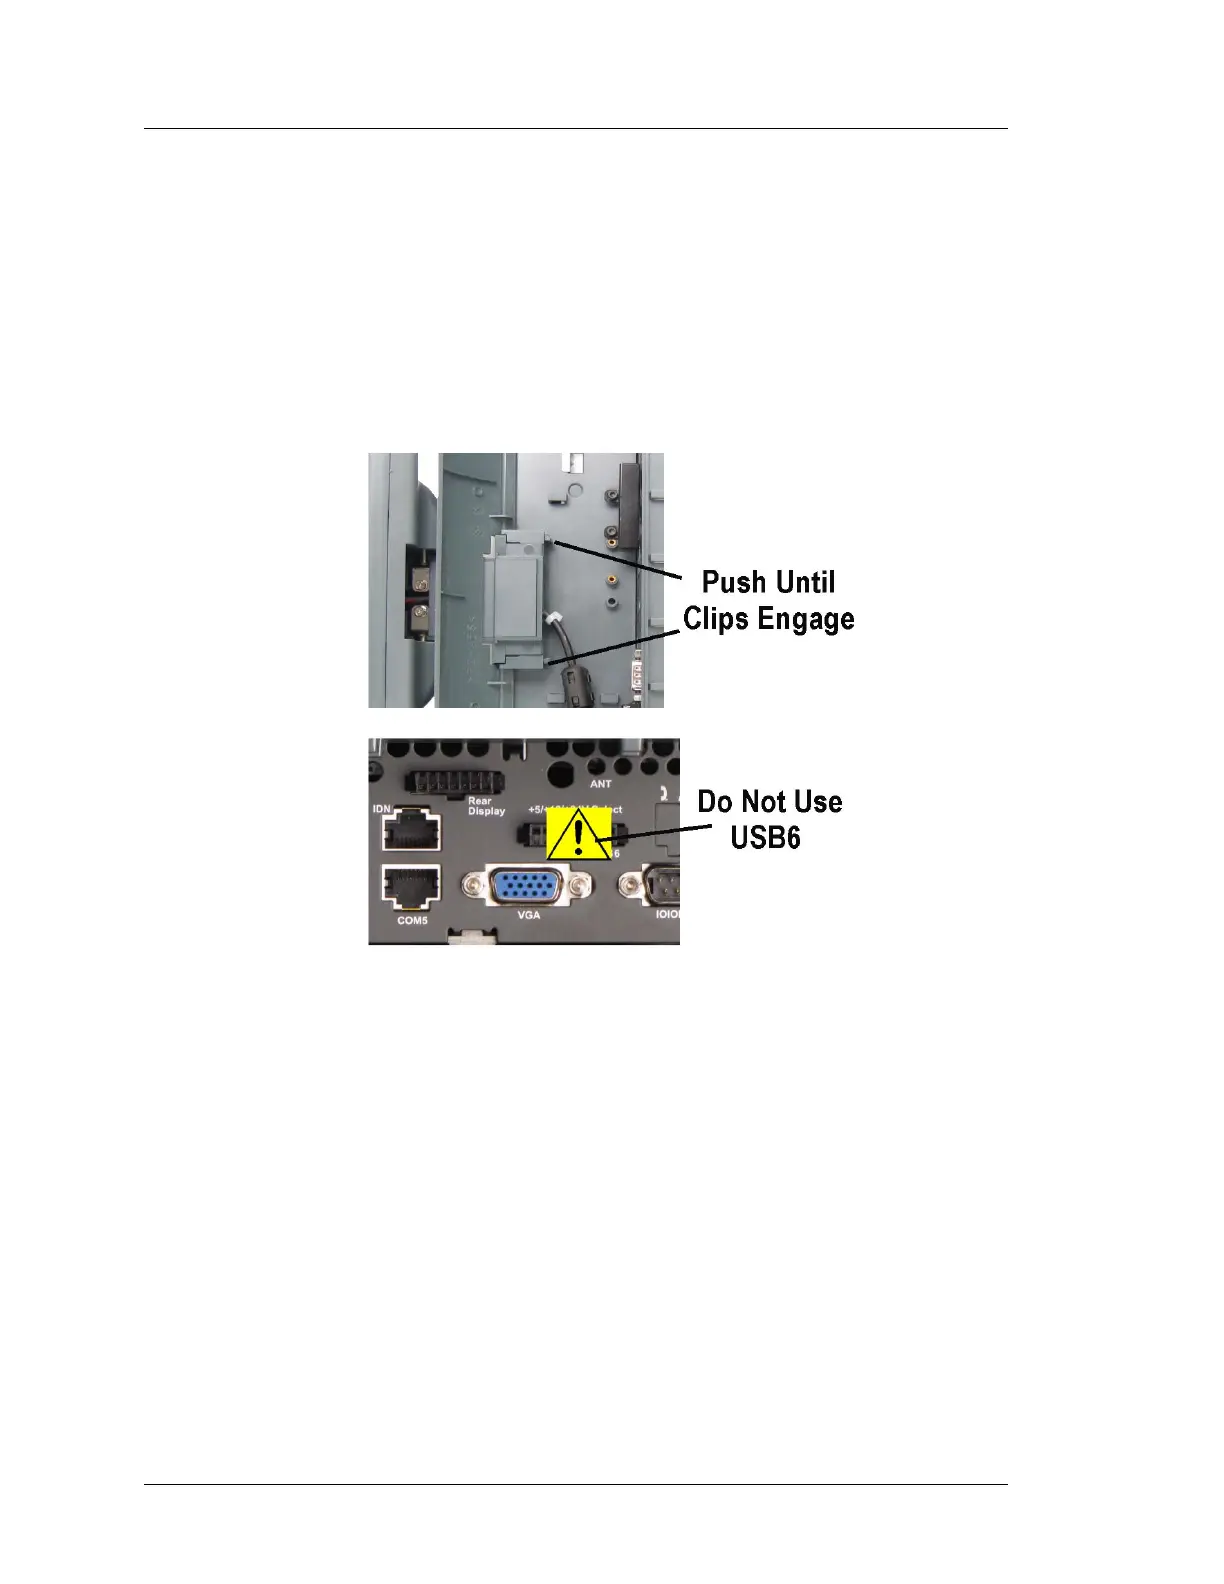
4. Feed the interface cable through the cut-out then insert the LCD customer
display bracket until the side clips snap into place as shown in Figure 3-26.
5. Connect the interface cable to the IO panel ‘Rear Display’ connector as
shown in
Figure 3-26.
o Warning: Connect the LCD Customer Display to the Remote Display
connector only. Connecting the LCD Customer Display to the USB6
connector could damage the Customer Display and or USB6 port.
Figure 3-26: Installing the Integrated Customer Display
6. Return the unit to the normal operating position, connect the AC power
cord and press the power button. The Integrated LCD Customer Display is
automatically detected and ready for use.
Testing the Integrated LCD Customer Display (WinCE)
7. From the Windows Embedded CE Desktop, touch My Device -> DOC ->
Utilities -> WS5ADiagUtility.
o The WS5A DiagUtility System Information Screen is displayed.
8. Touch the ‘Cust Disp’ tab. Press the [Send] button to send a test message to
the customer display.