Workstation 5A Setup Guide - Fourth Edition 3-25
What’s Inside?
Installing Options
USB Hard Drive
This procedure describes how to remove and replace the USB Hard Drive used
for Windows CE and most POSReady 2009 configurations.
1. Remove the LCD/Touchscreen Assembly as previously described.
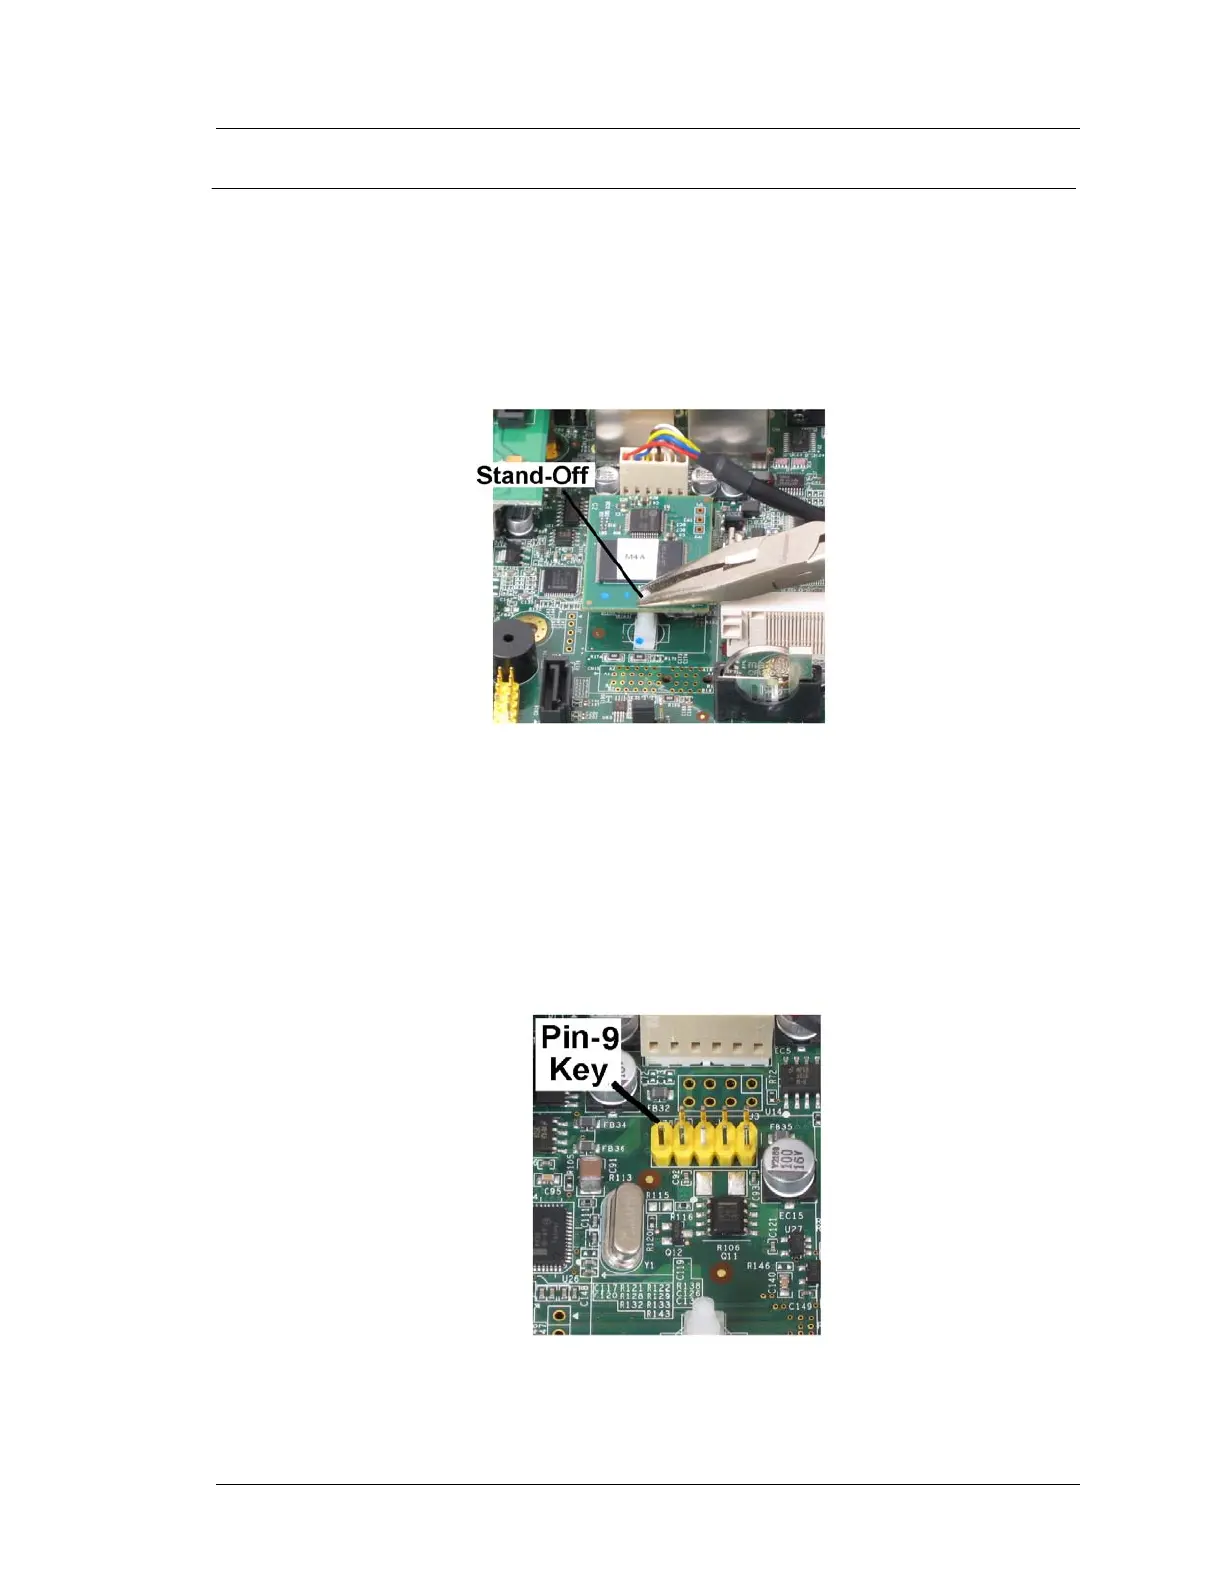
2. Refer to Figure 3-17 below. Use a pair of needle nose pliers to pinch the
stand-off and remove the device.
Figure 3-17: Removing the USB Hard Drive
Installation
1. Figure 3-18, below points out the location of pin-9 on the dedicated USB
Hard Drive header J8. Pin-9 serves as the key when installing the device. It
it possible to offset the pins, which could cause a POST failure. Be sure the
device is secured to the board with the stand-off clip.
Figure 3-18: Installing the USB Hard Drive
 Loading...