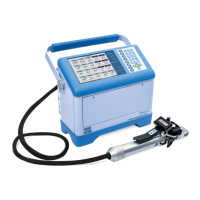
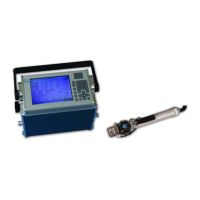
CIRAS-3 Operation Manual V. 1.09 87 support@ppsystems.com
recording temporarily, for example, to change the leaf sample or run a manual Zero or Diff Bal, press
Operations (F1), Rec Options (F2), Pause (F3). Press Resume (F3) to continue automatic recording.
Response Curves
The third recording option is recording data automatically using a response curve that you have created.
Using the arrow keys select Response curves. Press the TAB key to highlight the Response Curve
Scripts field, the Up or Down arrow keys or Expand List (F4) to view and select available scripts. The
CIRAS-3 is supplied with several simple default protocols (we call them scripts) stored on the console.
TIP
When performing automatic response curves involving chlorophyll fluorescence measurements, all CFM-
3 settings (Settings (F2) > CFM Settings (F7)) must be set up and saved prior to starting the response in
order to take effect.
There are multiple options available to create and edit your own response curve protocols to
automatically run response curves. This can be done on the CIRAS-3 Console, on a computer using the
PC Utility Software supplied with the system and also with any external xml editor. You can also find Help
on how to edit these files outside of the console on your own computer, and then transfer the files to the
console. This section describes the CIRAS-3 Console editing option.
Press Edit Rsp Crv (F5) (Edit Response Curve) to display the Response Curve Scripts editor screen.
The screen has two parts: above are fields where you select the desired response script and enter the
values that define the script, below the fields the tabular structure of your script is displayed and updated
as you make entries. This sample description is based on a simplified A/Ci curve.