Using the Controller with a PC, continued
68
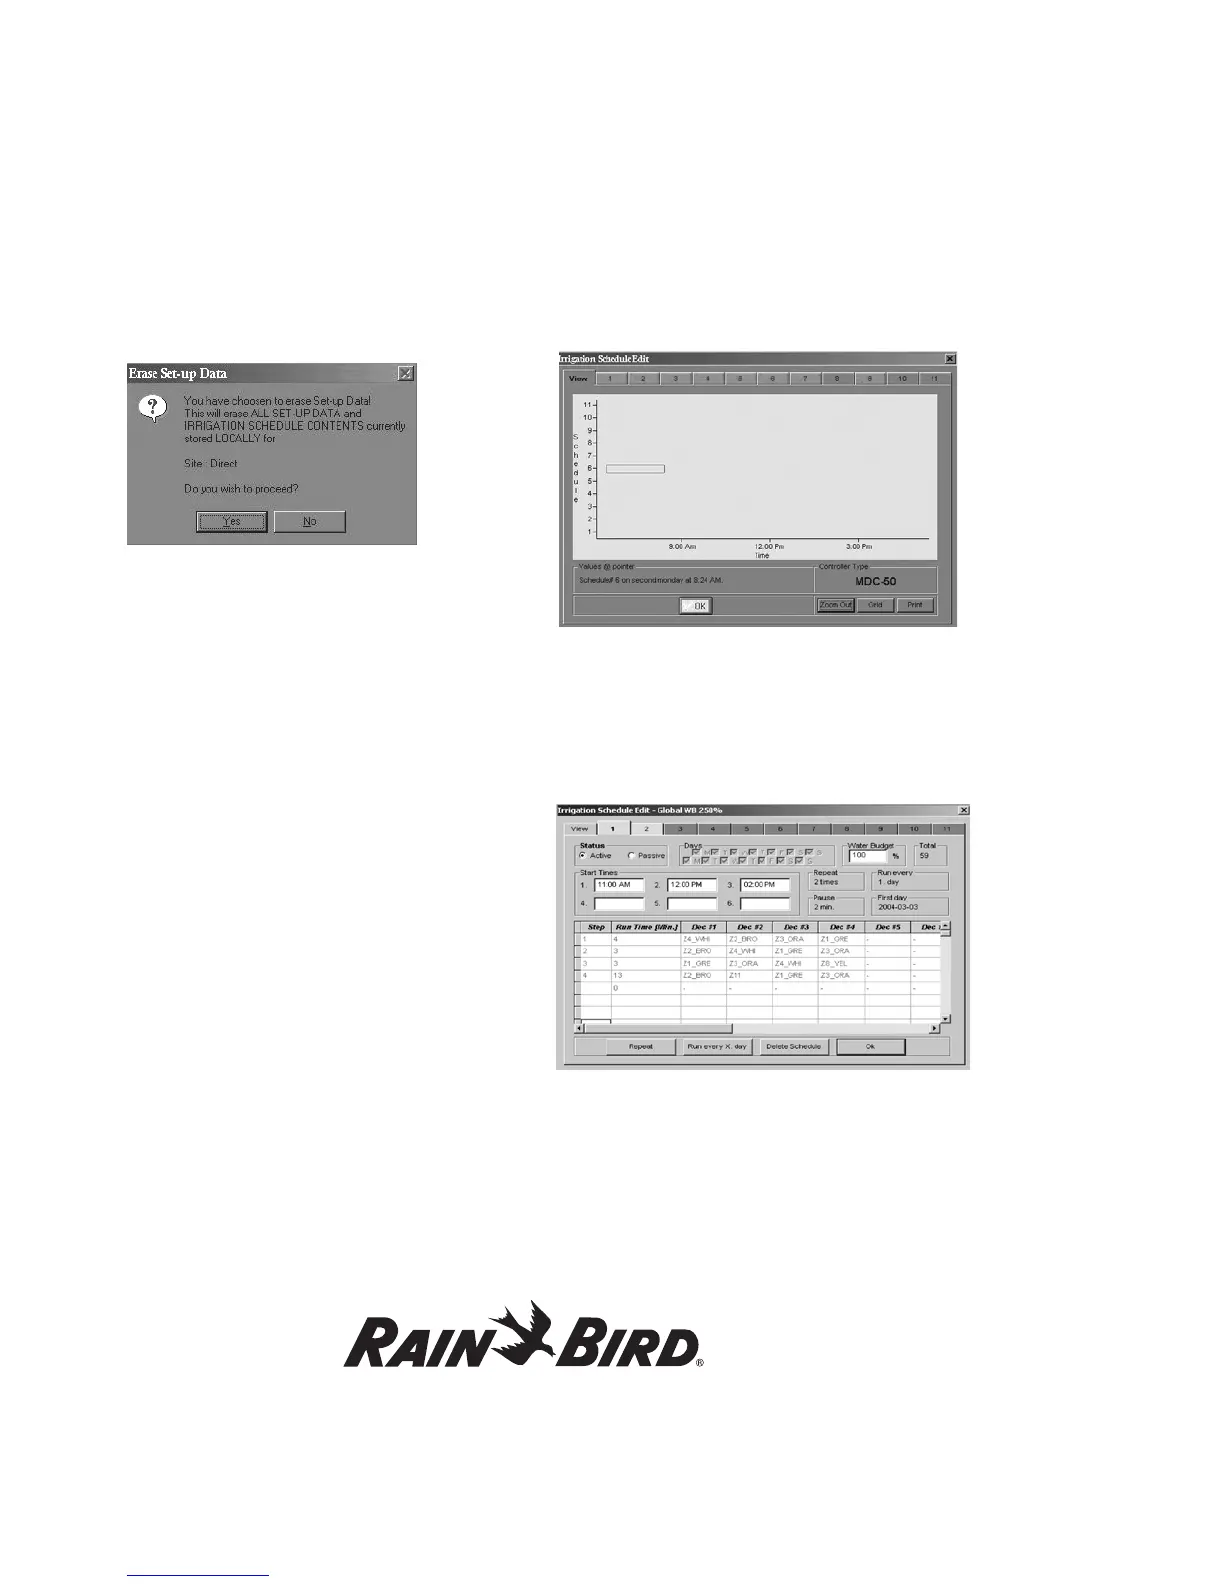
3. Select Yes to erase the information. Select
No to cancel the action.
Editing irrigation schedules
1. From the Rain Bird Remote Access window,
select Edit data.
2. Select Edit irrigation data and Irrigation
schedules from the pull-down menus to reach
the Irrigation Schedule Edit View pop-up
window.
Note: The Irrigation Schedule Edit View window
shows you an overview of each Program schedule.
Use the numbered tabs on top (1-11) to reach the
actual edit windows for each of the 11 Programs. The
View window features three additional control buttons.
The Zoom Out control button restores the full view of
all schedules after zooming in on a particular schedule
on the bar graph; Grid places grid lines over the
Schedule; and Print prints the Schedule.
To view a detailed section (i.e., Schedule 5, Monday,
between 6:10 am and 6:45 am) click on the graph.
With the left mouse button pressed, drag the cursor
across the section of the Schedule you want to view.
Dragging the cursor forms a rectangle showing the
area of the Schedule you want to detail. Release the
mouse button to Zoom In. The Schedule now shows
only the detailed area you selected. To return the
screen back to normal, select the Zoom Out button
again.
Note: When you move the cursor to a section on
the View window, a Values @ pointer shows you
the corresponding Schedule, day and time for the
section where the cursor points.
3. Select the tab of the Schedule you want to
change to reach the Irrigation Schedule Edit
window.
Note: The Irrigation Schedule Edit windows let
you add Schedules or change information in current
Schedules. For example, use these windows to
change Schedules from Active to Passive, change
the days, adjust the water budget, start and
repeat times, add pauses to Schedules and run
times, add steps and select different decoders.