¢@nnec i@ns Setup
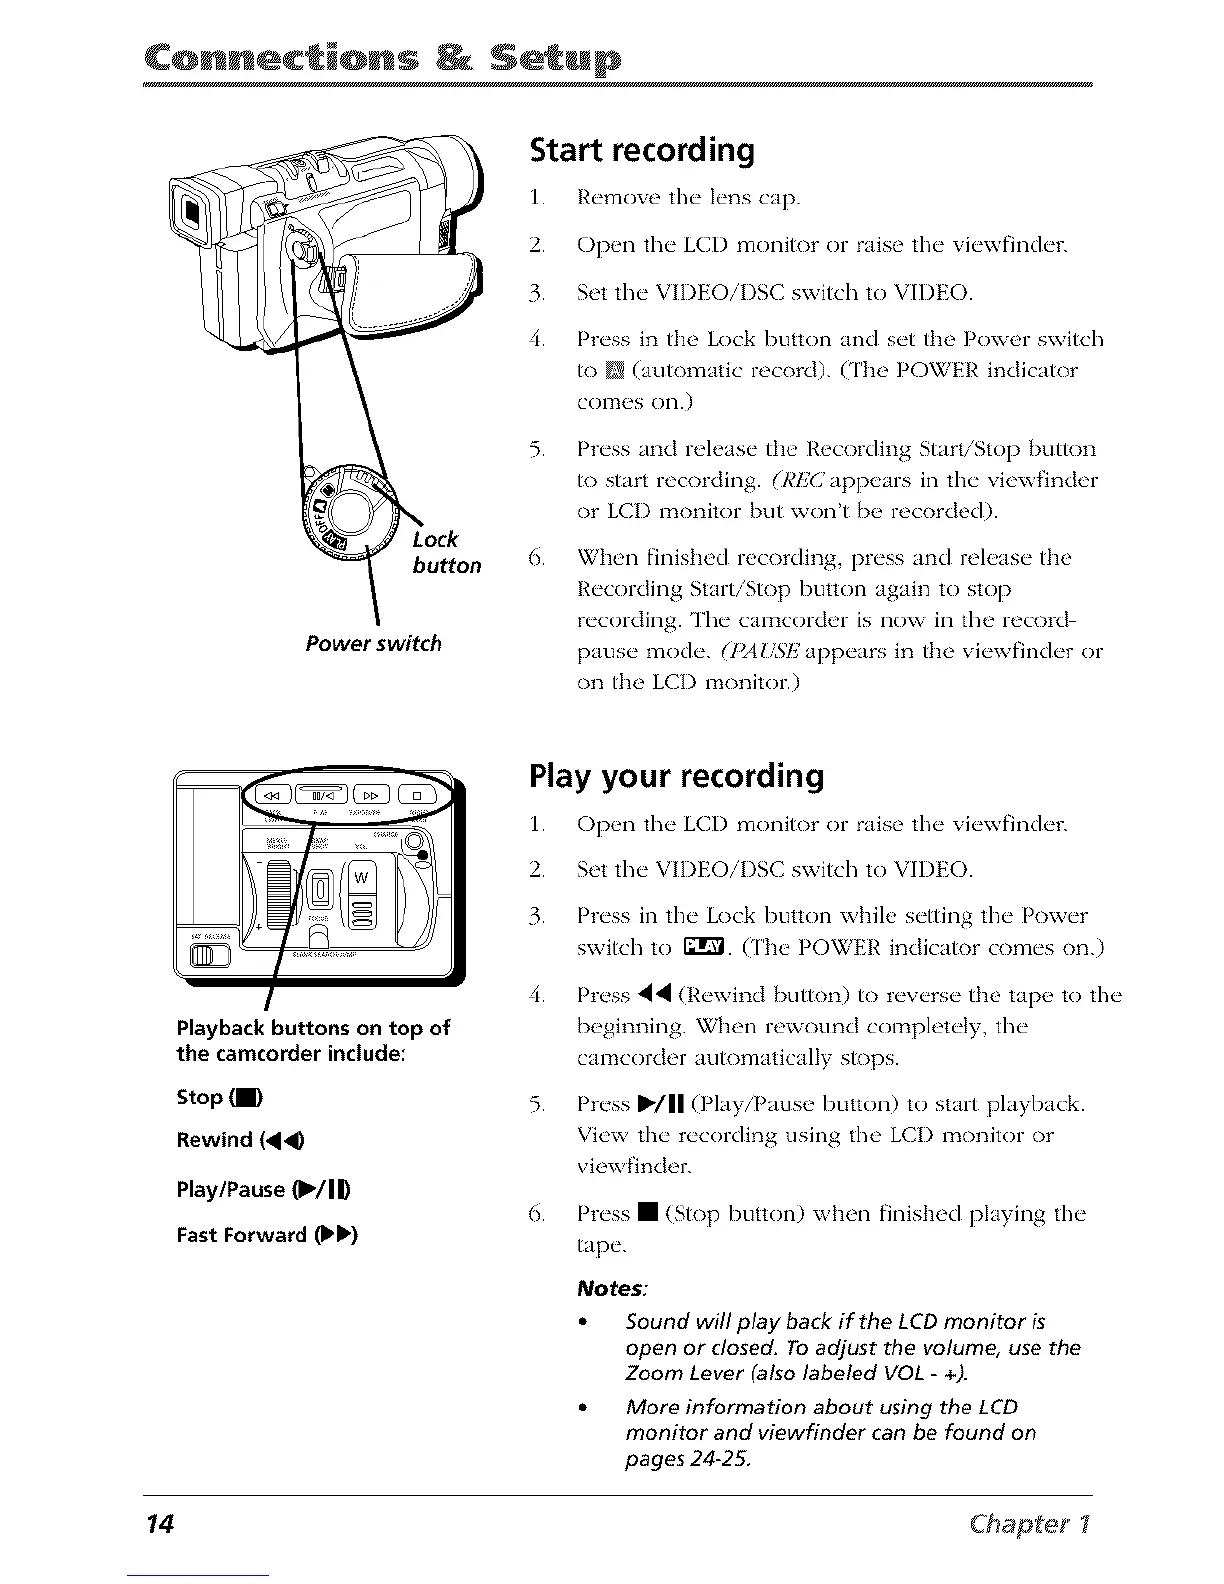
buttorl
Power switch
Start recording
1. R_'move the" h'ns cap.
2. Open the LCI) monitor or raise the viewfinder.
3. Set the VIDEOiDSC switch to VIDEO.
4. Press in the Lock button and set the Power switch
to N (automatic record). (The POWER indicator
COITtes on.)
5. Press and release the Recording Start/Stop button
to start recording. (REC ppeas 1t m viewfinder
or LCI) monitor but won't be recorded).
6.
When finished recording, press and release the
Recording Start/Stop button again to stop
recording. Tim camcorder is now in the record
pause mode. (INUSE appears in the viewfinder or
on the LCI) monitor.)
I
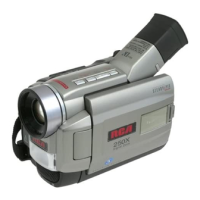
Playback buttons on top of
the camcorcler include:
Stop
Rewind (4<D
Play/Pause (1_/I _
Fast Forward (b!_)
Play your recording
11 Op_ql the" LCI) monitor or raise the" vi_'wfinch'r.
2. Set the VIDEOiI)SC switch to VIDEO.
3. Press in the Lock button while setting the Power
switch to 12T¢1. (['he POWER indicator comes on.)
4. Press 44 (Rewind button) to reverse the tape to the
beginning. When rewound completely, the
camcorder automatically stops.
5. Press IWII(Play/Pause button) to start playback.
View tim recording using the LCI) monitor or
viewfinder.
6. Press • (Stop button) when finished playing the
tape.
Notes:
Sound will play back if the LCD monitor is
open or closed. To adjust the volume, use the
Zoom Lever (also labeled VOL - +).
More information about using the LCD
monitor and viewfinder can be found on
pages 24-2_
14 Chapters