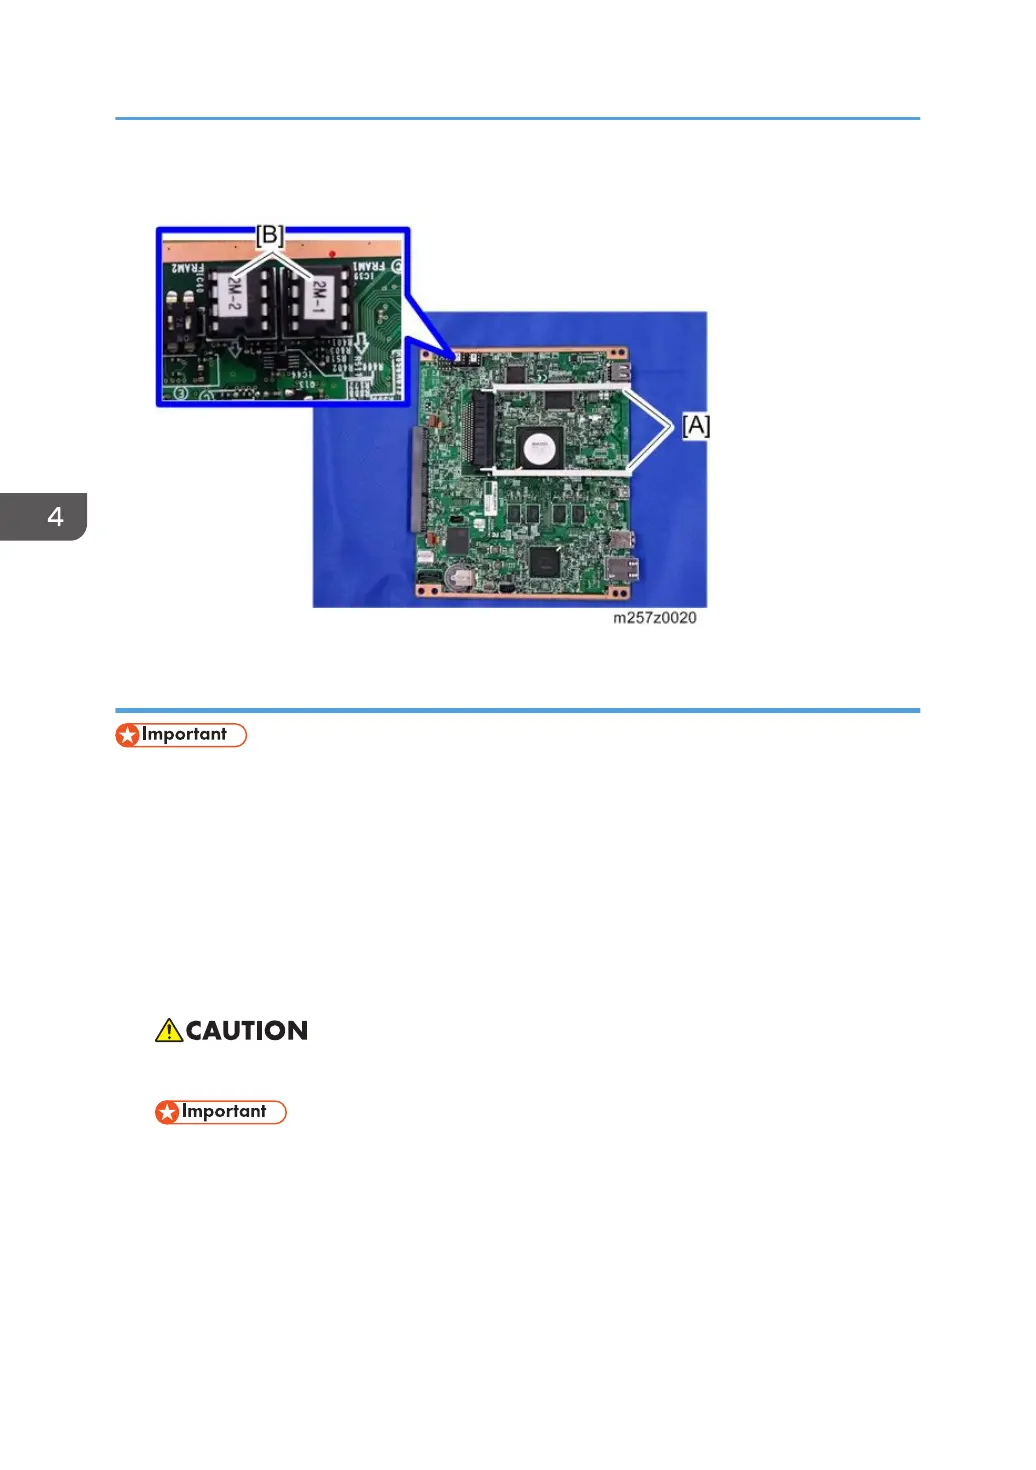
4. Remove the Interface rails [A] and NVRAMs [B].
When installing the new controller board
• When replacing the controller board, first, check which ESA applications have been installed. After
replacing the controller board, re-install the ESA applications by following the installation
instructions for each application.
• After reinstalling the ESA applications, print the SMC (SP-5-990-024/025 (SMC: SDK/
Application Info)). Then open the tandem tray [A] and remove the paper cassette decal [B]. Store
the SMC sheet [C] and the SD card(s) [D] that was used to install the ESA application(s).
1. Remove the NVRAMs from the old controller board.
2. Install the NVRAMs on the new controller board after you replace the controller board.
• Make sure that you install the NVRAMs in the correct sockets (see [B] in the diagram above).
• These NVRAMs are a set and must always be removed together and installed on a new
board at the correction locations. Failure to do this will cause the machine to issue SC195-00.
• Keep NVRAMs away from any objects that can cause static electricity. Static electricity can
damage NVRAM data.
• 2M-2 is inserted into the connector labeled FRAM-2.
• 2M-1 is inserted into the connector labeled FRAM-1.
4. Replacement and Adjustment
232

 Loading...


