7. Place the EC sensor in calibration solution EC 5. Press E.
8. Wait until the display indicates that the measuring time of 60 seconds has
elapsed.
9. Press E to save the calibration values, or ESC to abort the calibration process.
10. If the calibration process was successful, the message 'EC calibration
successful’ will appear on the display.
11. After completing the calibration process, restart the controller (switch power off
and back on).
12. Check the calibration by placing the sensor in both calibration solutions again.
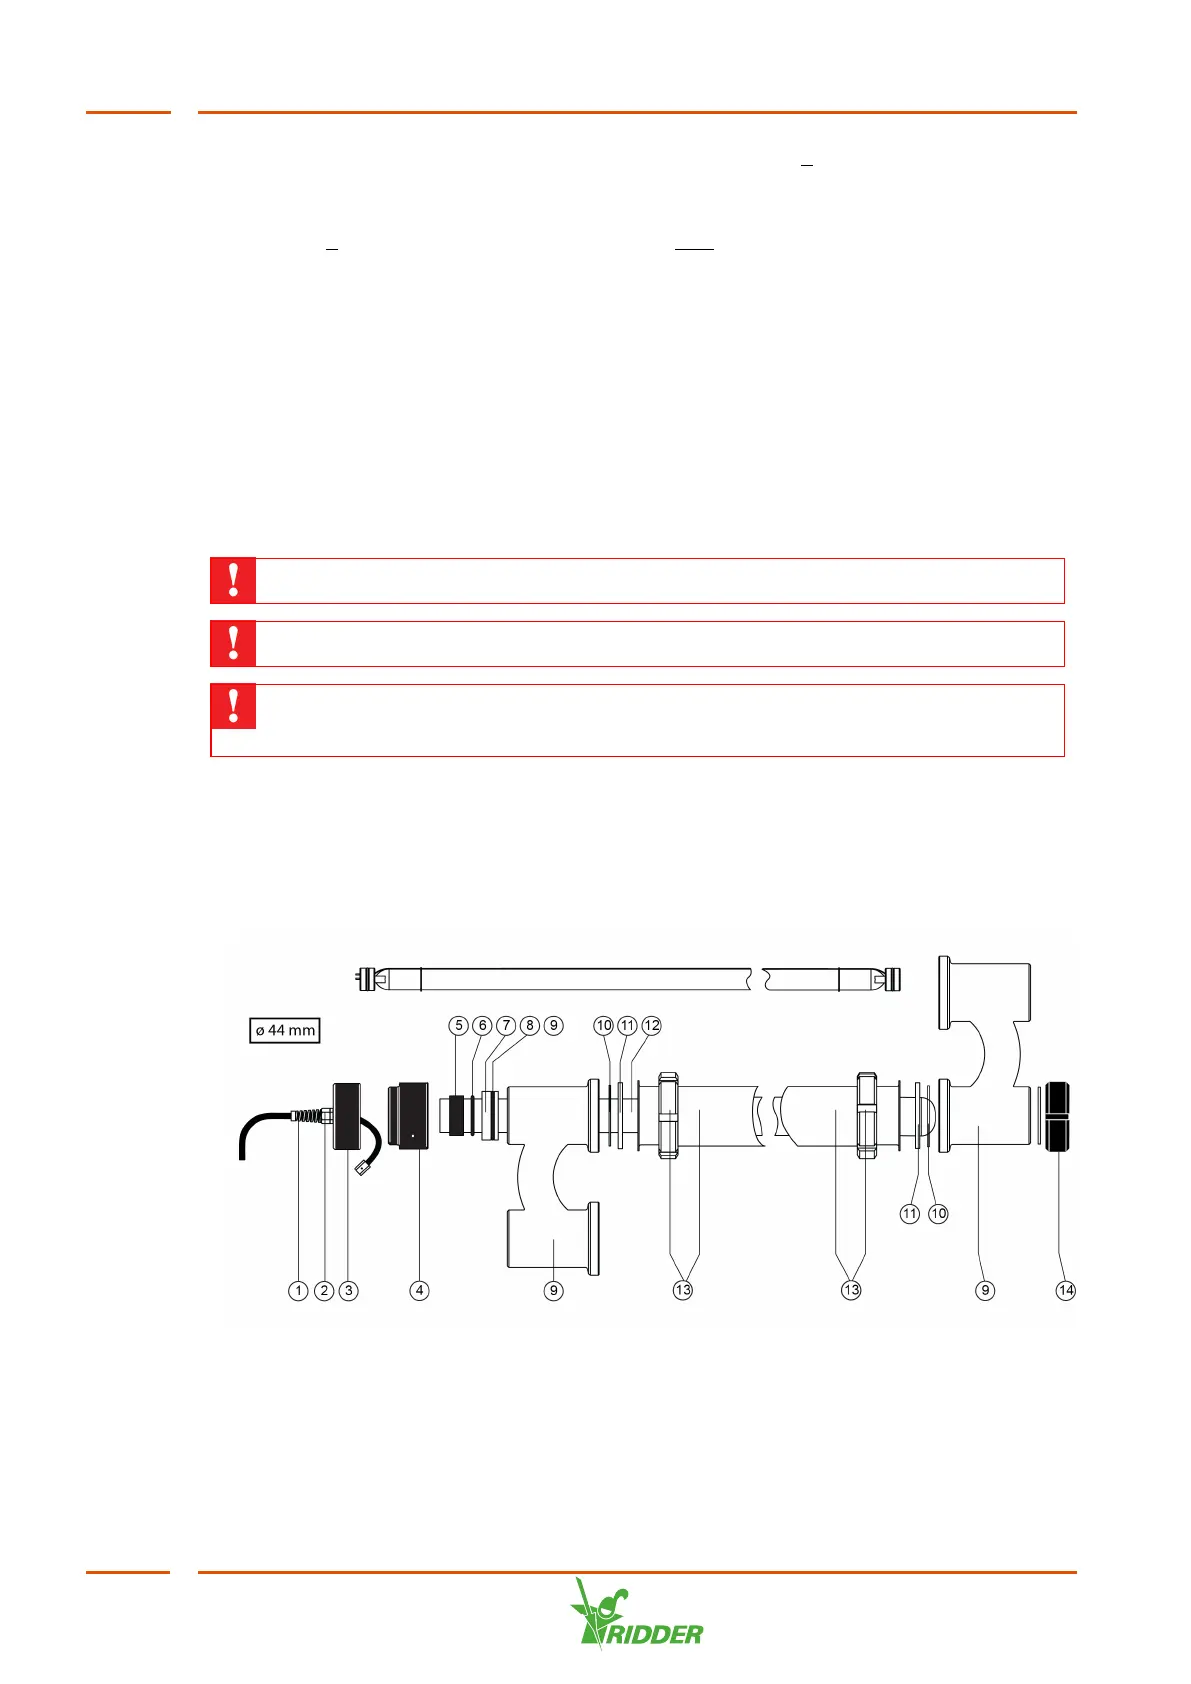
4.7 Installing quartz tubes and lamps
To prevent damage, the quartz tubes and UV-C lamps are supplied separately. These
must, therefore, be fitted during installation.
Make sure that all the parts are clean, grease-free and undamaged.
Never touch the quartz tubes or UV-C lamps with your bare hands!
First install the quartz tubes, then pressurize the system and make sure that
the pipes are not leaking. If there are no leakages, you can install the lamps.
4.7.1 Installing quartz tubes
The unit is supplied with quartz tubes with a diameter of 44 mm or 55 mm. The
installation of both models is almost identical. The installation of the 44-mm tube
includes an additional step: installing a plastic ring fitted with an O-ring (see figure).
VitaLite
32