Scene Memory
184
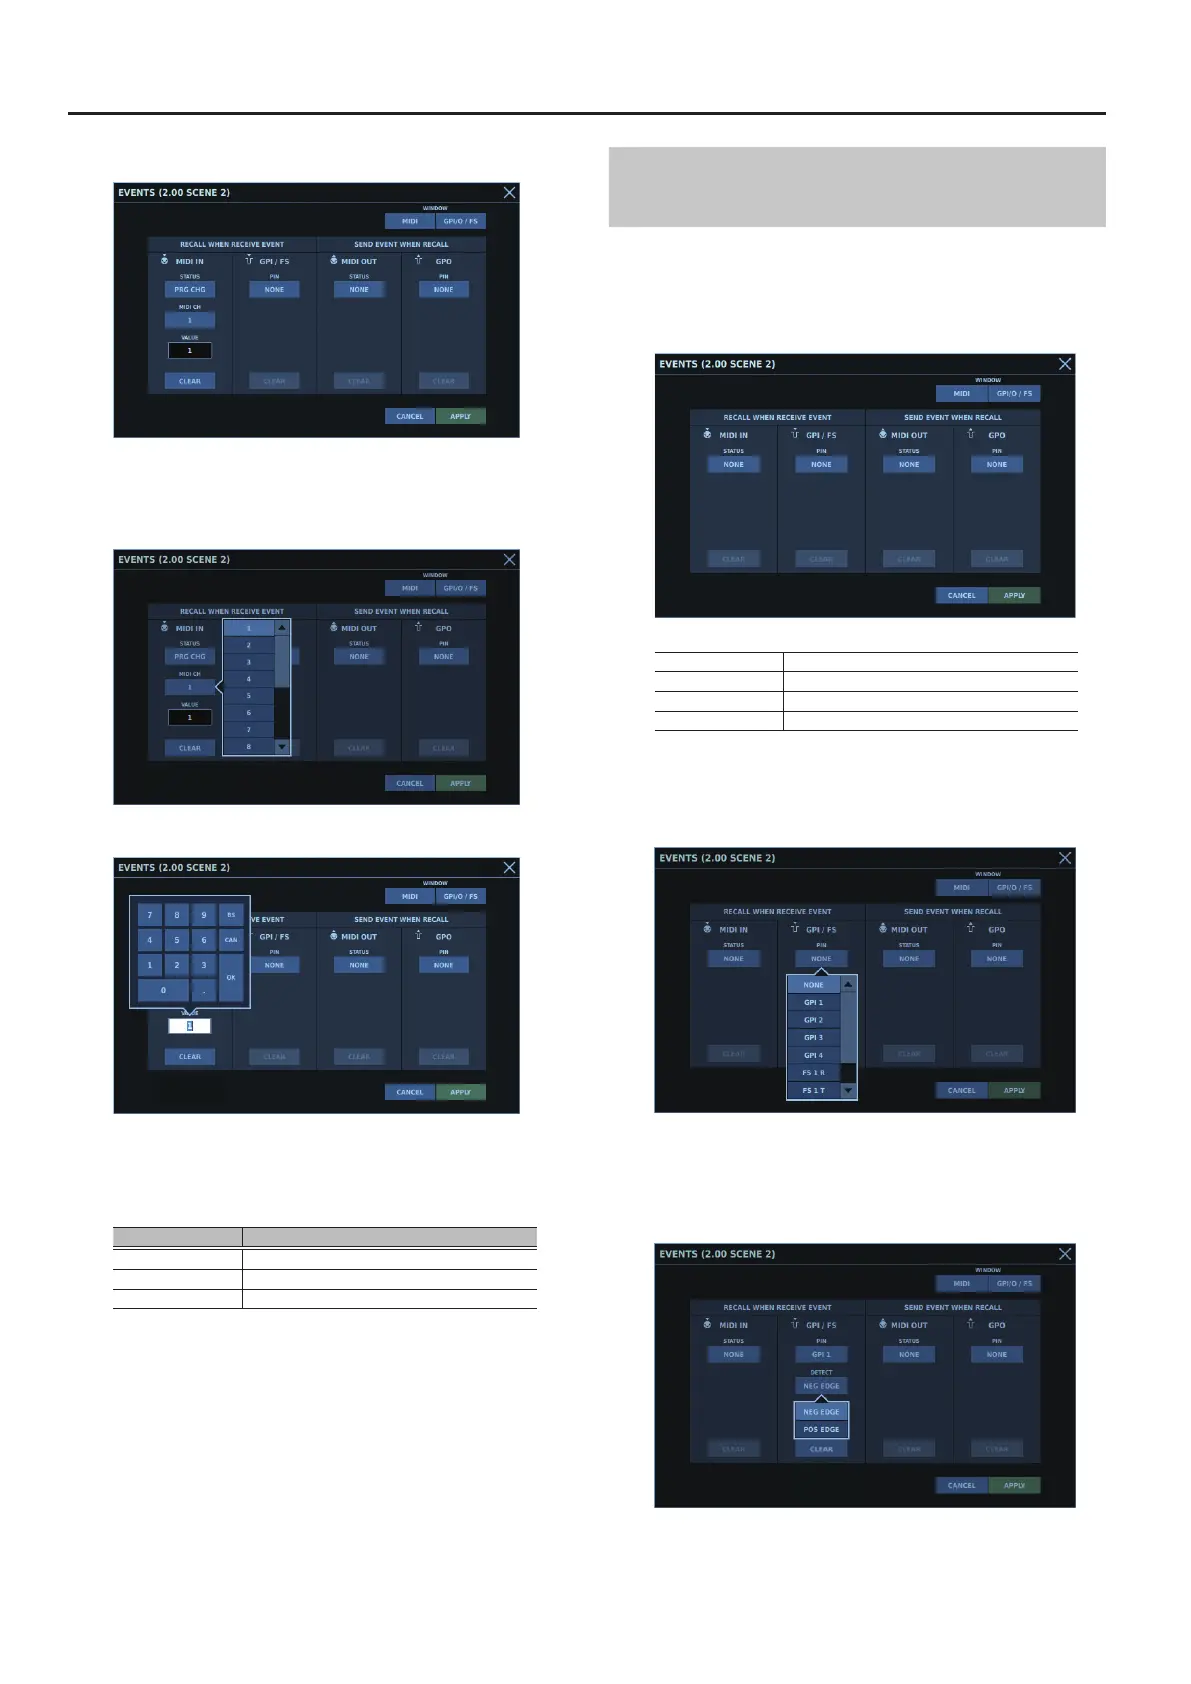
3. Select the MIDI data.
4. Tap <MIDI CH> and <VALUE>.
Tapping <MIDI CH> displays a popover for selecting the MIDI
channel.
Tapping <VALUE> displays a popover for inputting a MIDI value.
5. Set the MIDI channel and the MIDI value.
For the MIDI value, specify one of the following values according to
the <STATUS> setting.
<STATUS>
PRG CHG Program number (1 - 128)
NOTE ON Note number (0 - 127)
NOTE OFF Note number (0 - 127)
6. Tap <APPLY>.
This makes scene recall occur when the specied signal is input.
Assigning Scenes to GPI Connectors and FOOT
SW 1/2 Jacks
This assigns a scene to a GPI connector or FOOT SW 1 or 2 jack.
1. Tap <EVENTS> for the scene you want to assign to the
connector.
The EVENTS window appears.
MIDI This displays the MIDI window.
GPI/O / FS This displays the GPI/O / FOOT SW window.
CLEAR This clears the assigned function.
CANCEL This cancels the change and closes the window.
2. Tap <PIN>.
A popover for selecting the GPI connector or FOOT SW 1 or 2 jack
appears.
3. Select the GPI connector or FOOT SW 1 or 2 jack.
4. Tap <DETECT>.
A popover for selecting the detected input waveform appears.
 Loading...