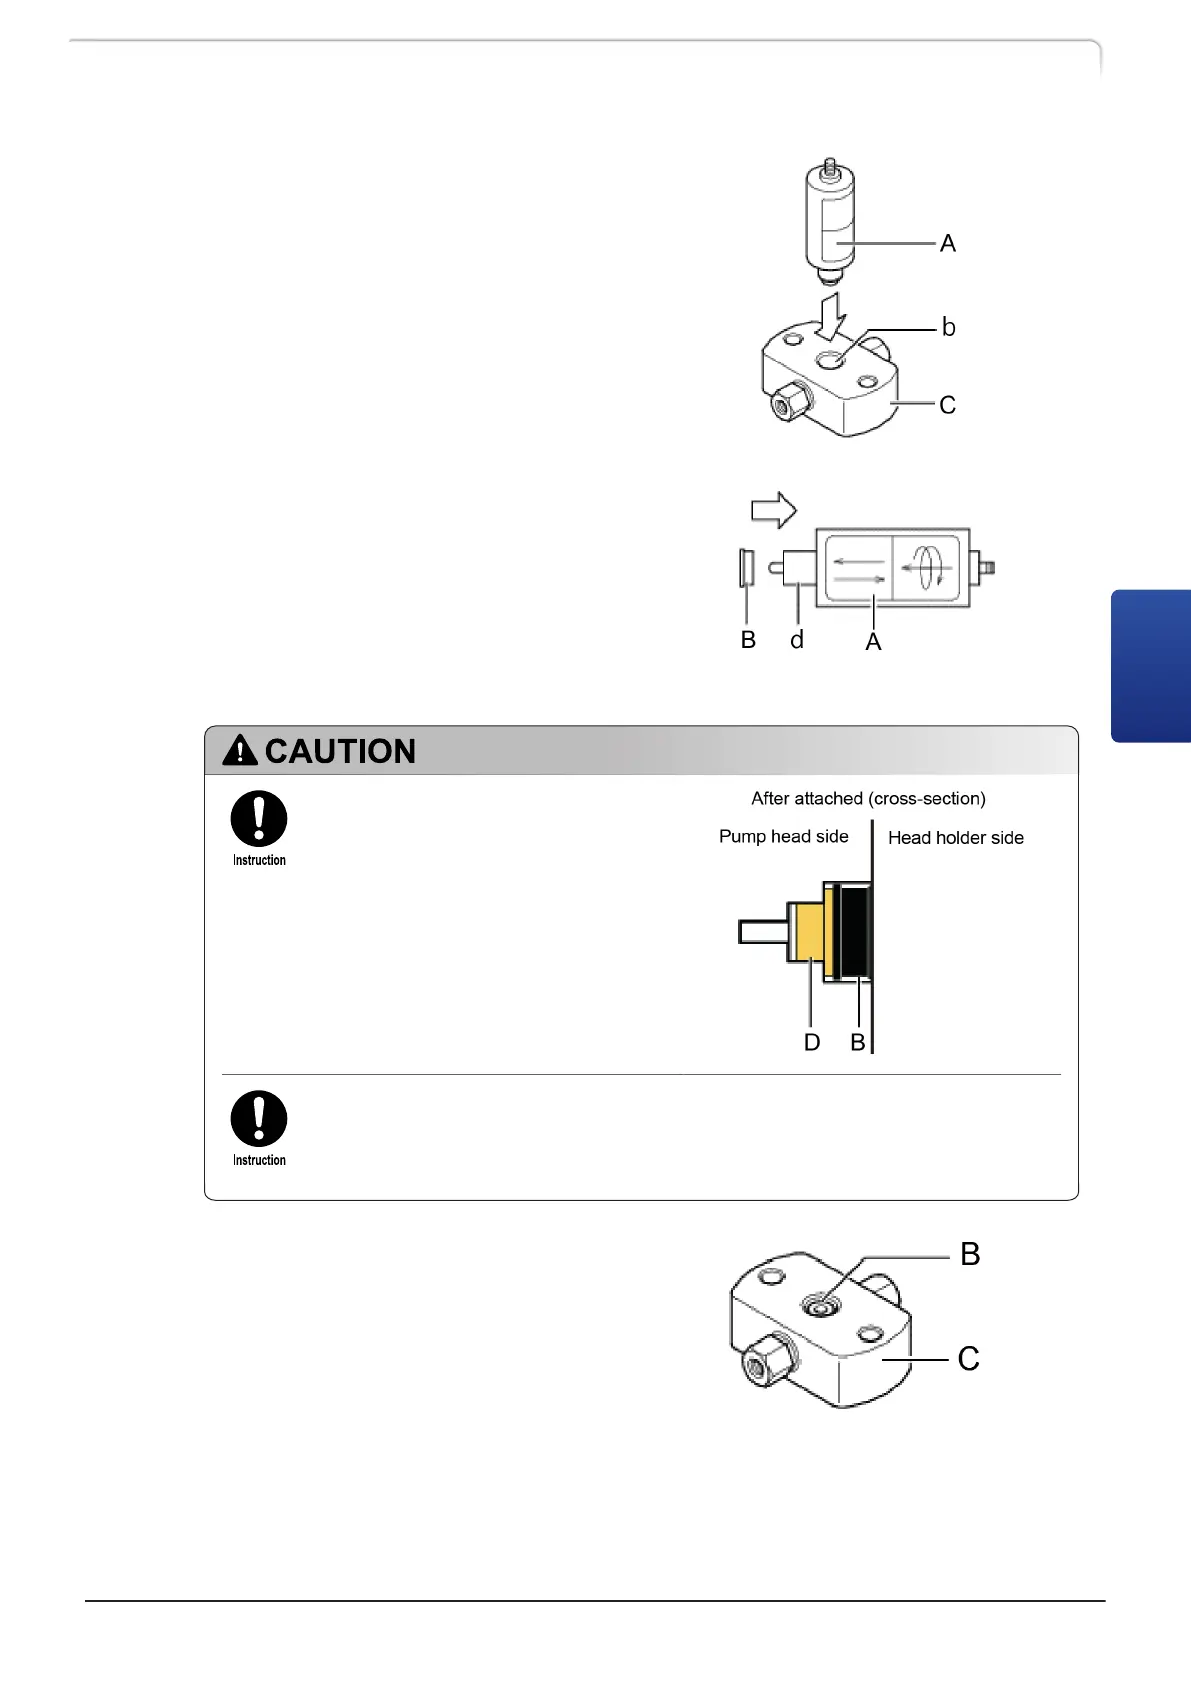
19 Insert the seal installer/remover
(A) vertically all the way into the
plunger seal hole (b) of the pump
head (B) and slowly pull out the
seal installer/remover upward.
The plunger seal will be installed
in the pump head.
20 Take the new backup ring (B) out
of the beaker and, with the
smaller diameter side facing the
seal installer/remover (A), put the
backup ring on the white
protrusion (d).
Be sure to attach the backup ring with
the correct orientation.
When the backup ring (B) is attached
correctly to the pump head, the larger
diameter side comes into contact with
the plunger seal (D).
Be sure that the backup ring is moistened with 2-propanol when putting it
on the seal installer/remover.
21
Insert the seal installer/remover
vertically all the way into the
plunger seal and slowly pull out
the seal installer/remover upward.
The new backup ring (B) will be
installed into the pump head (C).
LC-40D X3 CL LC-40D XR CL
97
4.4 Replacing the Plunger Seal
4
 Loading...