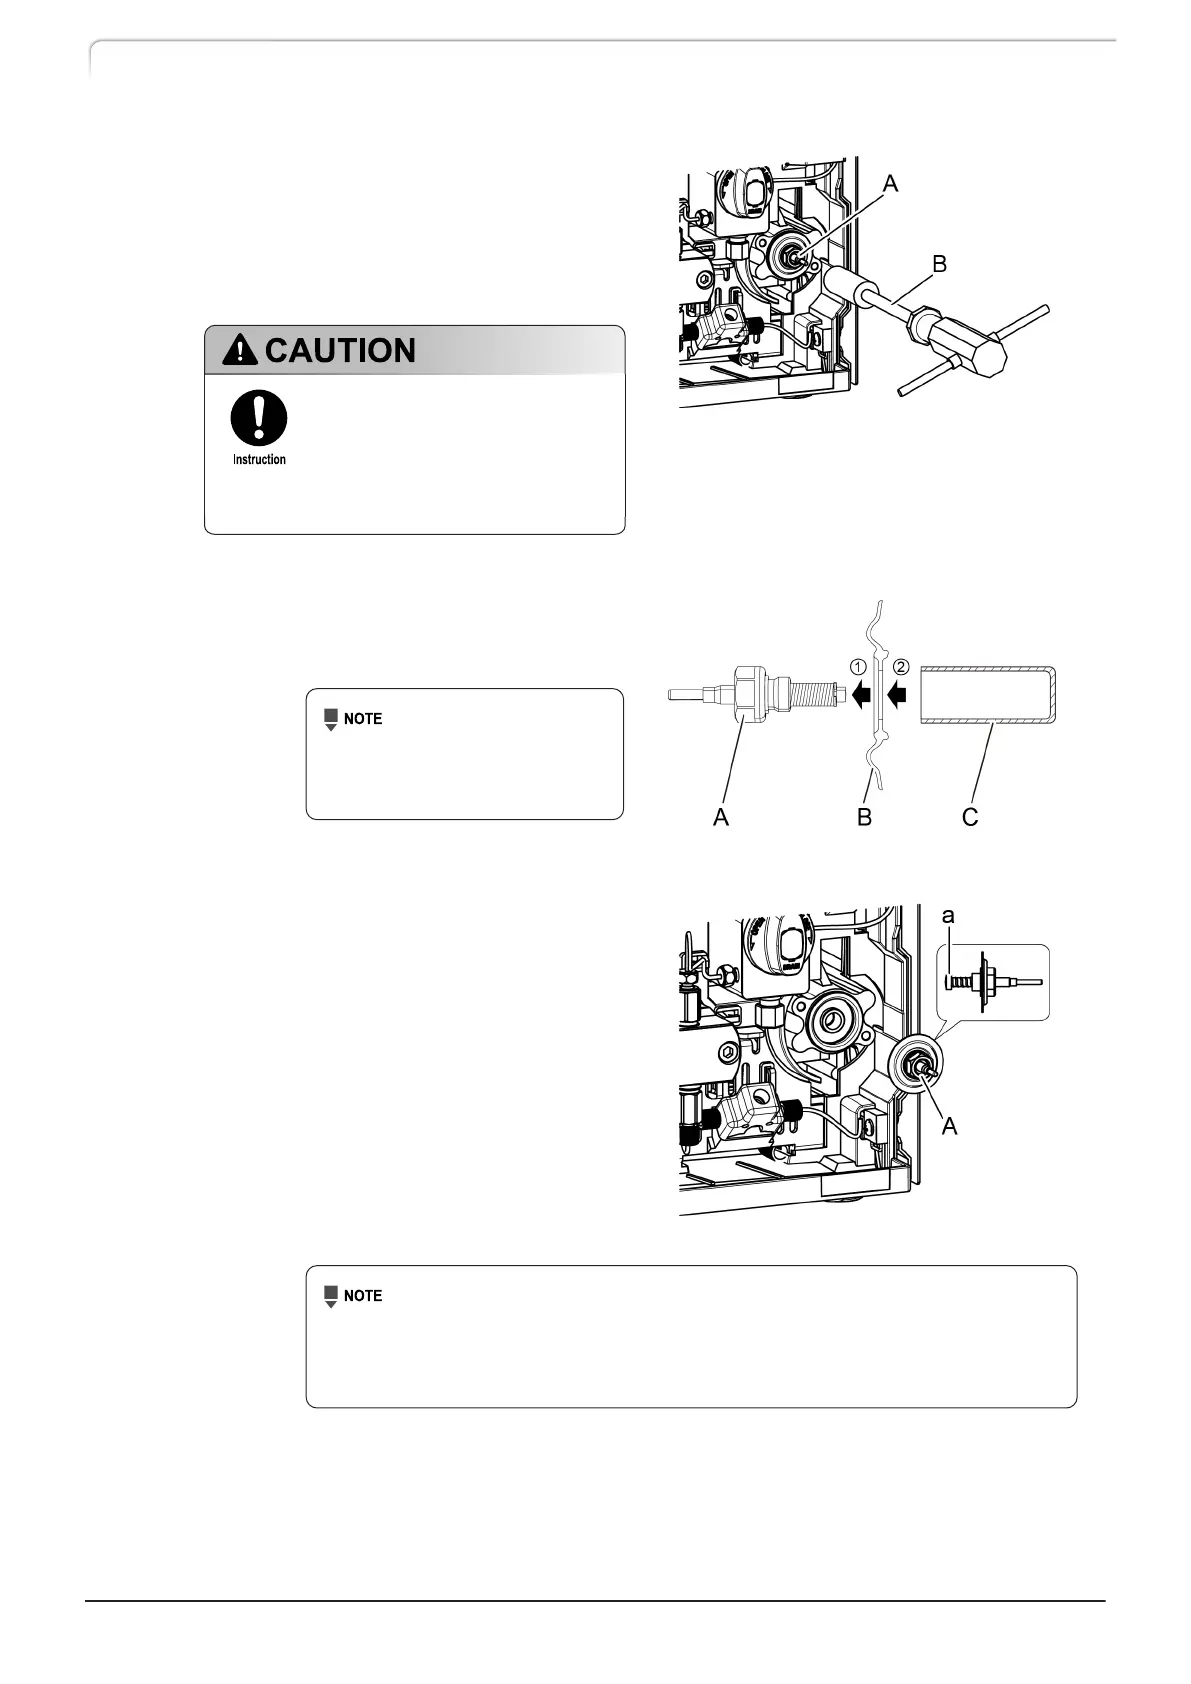
3 Insert the box driver (B) to the
plunger holder (A), then rotate
counter-clockwise to remove the
plunger holder with the
diaphragm.
Gently insert the box driver to
the plunger holder.
The plunger may become
damaged if the box driver is
forcefully inserted.
4 Attach a new diaphragm (B) to
the new plunger holder (A) using
the diaphragm jig (C).
Confirm the
direction of the
diaphragm when
attaching.
5
After applying the grease (black:
approximately 5 mm square size)
provided with the plunger holder
ASSY to the rear end surface of
the plunger (a), insert the plunger
holder (A) to which the
diaphragm was attached in
Procedure 4 into the pump body.
• Be careful not to get any grease on the diaphragm or the body.
• Attach the diaphragm so that it will not become detached from the
plunger holder. If the diaphragm becomes detached, wipe away any
grease and perform from Procedure 4 again.
104
LC-40D X3 CL LC-40D XR CL
4 Maintenance
 Loading...