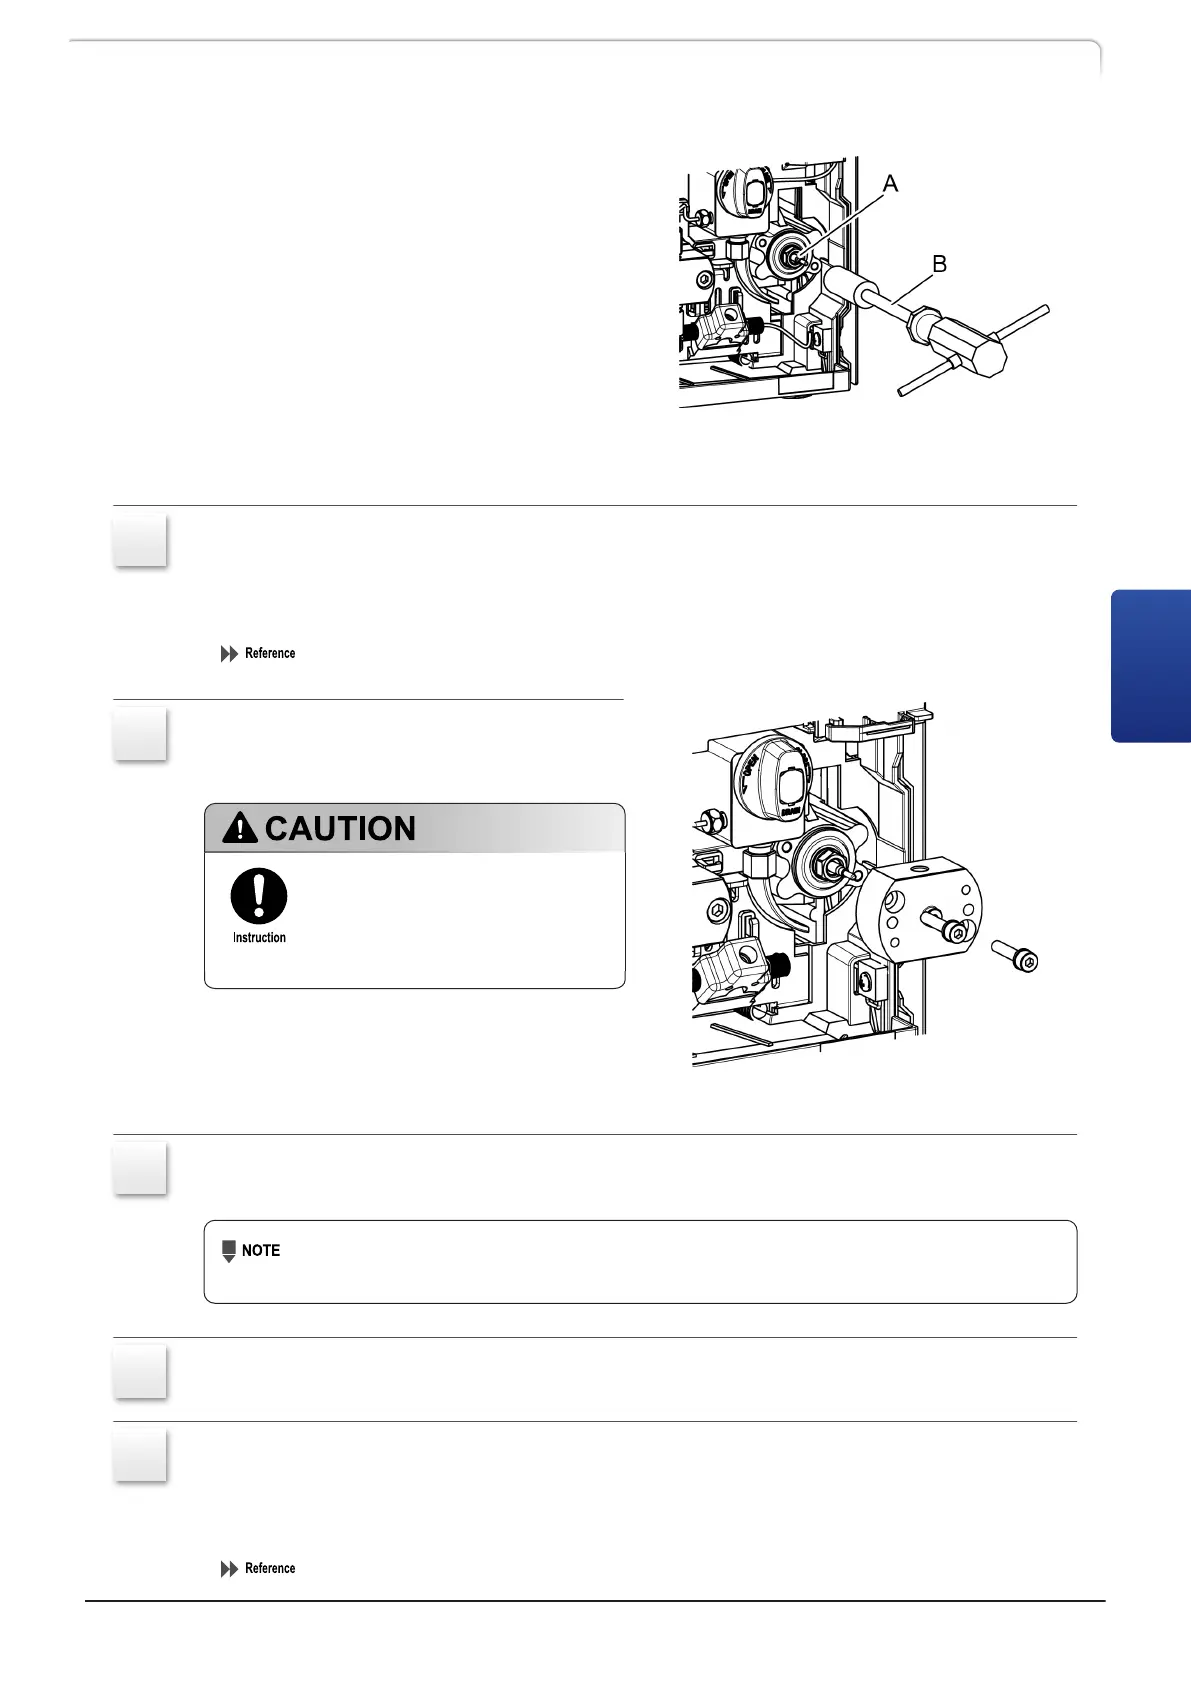
6 Tighten the plunger holder (A)
using the box driver (B).
7 Pinch the end of the plunger with
your two fingers, move it up,
down, right, left, clockwise, and
counterclockwise five times each
so that the grease applied to the
rear end of the plunger holder
can spread evenly. Then wipe off
the plunger surface with wiper
paper soaked in 2-propanol to clean it.
2
In the [PLUNGER SET] screen of the control setting group, press [2] and [Enter].
(To replace the left plunger, press [1] and [Enter].)
[PUMP] on the display is highlighted and after a while stops being highlighted. The right
plunger is now at the backmost position.
"Setting the plunger stop position《PLUNGER SET》" P.37
3
Attach the head holder to the pump
body.
Slowly push in the head
holder along the plunger.
Pushing in the head holder
forcibly may break the plunger.
4
Attach the 2 hexagonal socket screws to the head holder and tighten them with
an Allen wrench.
Tighten the right and left hexagon socket screws alternately in 90° increments.
Finally hold the longer part of the hex wrench and tighten them securely.
5
Attach rinse tubes to the top and bottom of the head holder.
6
In the [PLUNGER SET] screen, press [1] and [Enter].
(To replace the left plunger, press [2] and [Enter].)
[PUMP] on the display is highlighted and after a while stops being highlighted. The right
plunger is now at the frontmost position.
"Setting the plunger stop position
《PLUNGER SET》" P.37
LC-40D X3 CL LC-40D XR CL
105
4.5 Cleaning/ Replacing the Plunger and Diaphragm
4
 Loading...