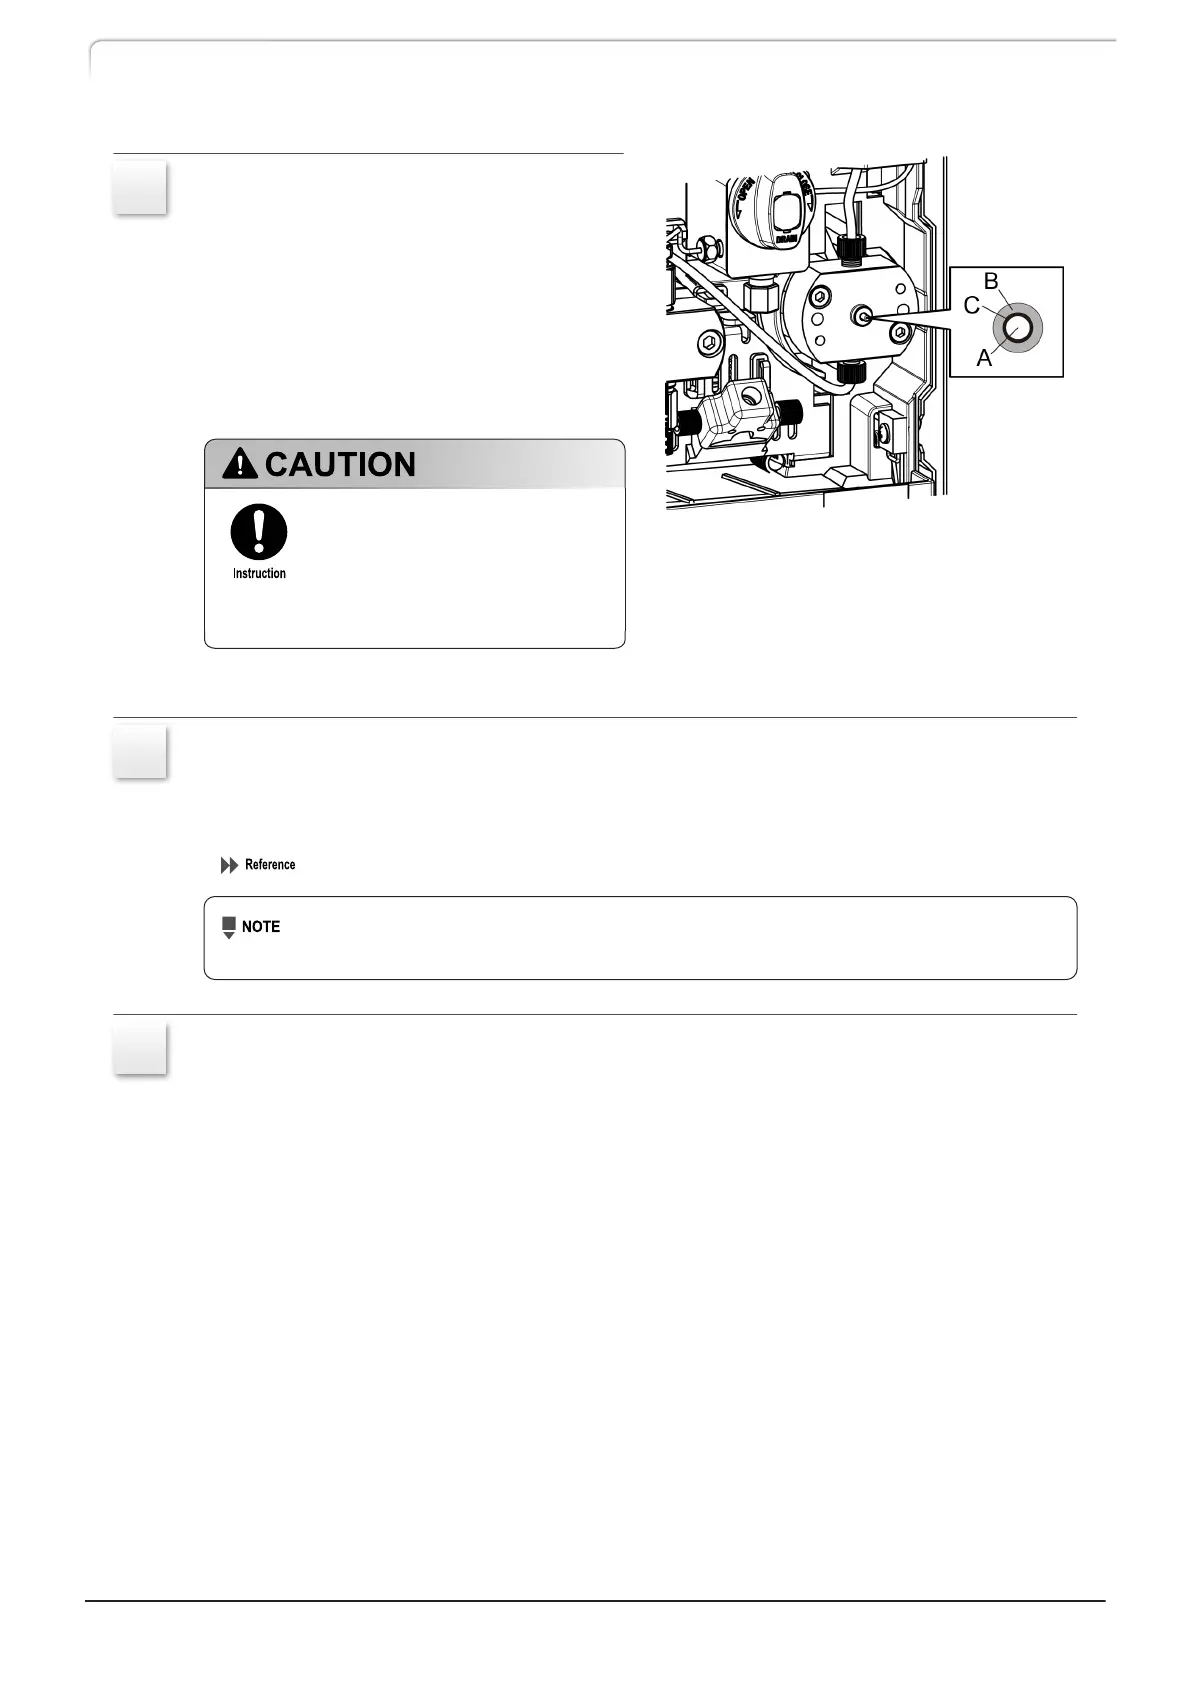
7
Pinch the end of the plunger that is
projecting from the head holder with
your fingers and adjust its position to
make the gap (C) around the plunger
(A) inside the hole of the projection (B)
of the head holder even. While
keeping the plunger in place, wipe off
the plunger surface with clean wiper
paper soaked in 2-propanol.
Move the plunger gently.
Moving the plunger too
abruptly could scratch the
plunger surface or cause it to
break off.
8
In the [PLUNGER SET] screen, press [2] and [Enter]. (To attach the left plunger
seal, backup ring and pump head, press [1] and [Enter].)
[PUMP] on the display is highlighted and after a while stops being highlighted. The right
plunger is now at the backmost position.
"Setting the plunger stop position
《PLUNGER SET》" P.37
When replacing the plunger, be sure to replace the plunger seal and the
diaphragms."4.4 Replacing the Plunger Seal" P.92.
9
Attach the pump head, SUS pipe, and inlet tube and set the seal rinsing kit back
in place by following the instructions in "Removing the pump head" P.85.
106
LC-40D X3 CL LC-40D XR CL
4 Maintenance
 Loading...