4.4.4.2 Using the AS-i Programmer
Setting the slave address with the AS-i Address Programmer
The converter contains two logical AS-i slaves. Either slave can be assigned an address in the
range 1A...31A or 1B...31B. The addresses can be allocated to the slaves sequentially, for
example, 3A and 4A, 10B and 11B or they can occupy the same number using extended
addressing, for example, 20A and 20B. If necessary they can have completely dierent
unassociated addresses, for example, 14A and 16B.
The decision on how to allocate these addresses must also take into account the addressing used
in the PLC program by either adherence to the memory map of the AS-i master or the way in
which the inputs and outputs can be allocated by the PLC hardware conguration.
The default address of both slaves is 0.
Setting the AS-i address of slave 1
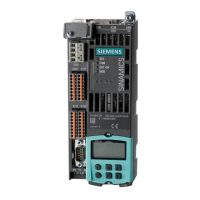
1. Plug the AS-i Programmer into the addressing socket of the converter.
2. Turn the dial on the Programmer to the ADDR position. The display
will indicate that this mode has been selected.
3. Press the button; the screen will display the text, SEt 0 with a
small ashing 0 to the left of the display.
4. Press the button until you reach the required number.
By pressing both the and simultaneously, you can toggle between A and B
identiers of the address.
5. Press the button to conrm the selected address.
ProG is momentarily displayed, followed by AddrES.
The number allocated to slave 1 is now shown at the bottom of the
display.
Setting the AS-i address of slave 2
1. Press the button; the display shows the text SEArcH followed
by uSE 0.
A small 0 is displayed to the left of the display and the number of the
rst slave that has already been allocated to slave 1 is shown at the
bottom of the display.
2. Press the button to select this number.
SEt 0 appears and the small 0 in the left of the display starts ashing.
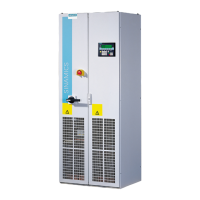
Installation
4.4 Connecting the converter to the eldbus
Distributed converter for SIMOGEAR geared motors
Operating Instructions, 10/2020, FW V4.7 SP13, A5E31298649B AL 97
 Loading...