50
1
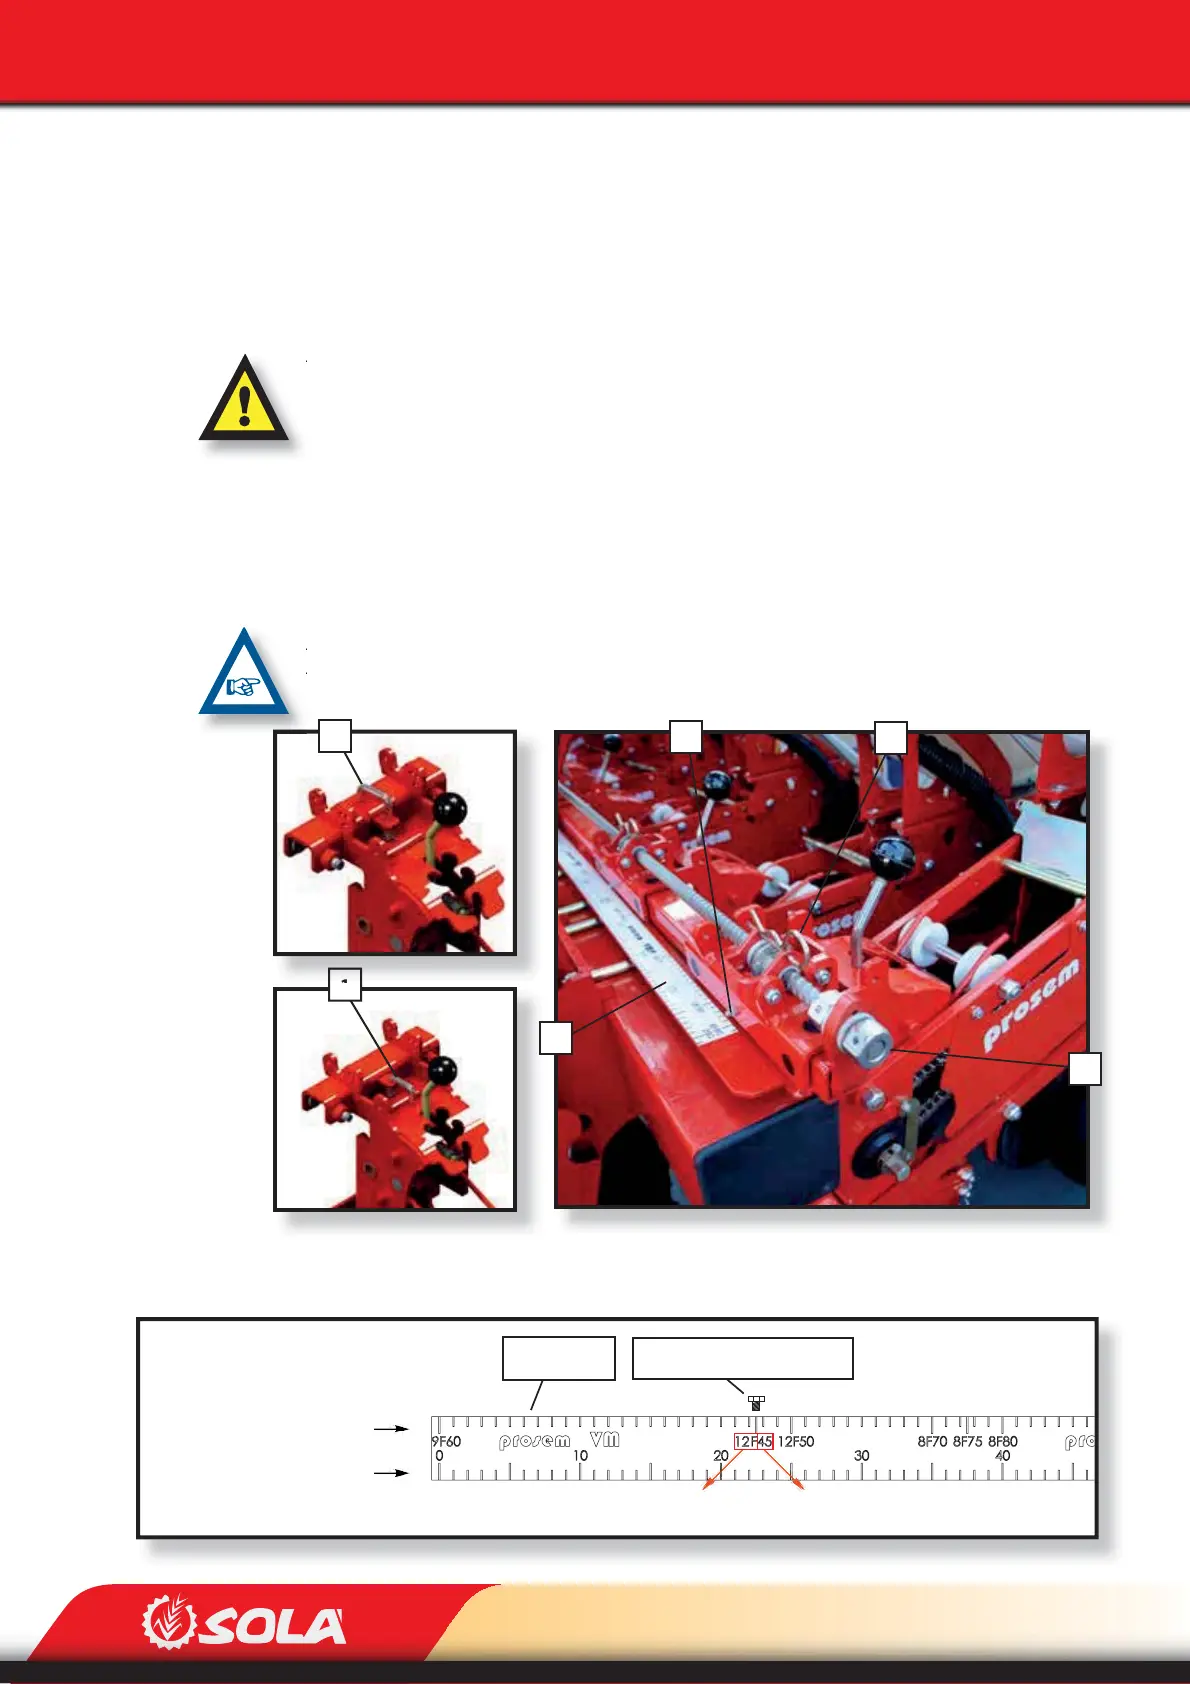
Fig. 6.30
2
Fig. 6.29
4
5
3
1
Fig. 6.28
ADJUSTMENTS
Adjusting ONE METERING UNIT using the VARIANT MANUAL spindle.
1- Free the metering unit so that it can move. For this purpose, place the securing hook on the
frame’s base (1, Fig. 6. 28) (if the hook comes equipped)
2- Place the pin (2, Fig. 6.29) only in the metering unit that is going to be moved.
THE REMAINING METERING UNITS ASSEMBLED TO THE SAME SPINDLE NEED TO THE LOCKED (1,
Fig. 6.30) AND WITHOUT PINS, UNLESS THE SPACING BETWEEN UNITS IS 40 CM OR LESS.
3- Turn the spindle to modify the position of the selected metering unit. For this purpose, use
a wrench to operate the nut (5, Fig. 6.29). Adjust the desired row spacing using the position
indicator (3, Fig. 6.29) and the graduated scale (4, Fig. 6.29).
4- Block the metering unit’s position using the securing hook (1, Fig. 6.30). It has to t into one
of the frame’s grooves.
TELESCOPIC HYBRID MACHINES HAVE NO SECURING HOOKS. TO FIX THE POSITION OF THE ME-
TERING UNIT, REMOVE THE PIN ONCE THE ROW SPACING HAS BEEN ADJUSTED.
For a better adjustment, some machines are provided with a graduated scale (Fig. 6.31)
Scale graduated in centimeters
Scale graduated according to:
row number and row spacing
number of rows row spacing (cm)
METERING UNIT’S
POSITION INDICATOR
GRADUATED
SCALE
Fig. 6.31