51
ADJUSTMENTS
Adjusting MULTIPLE METERING UNITS using the spindle VARIANT MANUAL
1- First, adjust the central units (Fig. 6.32) by freeing the units which are to be moved at the same
time. For this purpose, place the safety hooks onto the frame’s base (1, Fig. 6.28).
2- Place the pins in the selected metering units which are going to be moved (2, Fig. 6.29).
UNLOCKED UNITS (1, FIG. 6.28) WHOSE PIN IS IN PLACE (2, FIG. 6.29) WILL MOVE TOGETHER IN
THE SAME DIRECTION, KEEPING THE SPACING BETWEEN ROWS. TO PREVENT A METERING UNIT
FROM MOVING, REMOVE THE PIN (2, FIG. 6.29) AND USE THE SECURING HOOKS TO LOCK THE
UNIT’S POSITION (1, FIG. 6.30).
3-
Turn the spindle at the place where the selected metering unit is. To perform this, use a
wrench to operate the nut (5, Fig. 6.29). Adjust the desired row spacing by means of the posi-
tion indicator (3, Fig. 6.29) and the graduated scale (4, Fig. 6.29).
4- Lock the position of the metering units which have been moved using the securing hooks (1,
Fig. 6.30) and remove the pin (2, Fig. 6.29) from the metering units.
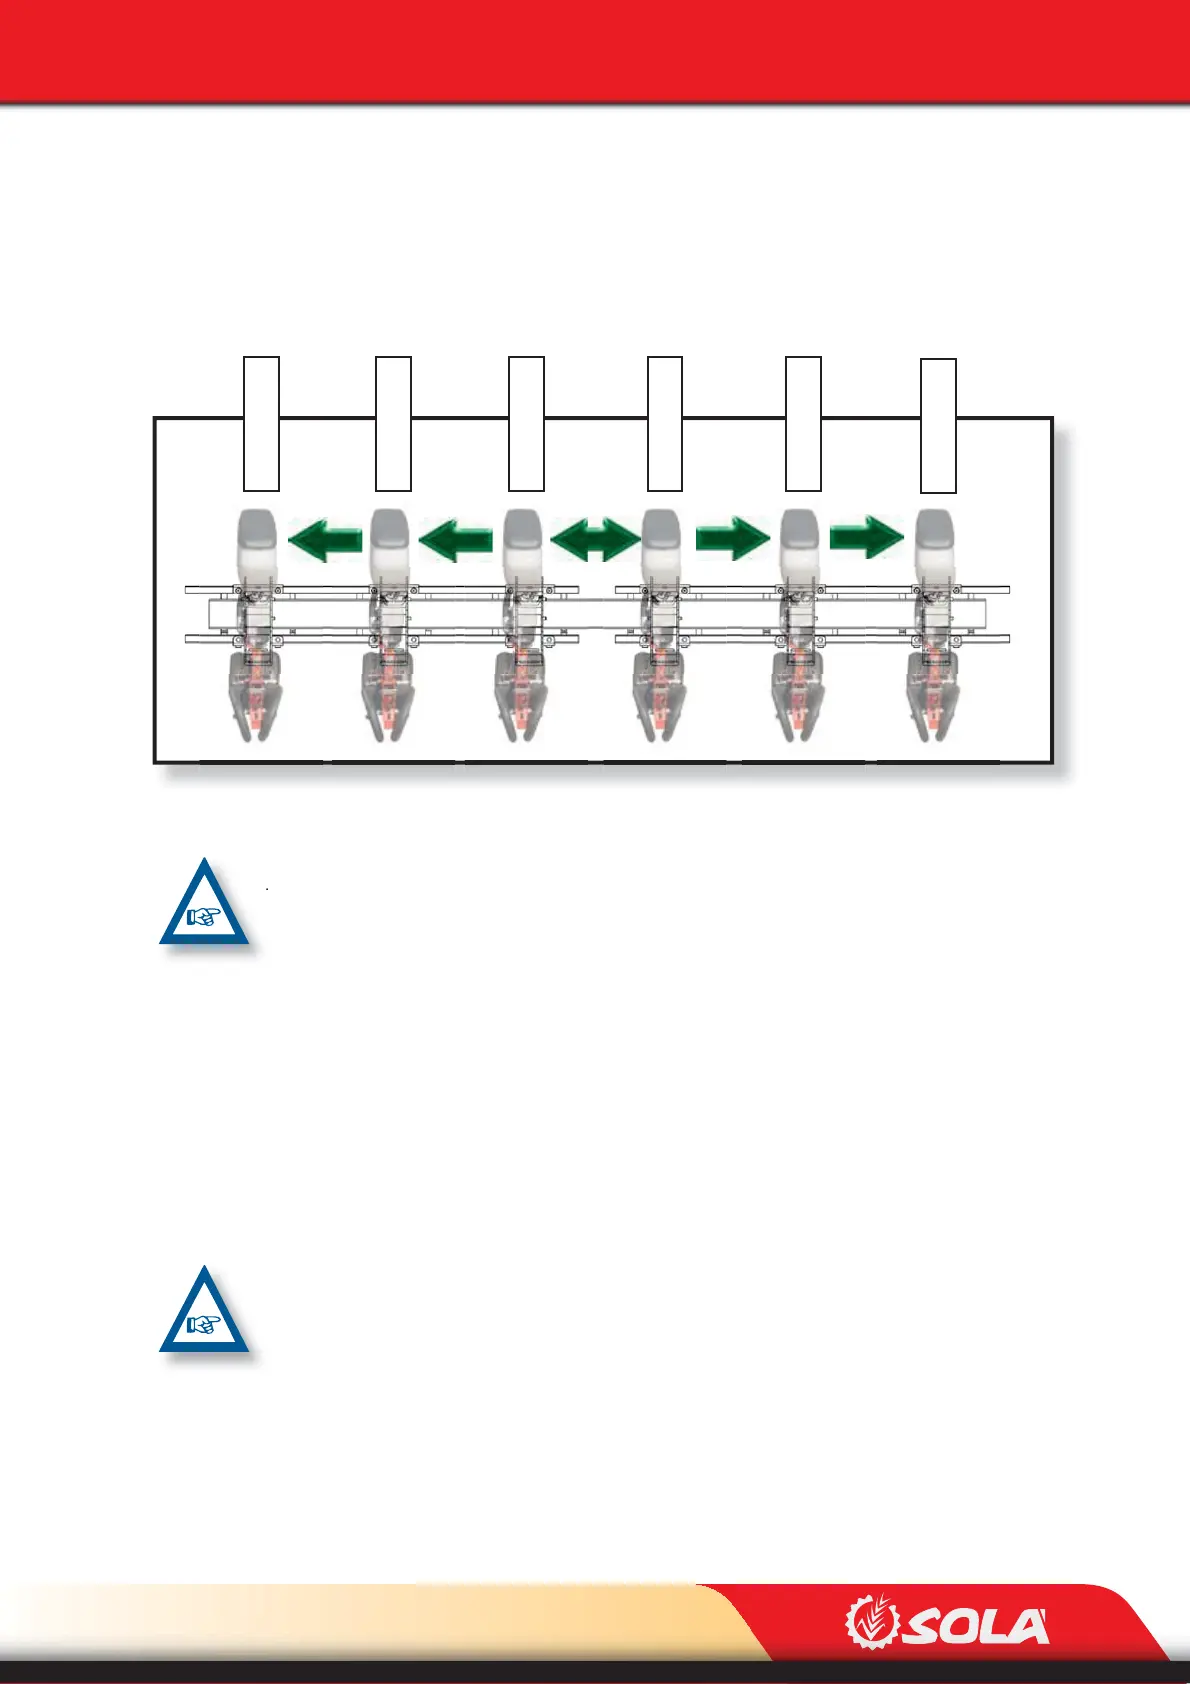
5- Repeat these steps in order to adjust the remaining units, following the order shown in Fig.
6.32 from the most inner to the most outer unit.
FIGURE 6.32 SHOWS HOW THE METERING UNITS HAVE TO BE MOVED TO GET A BETTER PRECI-
SION WHEN ADJUSTING THE ROW SPACING.
Fig. 6.32
2
do
unit
1
er
unit
3
er
unit
2
do
unit
1
er
unit
3
er
unit