189
Z DRIVE BELT
Required Tools
• 3 mm hex wrench
• Small flat head screwdriver
Removing the Z Drive Belt
1. Power OFF the Printer. See “Powering Off” on page 169.
2. Remove the rear top cover. See “Removing the Rear Top Cover” on page 174.
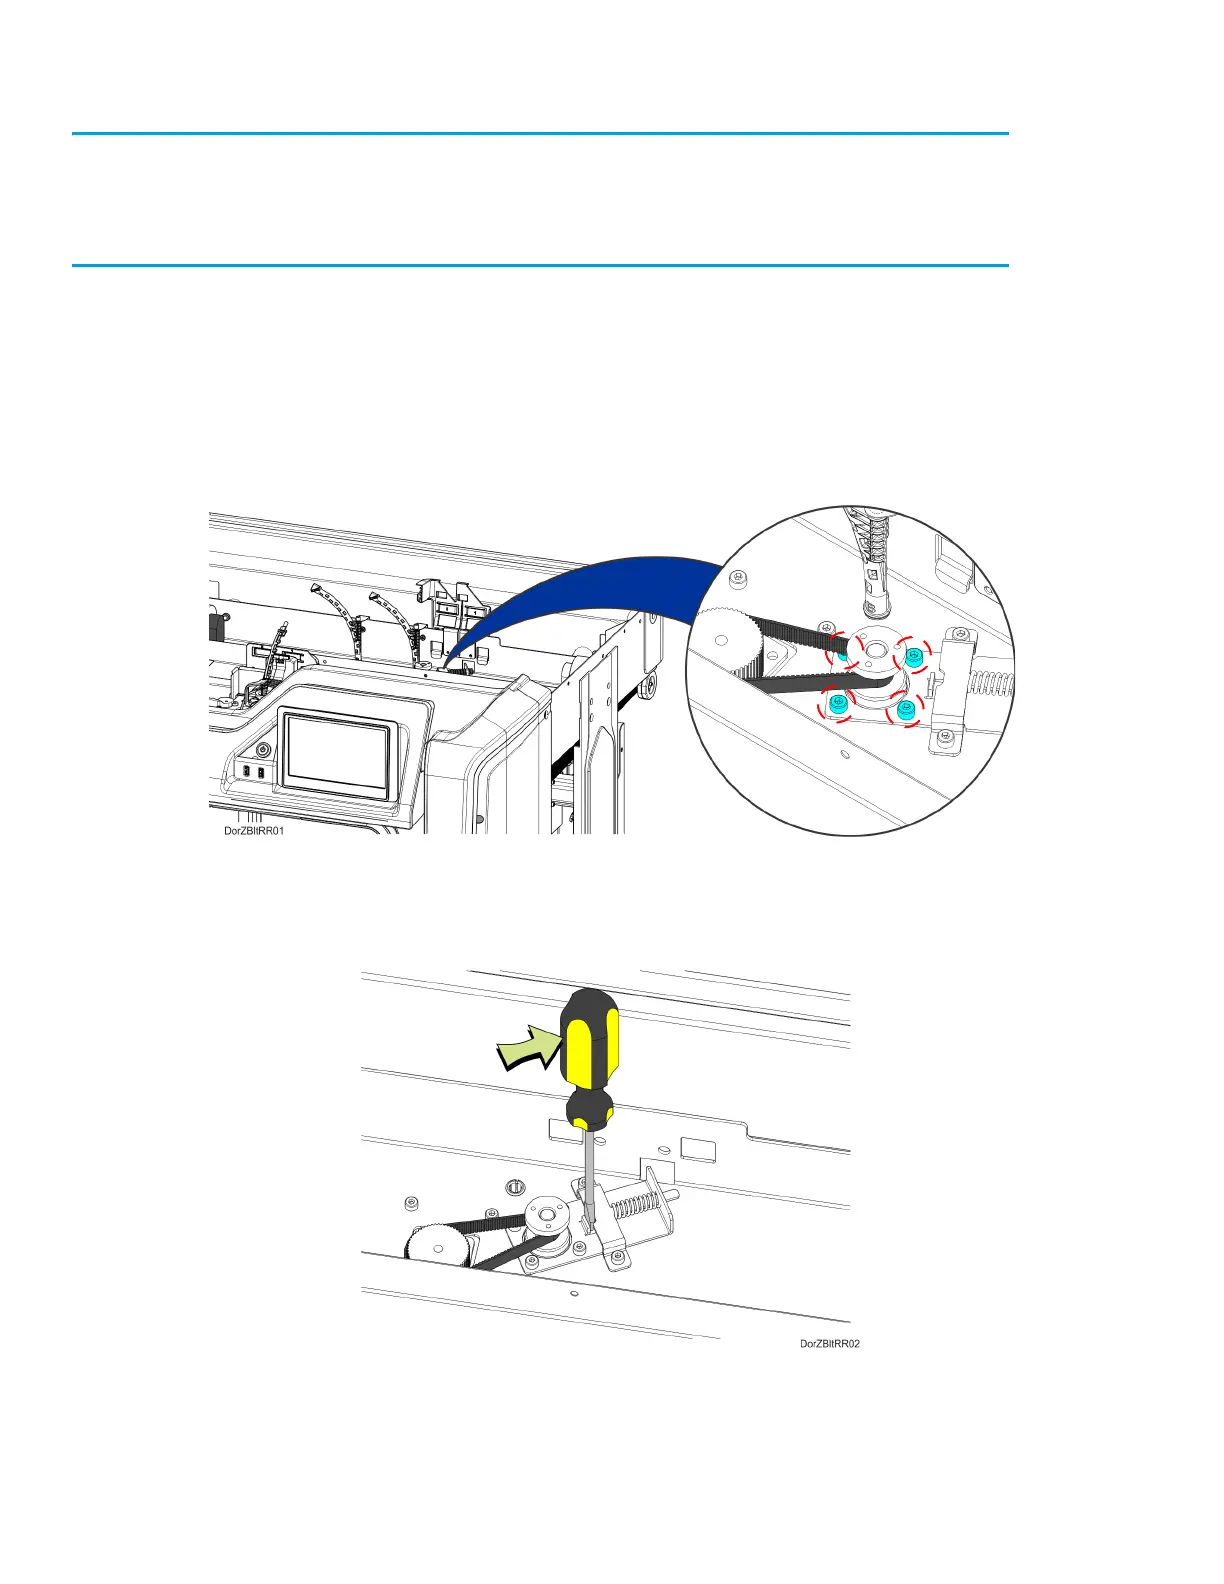
3. From inside the gantry enclosure, Use a 3 mm hex wrench to loosen the Z motor mounting
screws (4). See Figure 7-31.
Figure 7-31: Z Motor Mounting Screw Locations
4. Using a small flat head screwdriver, relax the belt tension by gently prying the Z motor tension
bracket away from the compression spring. See Figure 7-32.
Figure 7-32: Relaxing Z Belt Tension
5. While the belt tension is relaxed, remove the Z drive belt from its pulleys and extract it from the
printer.