191
Y BELLOWS
Required Tools
• 3 mm hex wrench
Removing the Y Bellows
1. Power OFF the printer.
2. Open the front top cover.
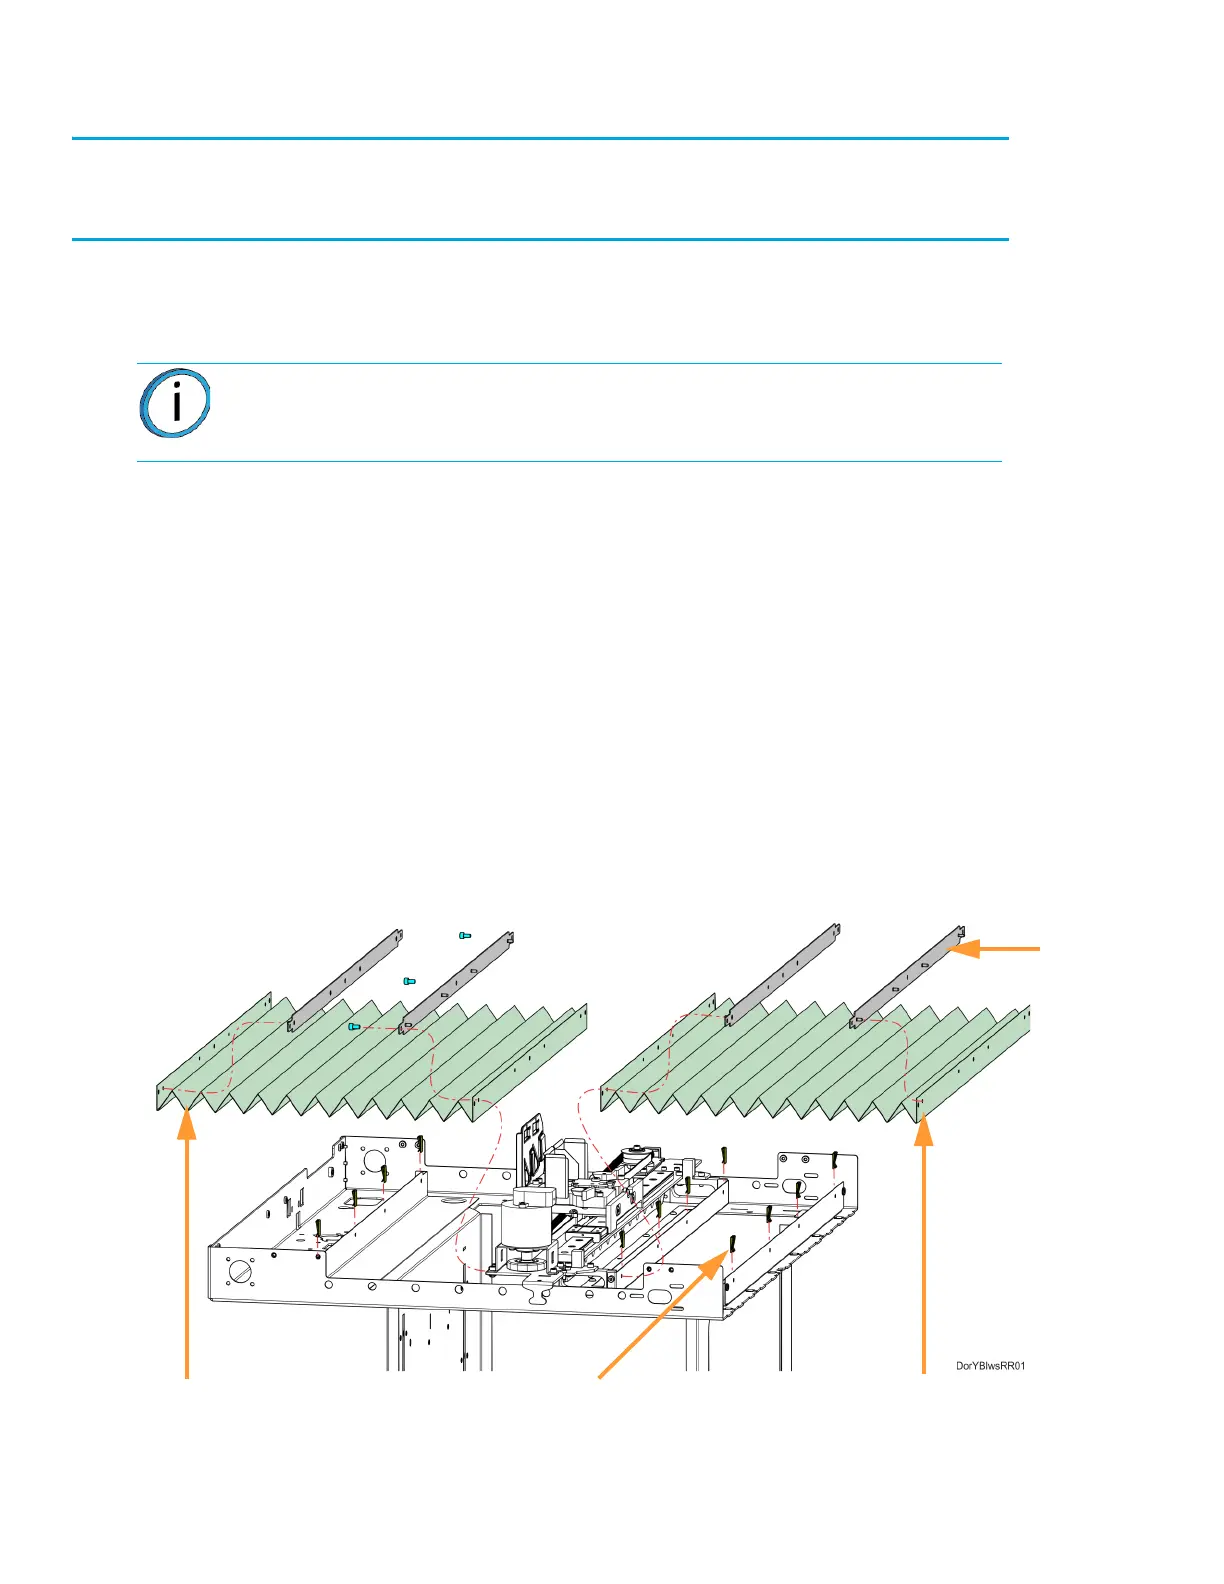
3. Remove the front Y bellows assembly. See Figure 7-33.
A. Remove the clips (4) that secure the front bellows retainer to the front of the oven frame.
B. Remove the clips (4) that secure the front bellows retainer to the front of the X bridge
assembly tray.
C. Remove the front Y bellows and retainers from the gantry enclosure.
D. Retain the Y bellows retainers for re-installation.
4. Remove the back Y bellows assembly. See Figure 7-33.
A. Remove the clips (4) that secure the back bellows retainer to the rear of the oven frame.
B. Using a 3 mm hex wrench, remove the screws (3) that secure the back bellows retainer to
the back of the X bridge assembly tray.
C. Remove the back Y bellows and retainers from the gantry enclosure.
D. Retain the Y bellows retainers for re-installation.
Figure 7-33: Y Bellows Detail
Note: Move the X bridge as necessary to access Y bellows mounting clips and
screws.
Front Y Bellows
Back Y Bellows
Clips (12)
Retainer (4)