S CLASS™ cutter User’s Manual
Setup 1-46
1.6.2.4 Drag knife installation
The S CLASS™ tangential cutters can also be operated with a drag knife. To set the
properties for the drag knife, see section 1.6.1.1. Follow steps 1 through 4, and then
continue with step 5 as follows:
1. Turn the installed tool counterclockwise. The holder will rise up, making it possible to
lift the knife holder out of the tangential head. Underneath is the place for a nosepiece.
Remove this part also if it is mounted.
2. Mount the nosepiece for the drag knife.
3. Gently insert the drag knife into the rear tool shaft. Turn the drag knife clockwise all the
way down.
4. The change of tool can either be input on the touch screen with Summa Cutter Control,
or with the cutting software.
5. Selecting drag knife operation will add “knife offset” to tool properties.
NOTE: The information on the touch panel shows the tool currently selected by the cutter.
Make sure the cutter’s tool setting matches the actual tool in use.
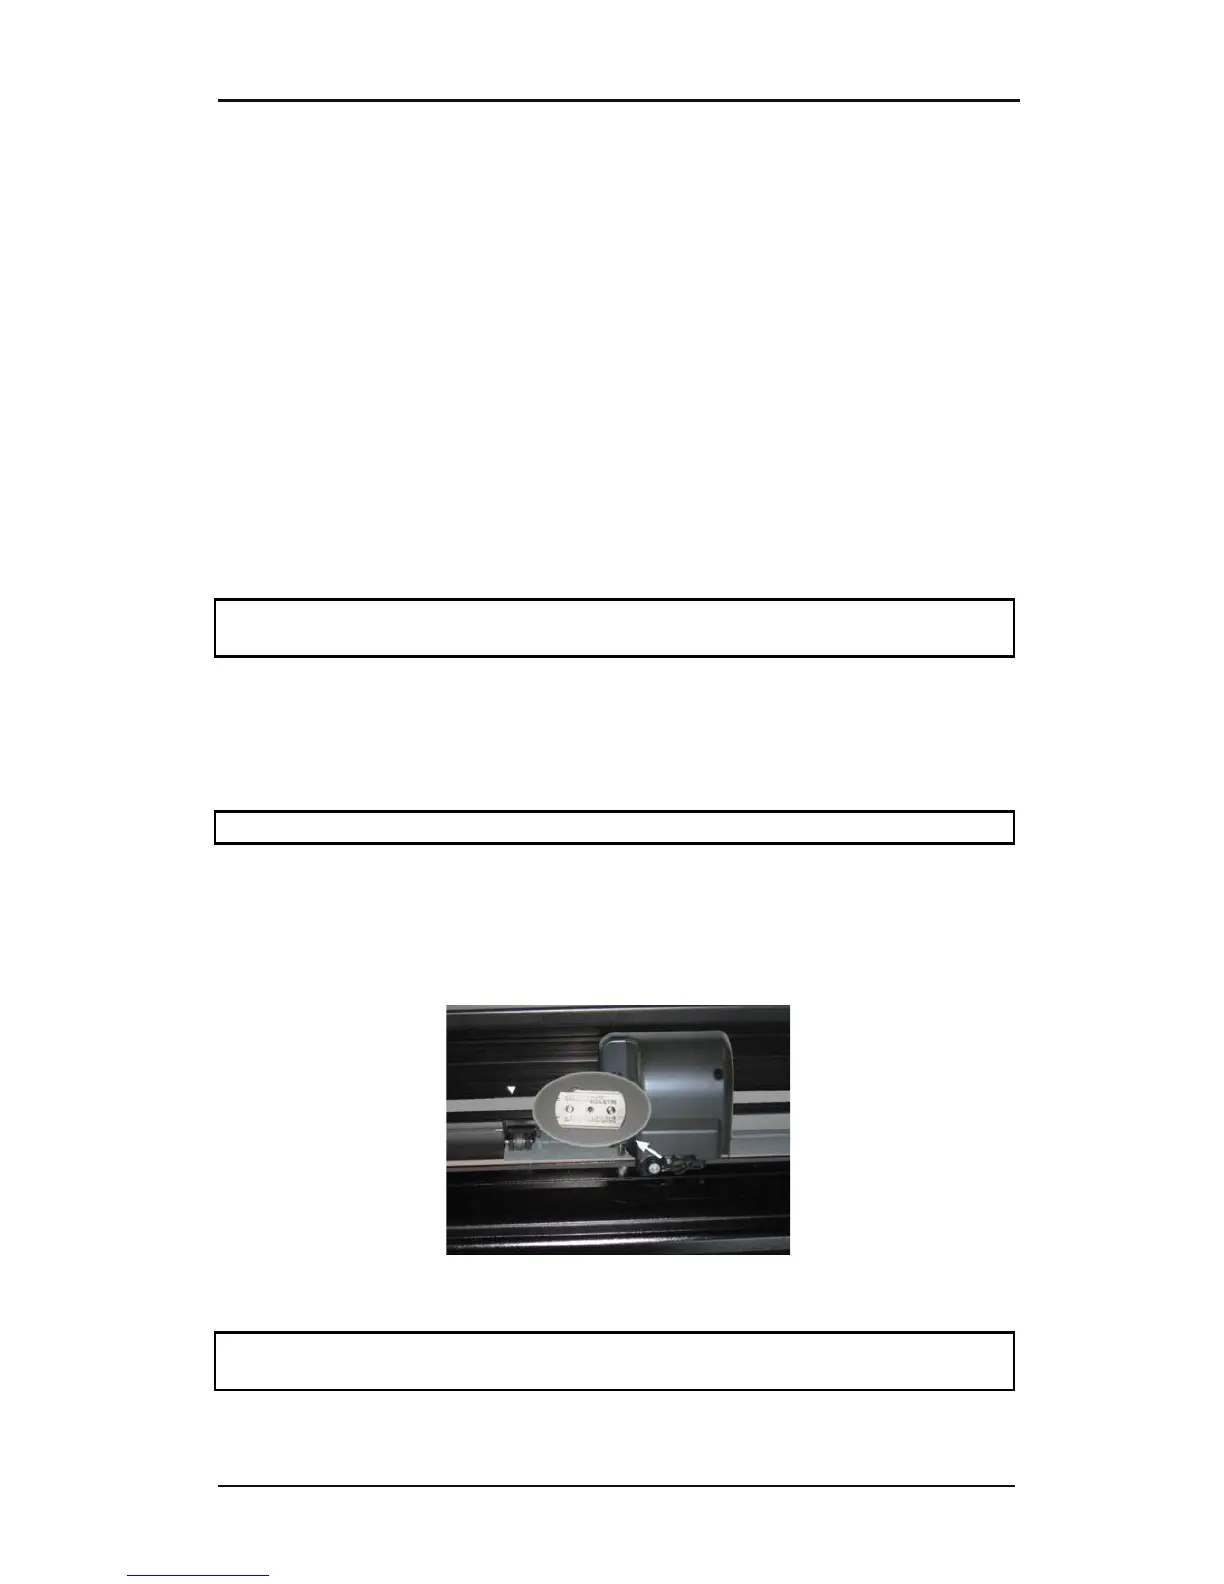
1.6.3 Replacement of the separation knife blade
The tool carriage also holds the separation knife. With this knife (razor blade), the job can be
automatically cut off after it is finished.
NOTE: This separation knife may only be used with standard vinyl (max 0.25mm thick).
1. Remove the razor blade holder by turning on the knurled screw at the bottom of the
tool carriage.
2. The razor blade is kept in its place by a small magnet. Turn it around or replace it when
it is worn down, figure 1-b.
FIG 1-35
1-37 RAZOR BLADE FOR AUTOMATIC SEPARATION OF MEDIA
NOTE: The assembly is tilted under an angle of +/- 30° when it is put back on the machine.
Mind the position of the assembly before replacing the razor blade.