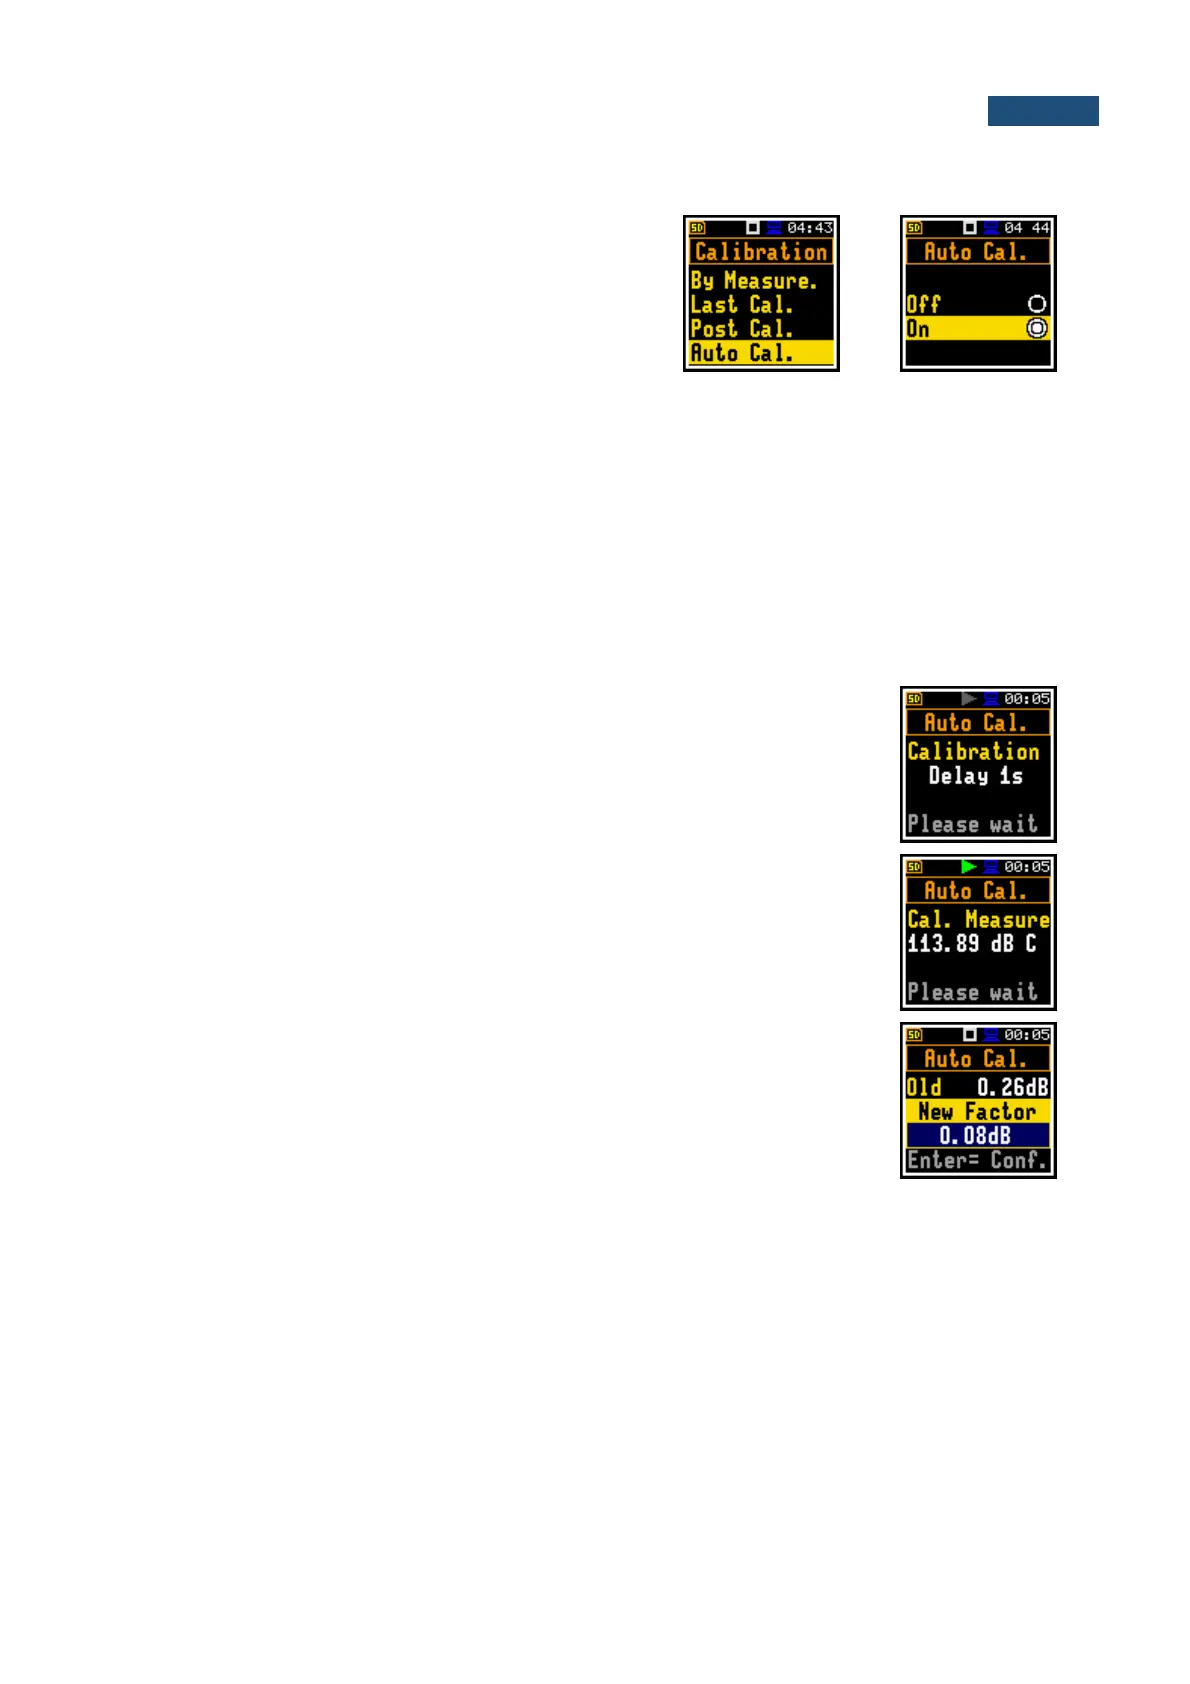
4.2.4 Automatic calibration – Auto Calibration
Position Auto Cal. enables the user to perform automatic
calibration when the sound calibrator is attached. In this
case, the window Calibration by measurement will
appear automatically. If Auto Cal. is switched off, the
user should enter this window through the Menu.
Automatic calibration feature was implemented to make calibration as easy as possible and to allow the
user to perform a calibration of the SV 977A with minimum steps.
If the automatic calibration is switched on, the instrument, when it doesn’t perform the measurement,
periodically compares the measured signal level (Running SPL for 1 second) with the reference
calibration level and starts the calibration measurement if the stable SPL result is within ±5dB of the
calibration level.
To perform the automatic microphone calibration, follow next steps:
1. Switch on the instrument.
2. Attach the SV 35A (or equivalent 114 dB/1000 Hz) calibrator to the microphone and switch it on (if
the used calibrator doesn’t have automatic switch-on feature).
Generated by the calibrator sound pressure level starts the Automatic Calibration
process if the difference between the Calibration Level value set up in the
Calibration screen and the measured calibrator SPL level is in the range ±5 dB.
During the calibration measurement, the level of the measured calibration signal
will be displayed. If the maximal difference between three 1-second consecutive
Leq results is less than 0.05dB, the calibration measurement will be finished. The
measurement can be always stopped by the <Start/Stop> key.
After calibration measurement stop, the Old and New Factor (difference
between the Calibration Level and the Calibration Measurement, calculated in
dB) are displayed. The user will be proposed to save the new calibration factor
by pressing <Enter> (Enter to Confirm), or reject it by pressing <Esc>. In both
cases the instrument exits the Calibration screen.
3. Detach the calibrator from the microphone and leave the Auto Calibration screen.