Note: In the Simple interface mode, Compensation Filter position is hidden, but the
instrument will use settings previously defined in the Advanced mode or default settings
(Microphone: On; Diff. Field: Off; Windscreen: Off; Outdoor: Off).
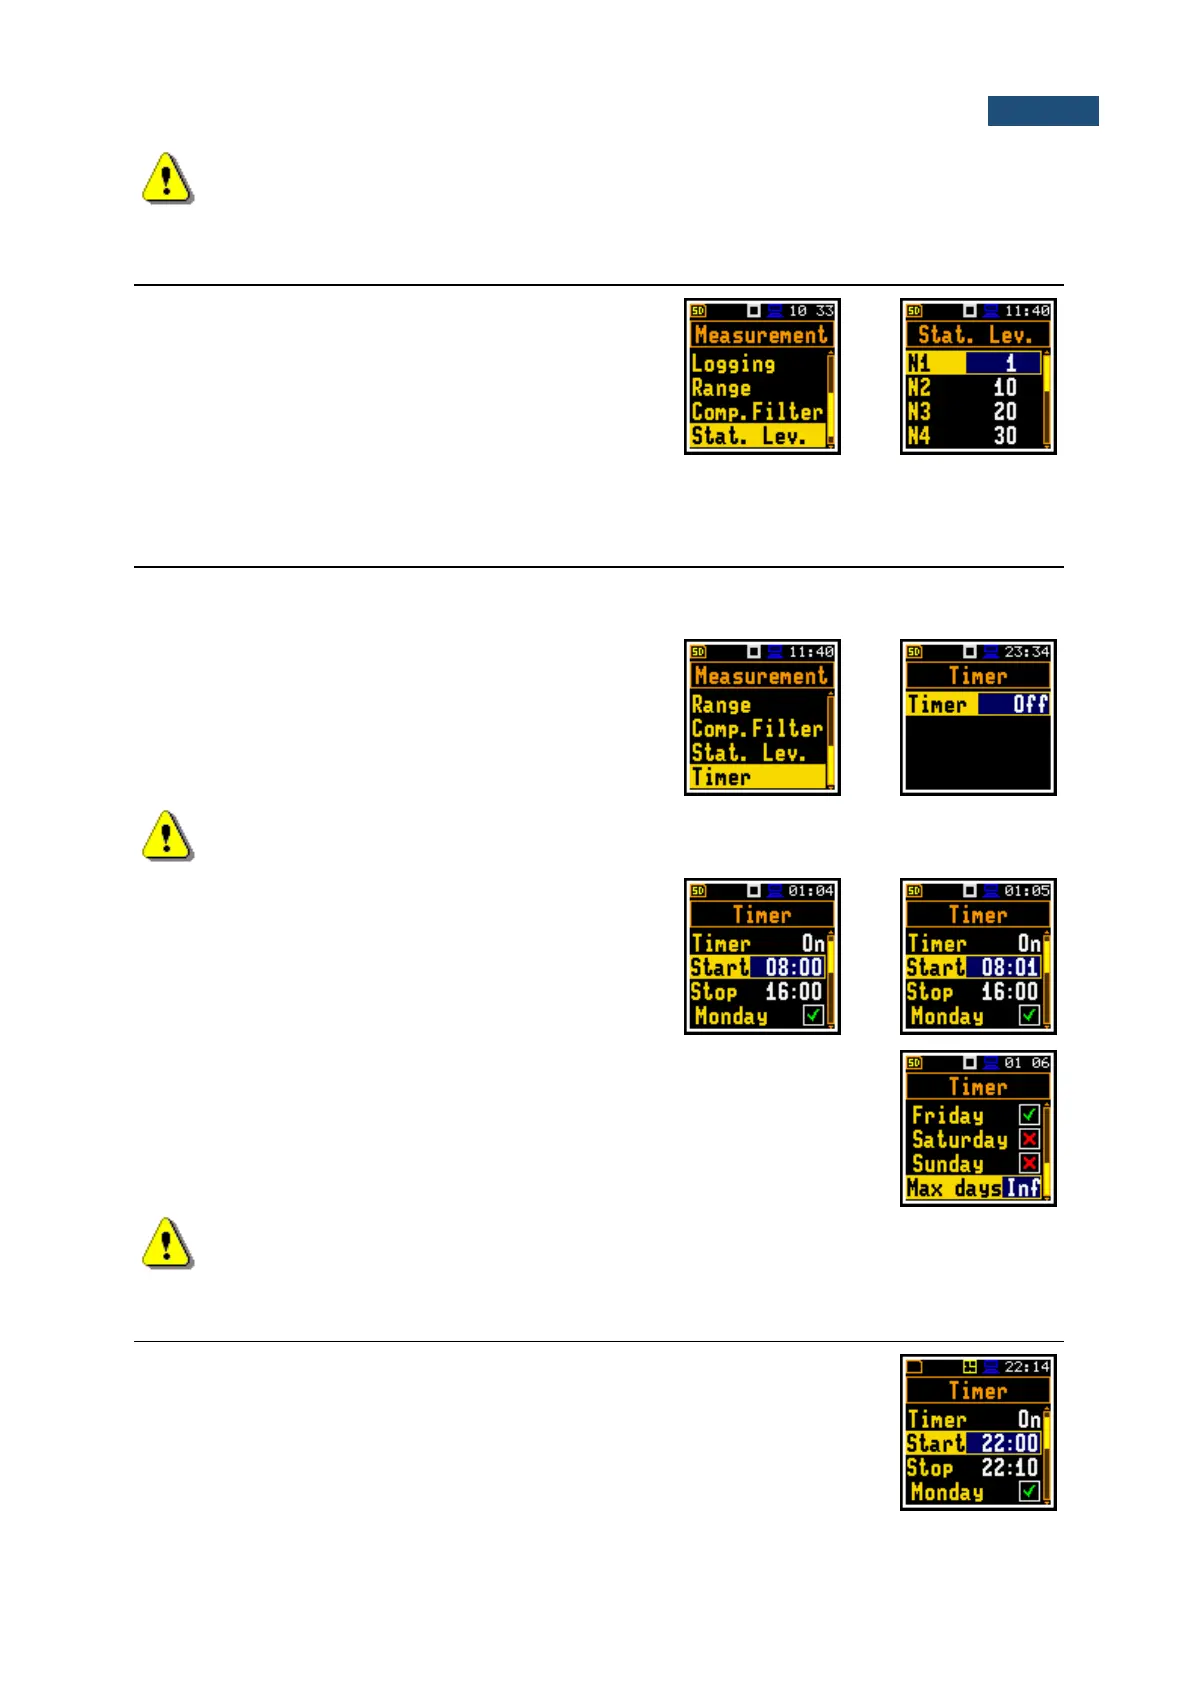
5.8 STATISTICAL LEVELS SETTINGS – STATISTICAL LEVELS
In the Stat. Lev. list of parameters, the you can define ten
statistical levels, named from N1 to N10, to be calculated,
displayed and saved in a file together with the Summary
results.
Default statistical levels have following settings: 1, 10, 20,
30, 40, 50, 60, 70, 80 and 90. All values should be within
the integer range [1, 99]. Each value can be set
independently from others.
5.9 PROGRAMMING THE INSTRUMENT’S INTERNAL TIMER – TIMER
The Timer function is used to programme the automatic start-up of the measurement at a given time and
day of a week and with the parameters set in the Measurement section.
The Timer position enables programming the internal
real-time clock to act as a delayed start and stop timer.
The instrument will be switched on by itself at the
programmed time and will perform the measurement with
the same settings that were used before the instrument
was turned off.
Note: In the Simple interface mode, the Timer position is hidden, but the instrument will use
settings previously defined in the Advanced mode or default settings (Timer: Off).
Setting hour and day of the measurement’s start
The Start (hh:mm) and Stop (hh:mm) positions
determine the time for the measurement to start and to
stop automatically.
In the positions: Monday, Tuesday, …, Sunday; you can select days in a week
when measurements should start.
The timer can be programmed for Max days ahead (up to 100) or without
limitation (Inf) and during these days, the instrument refers to the time of the Real
Time Clock (RTC). Make sure that the real-time clock settings are correct before
using the timer.
Note: Make sure that there is sufficient internal batteries power available for the instrument
to carry out the required measurements when it wakes up.
5.10 EXAMPLE OF TIMER EXECUTION
Let us assume that you wish to switch on the measurement on Monday at 22:00,
to measure noise level for 10 minutes and save results in the fileat s with names
R1, R2, R3 etc. as long as they are created
To do this configure the Timer function as on the attached screen and to set the
measurement parameters (path: <Menu> / Measurement / General Settings) and
the file name (path: <Menu> / Measurement / Logging / Logger Setup).