ENGINE
3D-16
6. Remove the filter from the filter clamp.
7. Lightly lubricate the new seals with clean diesel
fuel and install in the mounting.
8. Position the replacement filter in the clamp.
9. Inspect the filter to filter head seal and replace as
necessary.
10.Position the bowl on filter and secure with the
clamp.
11.Position the filter and bowl on the filter head and
secure with the clamp.
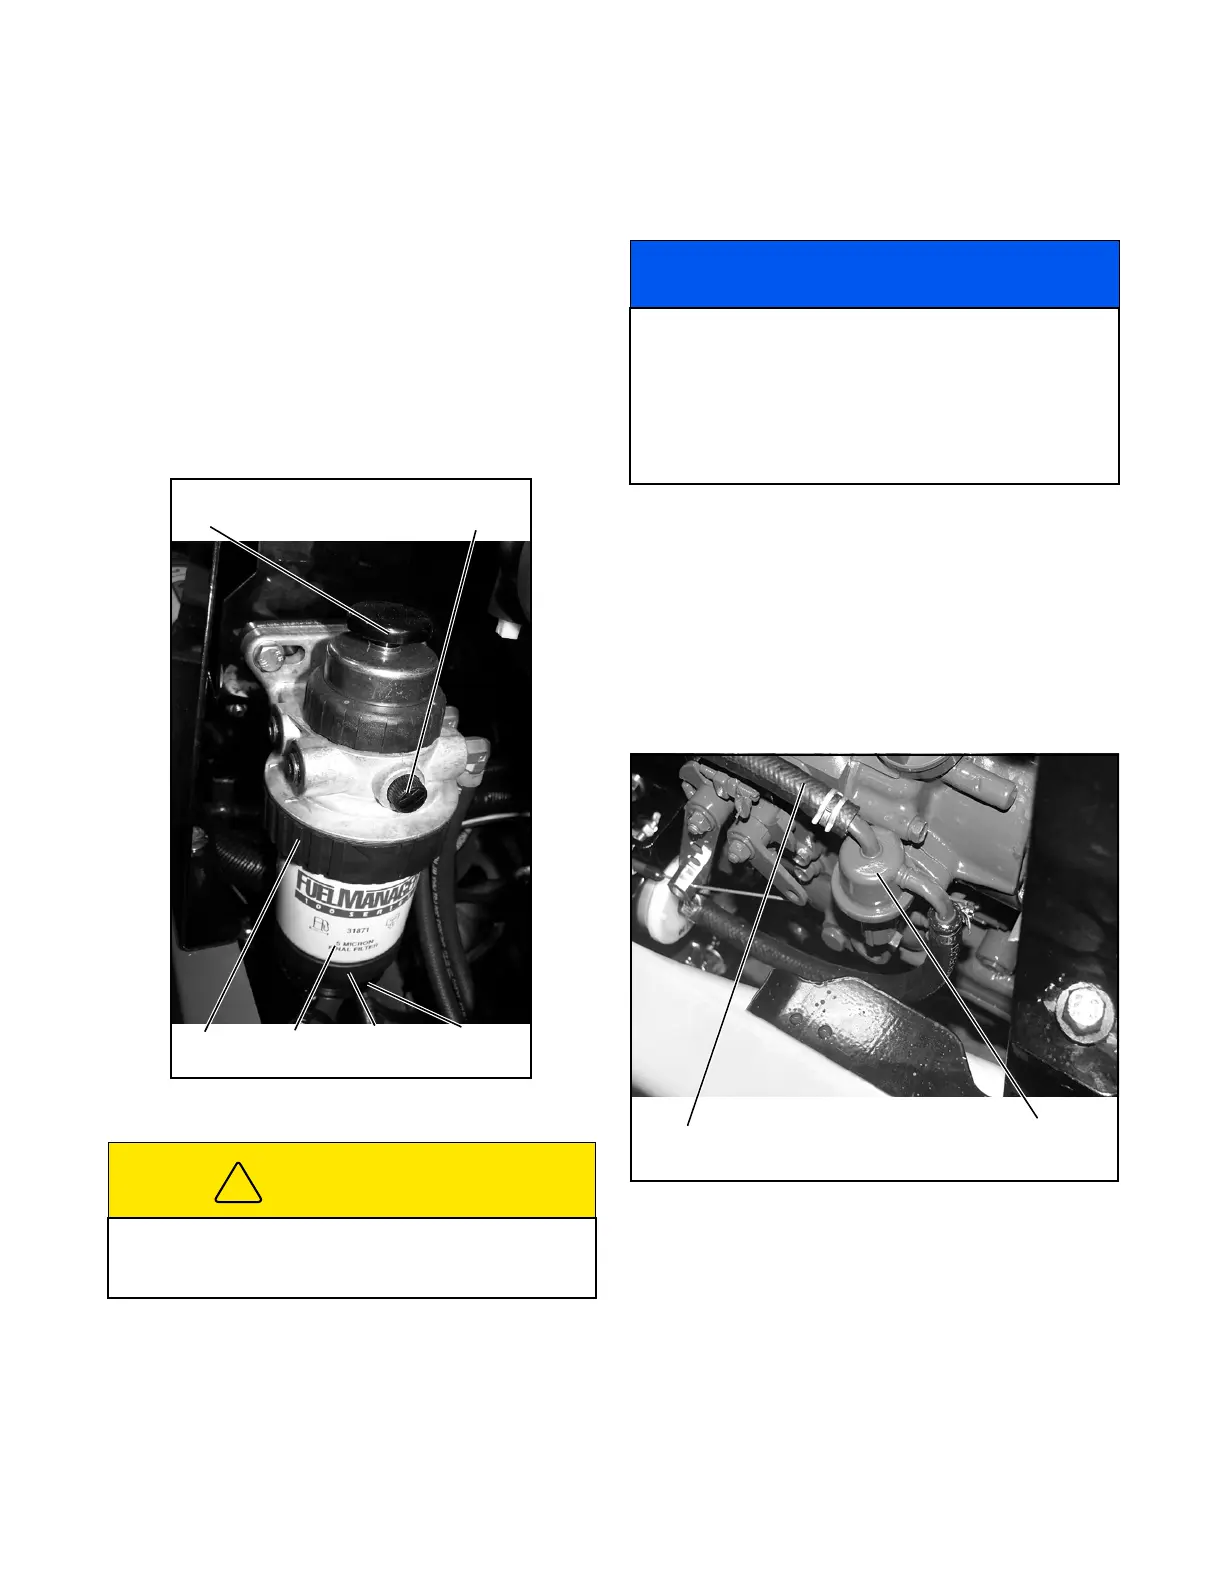
Figure 3D-14. Fuel/Water Separator
12.Close the drain valve on the bottom of the bowl.
13.Purge any air from the fuel system after installing
the new filter.
14.Fill the fuel tank with fuel.
15.Loosen the air vent screw on the fuel/water sepa-
rator turning counterclockwise two turns. Drain
any excess fuel into a suitable fuel container.
16.Operate the primer button on the fuel/water sepa-
rator to fill the fuel/water separator with fuel
(Figure 3D-14). When fuel begins to flow from the
fuel/water separator air vent, close the air vent.
Figure 3D-15. Fuel Pump and Primer Lever
17.Open the air vent on the fuel injection pump
(Figure 3D-16) by turning the air vent plug approx-
imately two turns counterclockwise.
CAUTION
Dispose of fuel properly. Contact the local environ-
mental department for instructions on disposing of
unwanted fuel products.
Primer
Button
Air
Vent
Clamp
Ring
Filter
Bowl
Clamp
Ring
NOTICE
Refer to the Parts and Maintenance Manual and
engine manufacture’s manual for additional informa-
tion on the fuel system. When the fuel filter is
replaced, fuel piping is removed, the fuel tank is
emptied, or the engine has not been operated for a
long time, purge the fuel system of air using the fol-
lowing procedure.
To Fuel/Water
Separator
Fuel
Pump
 Loading...


