HYDRAULICS
4252490-Rev A 6-53
6
NOTE
Record the number of washers used and their locations
to ensure correct installation.
8. Remove cotter pin (8) and washers (9).
9. Remove cotter pin (5) and washers (6), and remove
pin (14) from lift cylinder (7) and lift arm (13).
10. Rotate the rod end of the lift cylinder (7) up, and
remove lift cylinder from swing arm (10).
Installation Notes
• Install lift cylinder by reversing the order of removal.
• Make sure new O-rings are in place before installing
hoses on fittings.
• Replace hydraulic oil charge filter. (See “Hydraulic
Oil Charge Filter Assembly” on page 6-59.)
• Refill hydraulic tank. (Refer to “Parts and
Maintenance Manual” for correct oil specifications.)
• Start engine. Check hydraulic system for leaks.
Repair as necessary.
• Check hydraulic oil level and add if necessary.
Disassembly, Inspection, and Assembly
See Figures 6-61 through 6-64.
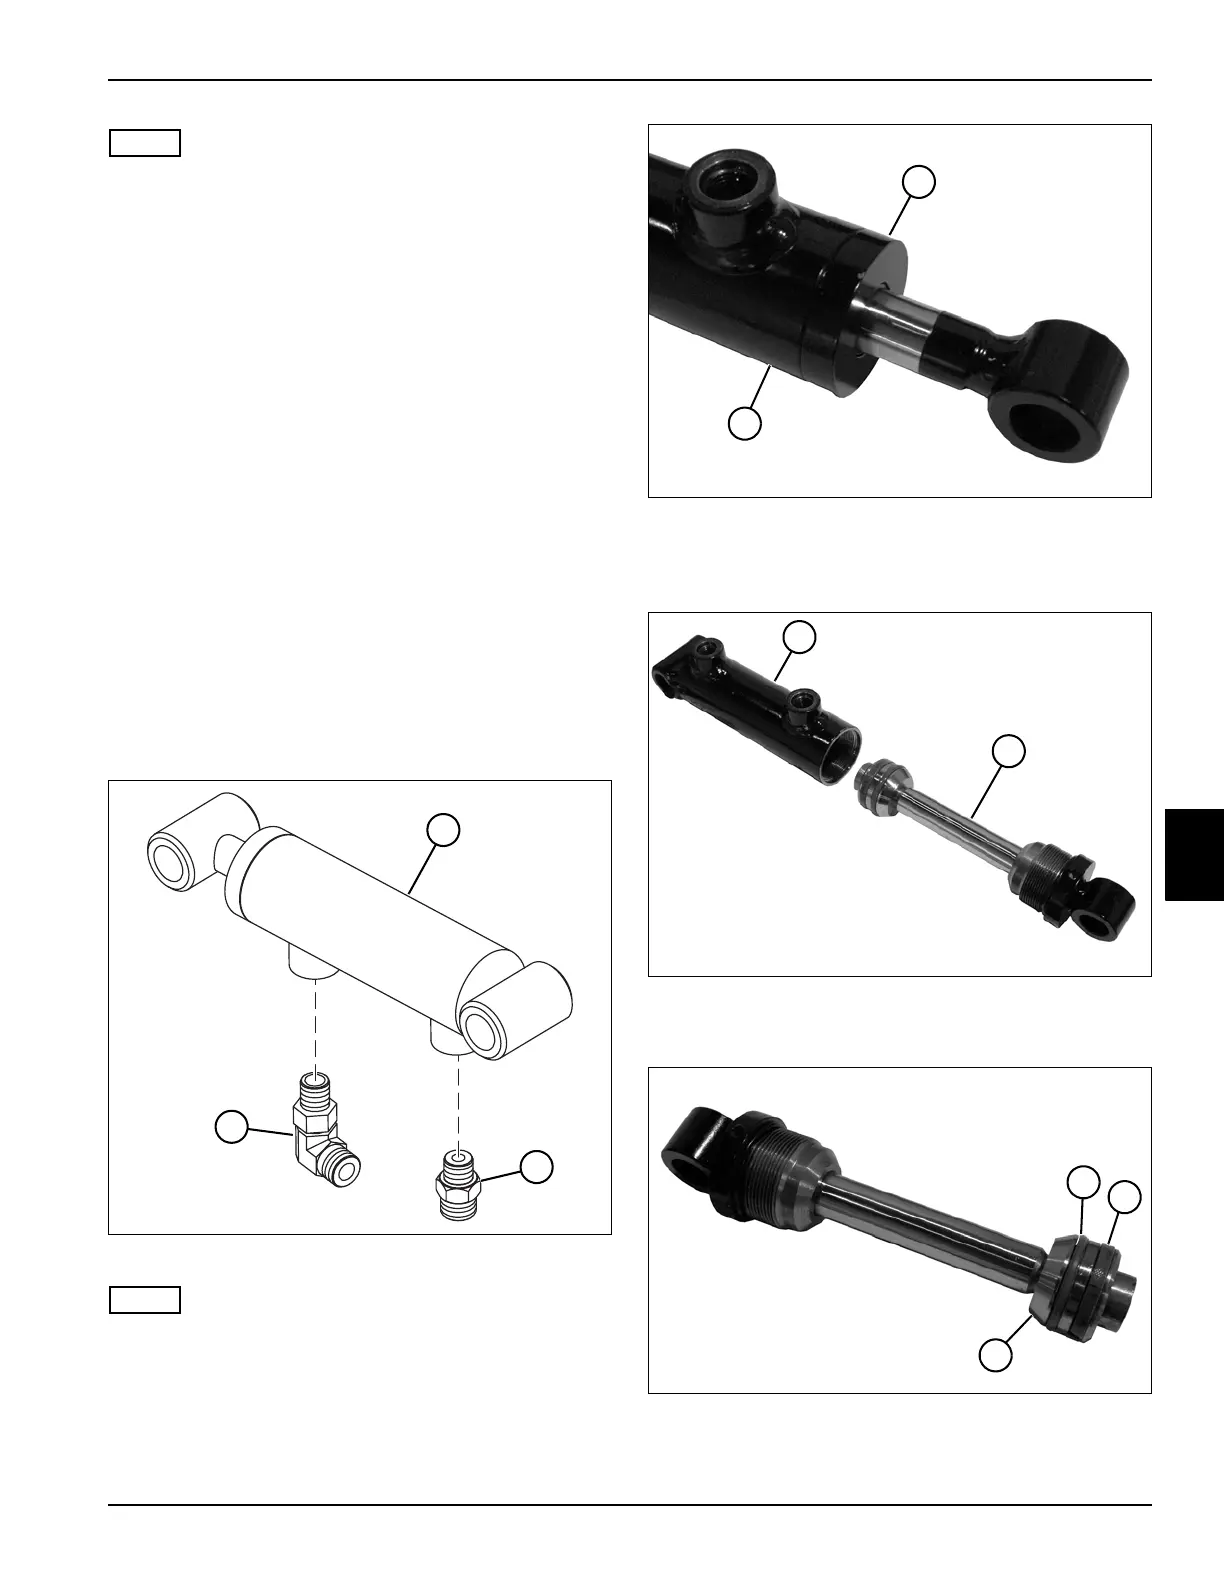
Figure 6-61
NOTE
Record the location and orientation of fittings before
removing to ensure correct installation.
1. Remove fittings (2 and 3) from lift cylinder (1).
Figure 6-62
2. Use a spanner wrench to remove rod guide (4) from
barrel (5).
Figure 6-63
3. Remove piston rod assembly (6) from barrel (5).
Figure 6-64
4. Remove seals (7 and 8) from piston (9).
TN3817
2
1
3
TN3847
4
5
TN3848
6
5
TN3849
8
7
9

 Loading...


